Skip to content
Sales Igniter
Sales Igniter
  • Features
    • Features
    • Reviews ⭐⭐⭐⭐⭐
    • Demo
      • Live Stores
      • Live Demo
    • Screenshots
      • Magento 2 / Adobe Commerce
      • WooCommerce / WordPress
  • Pricing
    • Magento 2 / Adobe Commerce
    • WooCommerce / WordPress
    • Magento 1.9.x / OpenMage
    • Web Hosting
  • Help
    • Documentation
      • Magento 2
      • WooCommerce / WordPress
    • Screencast
    • FAQ
    • Blog
  • Account
    • My Account
    • My Account (Alternate)
  • Contact
    • Contact Sales Igniter
    • Custom Project Quote Request
Search
Sales Igniter
Sales Igniter
Search
  • Features
    • Features
    • Reviews ⭐⭐⭐⭐⭐
    • Demo
      • Live Stores
      • Live Demo
    • Screenshots
      • Magento 2 / Adobe Commerce
      • WooCommerce / WordPress
  • Pricing
    • Magento 2 / Adobe Commerce
    • WooCommerce / WordPress
    • Magento 1.9.x / OpenMage
    • Web Hosting
  • Help
    • Documentation
      • Magento 2
      • WooCommerce / WordPress
    • Screencast
    • FAQ
    • Blog
  • Account
    • My Account
    • My Account (Alternate)
  • Contact
    • Contact Sales Igniter
    • Custom Project Quote Request

Manual

1
  • Magento Google Maps Module Manual
View Categories
  • Home
  • Doc
  • Google Truck Routing
  • Manual
  • Magento Google Maps Module Manual

Magento Google Maps Module Manual

1 min read

Install & Setup #

1) Unzip the module files and upload them all to your web server via FTP 

2) Go to your admin > system > cache and clear your cache 

3) Logoff and login to your admin to clear the ACL cache or else you will get 404 errors when trying to access the Google Maps menu< 

Google API Key Setup #

1) Go to https://code.google.com/apis/console and signup for an account if you don’t already have one 2) Click on services and enable Google Maps API v3 


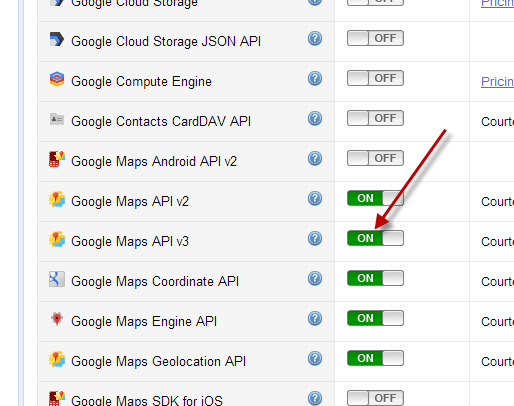
3) Now generate an access key. Go to API Access and click create new browser key. You can enter in your domain name for allowed refers.

4) Now copy this key that it gives you 


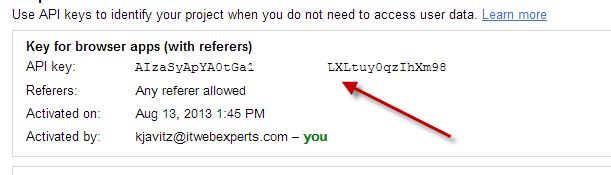
5) Now we are going to paste it to the Magento admin under system > config > Google Api > google maps api 


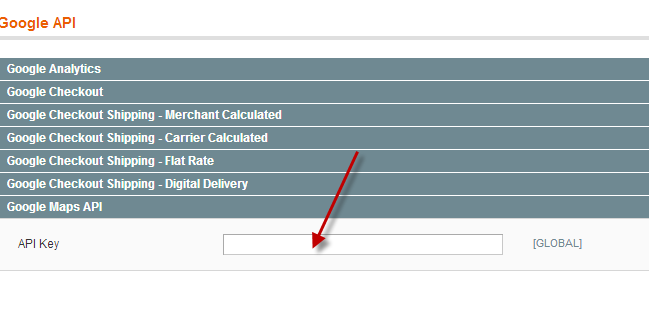
6) now save the config 

How It Works Step By Step #

1) First make sure your store has some orders in it 

2) Now go to Google Maps > manage trucks and click Add Truck 


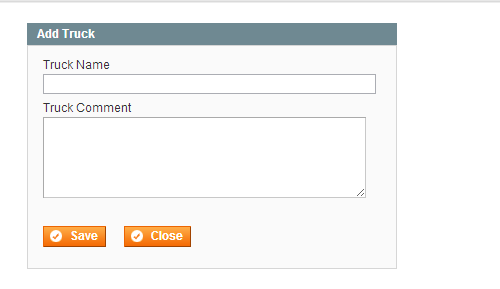
Keep adding trucks until all of your delivery trucks for the day are added. 

3) Now you can add your orders to your truck. Click the markers in the Route map in the middle of the page and select the truck you want it to go on. 


4) After you have added your orders to the trucks, you can hover over Actions and print the packinglists, routes, and maps for each truck. Note that on the packing list the GPS points for each order will appear which you can add to your GPS. 


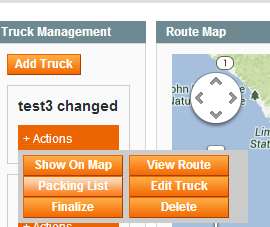
5) If a truck is done having orders being added to it, click Finalize. Past truck shipments will show on the right side under Truck History 


6) Please note that an order can be Sent and Returned, so basically an order will show up on the map twice. Once an order is assigned both a dropoff and pickup truck, it will no longer show up on the route map. 

What The Buttons Do #

Edit Truck – Edit truck name, comments, and other fields 

Show On Map – pops up Google Map with the truck route on it 

View Route – pops up Route of the truck with all the deleries on it 

Packing List – generates and downloads a packing list PDF to give to the delivery driver 

Finalize – click this button to move a truck from the Truck Management to the truck history. Basically click it when you are done adding orders to a truck 

Unfinalize – this will move a truck from the truck history to the truck management area. Click this button if you make a mistake and want to reload a truck with orders.

What are your Feelings

  • Happy
  • Normal
  • Sad

Share This Article :

  • Facebook
  • X
  • LinkedIn
  • Pinterest
Magento Google Maps Module ManualMagento Google Maps Module Manual
Table of Contents
  • Install & Setup
  • Google API Key Setup
  • How It Works Step By Step
    • What The Buttons Do

Rental Newsletter

Learn about the latest rental industry news, features added to our rental system, and receive special offers. Subscribe now.

loader

OVERVIEW
Home
Features
Pricing
Live Stores
FAQs
Blog
Contact Us
INDUSTRIES SERVED
Audio Video, Computer, Electronics
Baby Equipment Rental System
Car Reservation Software
Clothing, Dress, Purse Rental
Heavy Equipment, Construction
Hotel, Property & Vacation Rentals
Inflatable Bounce House
Movies, Video Games, Board Games
Party & Event Rental Software
Sporting Equipment
Watches and Jewelry Rental
LATEST UPDATES
How to Start An Equipment Rental Business
Rental Pricing: How Much Should I Charge To Make The Most Profit?
How to add Bookings and a Rental Calendar to a Magento 2 website?
10 Brilliant Rental Software Apps You’ll Love
ADDITIONAL LINKS
Terms & Conditions
Free Rental Contract Agreements
Free Rental Pricing Calculator
Awesome Rental Business Resources List
Affiliate Program
Social Media

Copyright © 2026 Sales Igniter. All Rights Reserved

Loading...

Insert/edit link

Enter the destination URL

Or link to existing content

    No search term specified. Showing recent items. Search or use up and down arrow keys to select an item.