
Three things decide whether a rental handover goes well: knowing who the customer is, knowing what they need, and having agreed in advance who pays if the item comes back damaged. A rental store that collects none of that at checkout ends up collecting it by phone, on the morning of the hire, with the van already loaded. This guide covers how to set up all three on a WooCommerce rental store — custom fields for the questions, a damage waiver for the cover, and ID verification for the handover itself.

What a rental damage waiver actually is
A rental damage waiver is a fee the customer pays that limits what they owe if the item is accidentally damaged. It is not a deposit and it is not insurance, and confusing the three is the most common mistake in this area. A deposit is money you hold and give back. Insurance is a regulated product sold by an insurer. A waiver is something your rental business sells, keeps, and honours out of its own pocket.

Two practical consequences follow from the waiver being your own product rather than an insurer’s. The first is that you decide what it excludes, and you must write those exclusions down — negligence, off-road use, unauthorised drivers, loss and theft are the usual ones. The second is that in some jurisdictions selling anything that looks too much like insurance is regulated. A waiver that caps liability is generally fine; one that promises to pay out to a third party may not be. If your waiver is going to carry real money, have the wording checked locally rather than copying a competitor’s.
Step 1: Decide what you need to ask before the item leaves
Start from the handover, not from the software. Walk through what your team asks a customer on collection day and write down every question. Most rental businesses find the list is shorter than they expected, and that roughly half of it never needed to be asked by a human at all.
- Facts you need to release the item — licence number and country of issue, age, certification, a second named driver.
- Choices that change the price — a child seat, a ski rack, delivery rather than collection, a reduced excess.
- Logistics — a delivery address, a site contact, access notes, the floor the equipment is going to.
- Things you only need sometimes — ask these conditionally, so the form stays short for the customer who does not need them.
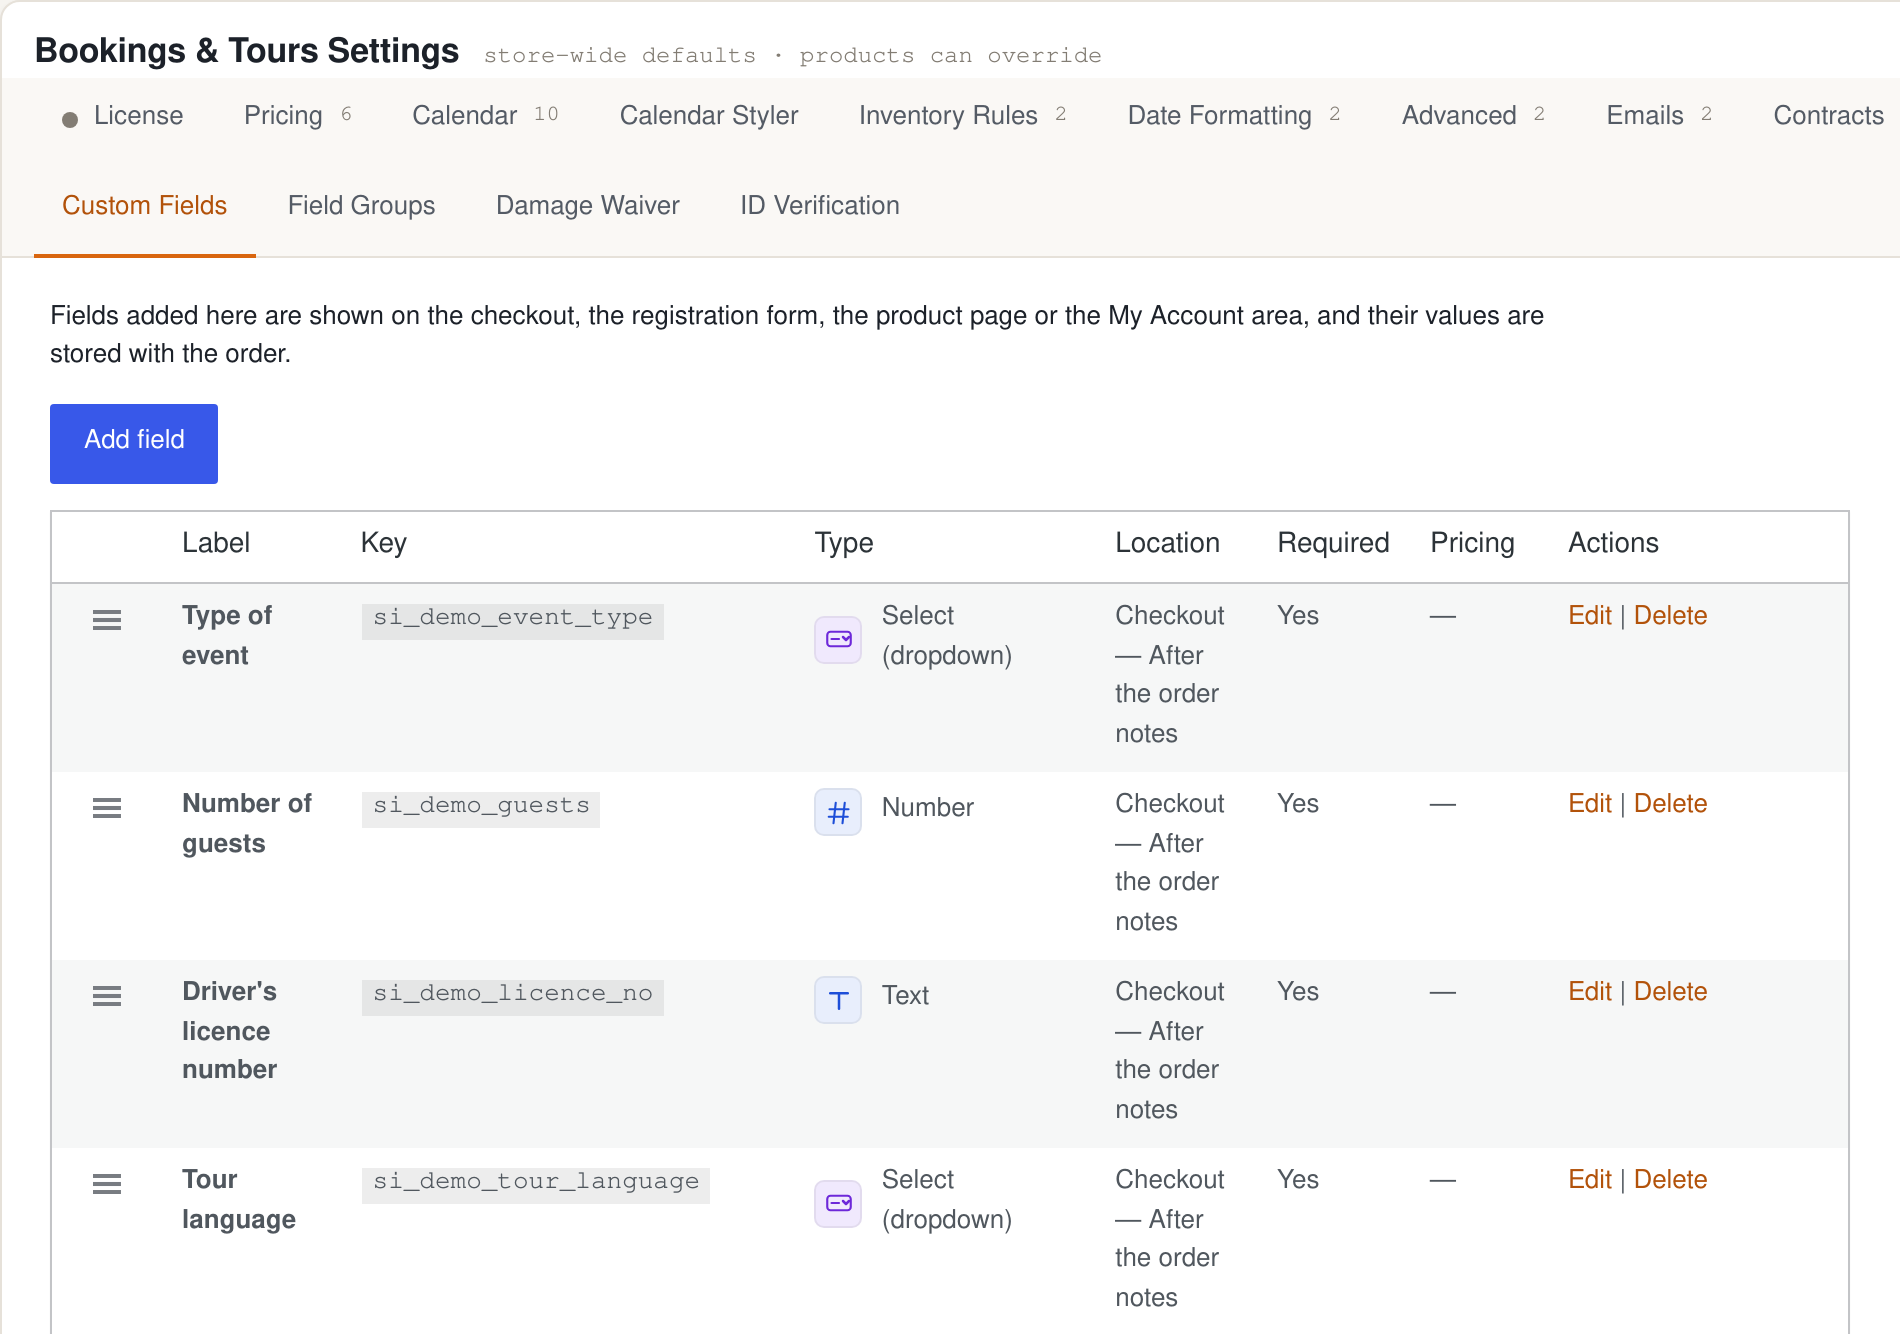
Each of those becomes a custom field with a type that matches the answer you want. Using the right type is not cosmetic: a date field gives you a date you can sort on, where a text field gives you “next tues” and a phone call.
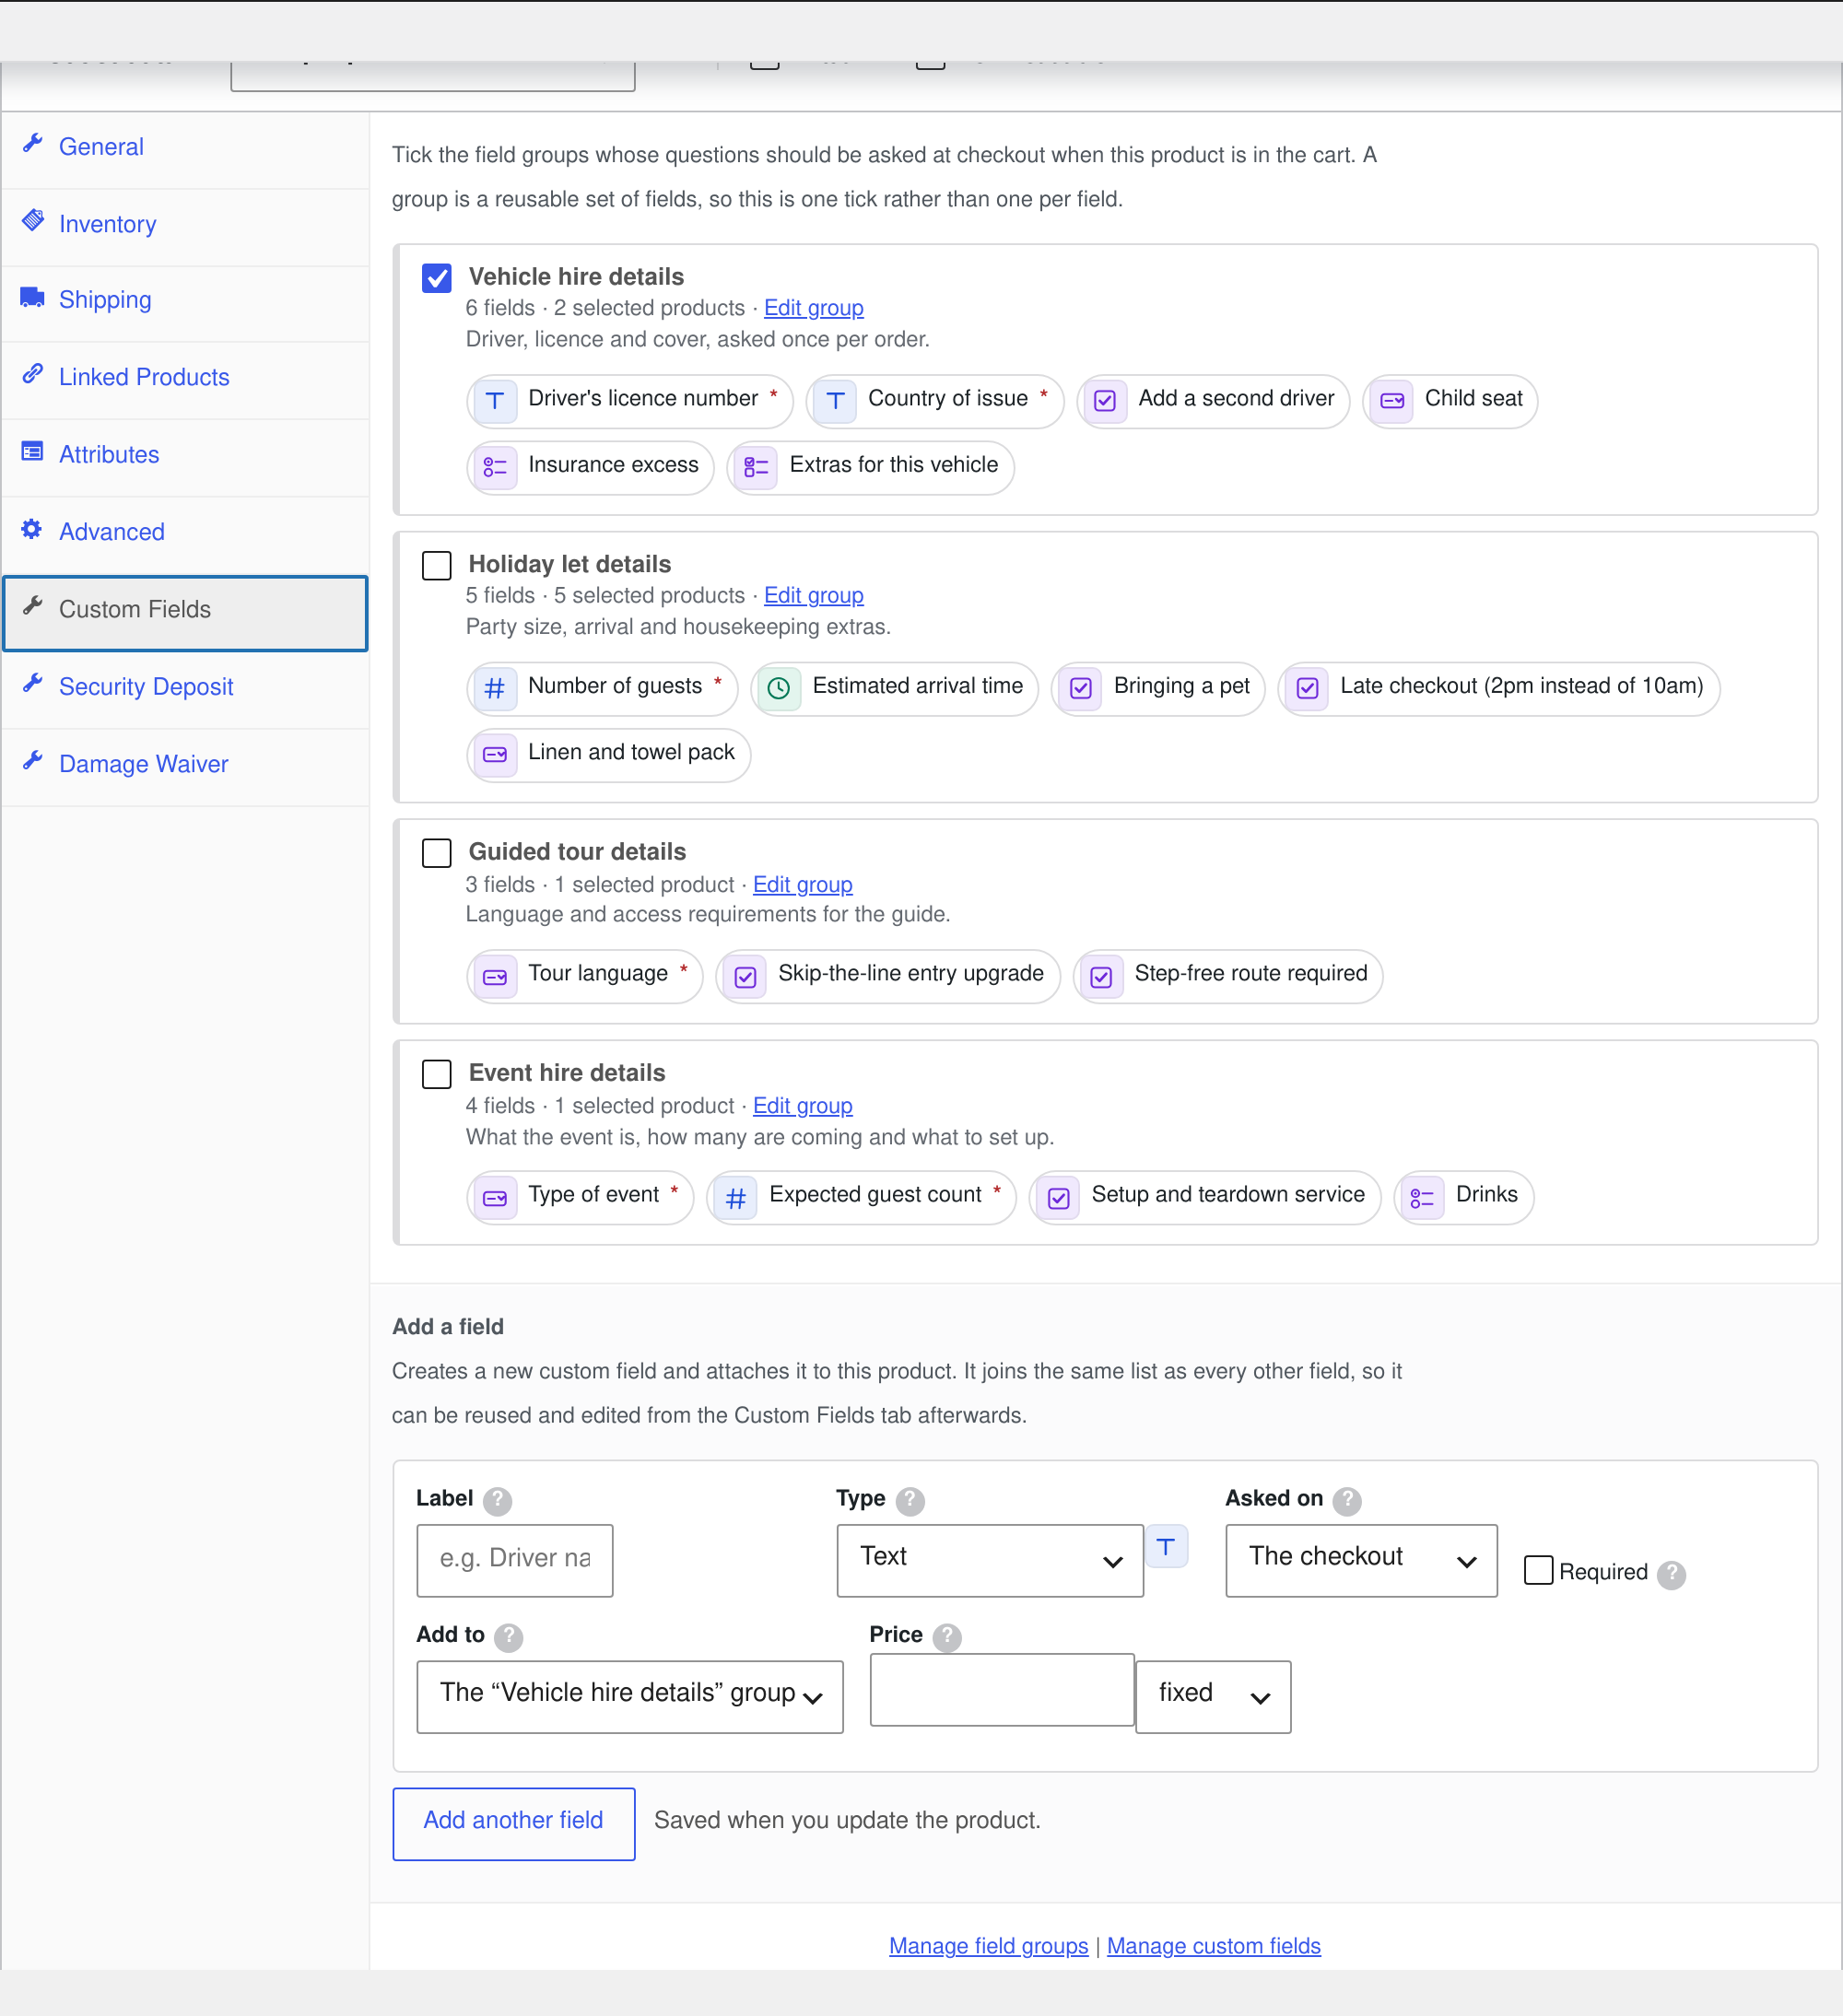
Do not attach fields to products one at a time. Group them — “Vehicle hire details”, “Delivery details”, “Event setup” — and apply the group to a category or a list of products. When you add a twelfth van next spring, it inherits the whole question set instead of being configured from memory.
Step 2: Put each question where it belongs
There are two places a question can be asked, and the choice matters more than it looks.
- On the product page, for anything specific to that item. The answer belongs to the cart line, so hiring two vans with different extras gives you two lines with the right data on each.
- At checkout, for anything that is true of the whole order — the hirer’s licence, a delivery address, a purchase order number. Asking these once per item would be tedious and would produce conflicting answers.
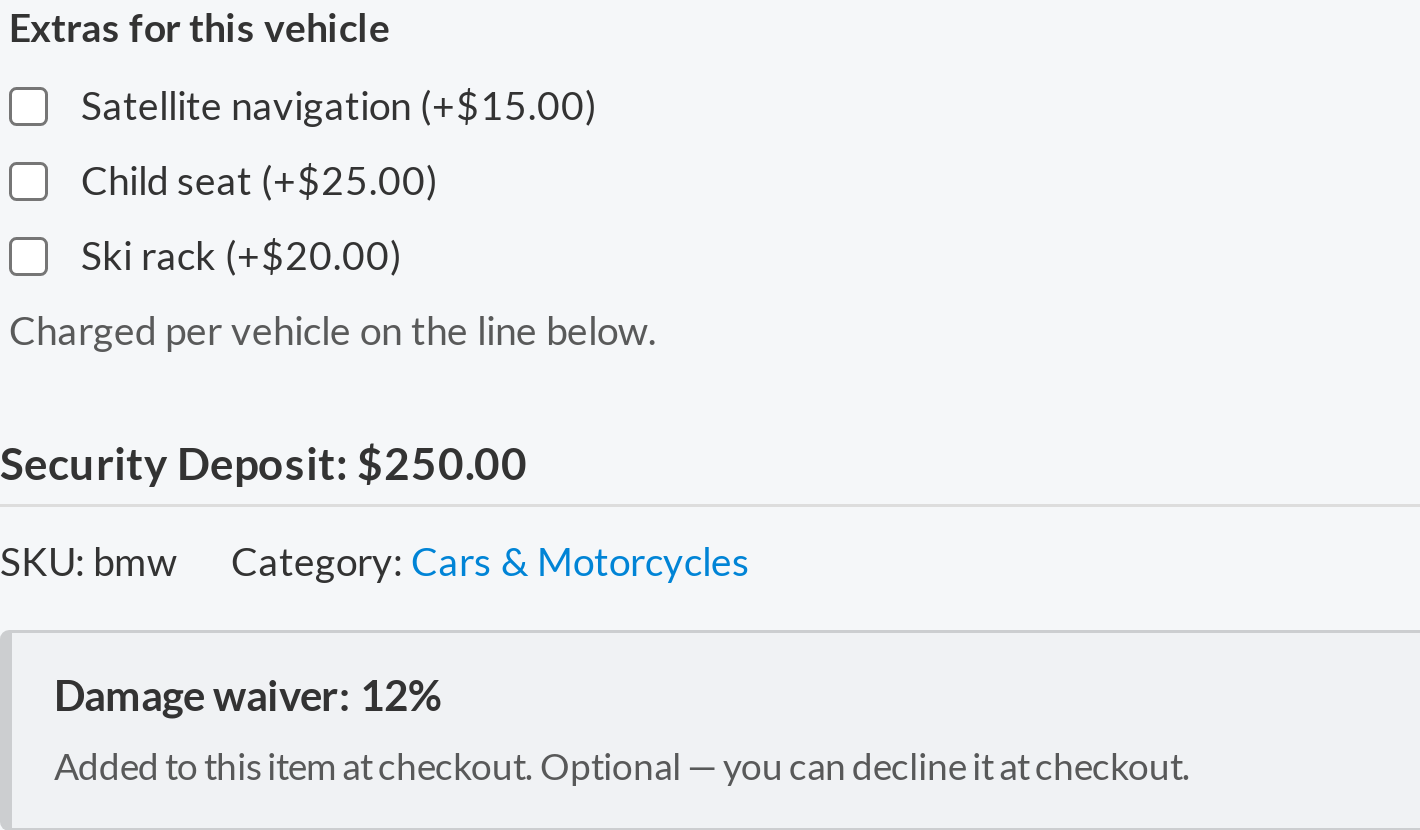
Product page fields can carry a price, which is the cleanest way to sell extras. The customer sees the cost against the option before they book, and it is charged per unit, because the extra belongs to those items rather than to the order.
A required field that is left blank stops the add to cart. That is the point: it is the only moment where refusing to continue costs you nothing, as opposed to the morning of the hire, when it costs you the hire.
Step 3: Set up a damage waiver on rental equipment
The waiver is configured once as a store-wide rule, and individual products override it where they need to. Set the rule first and let it cover the ninety per cent.
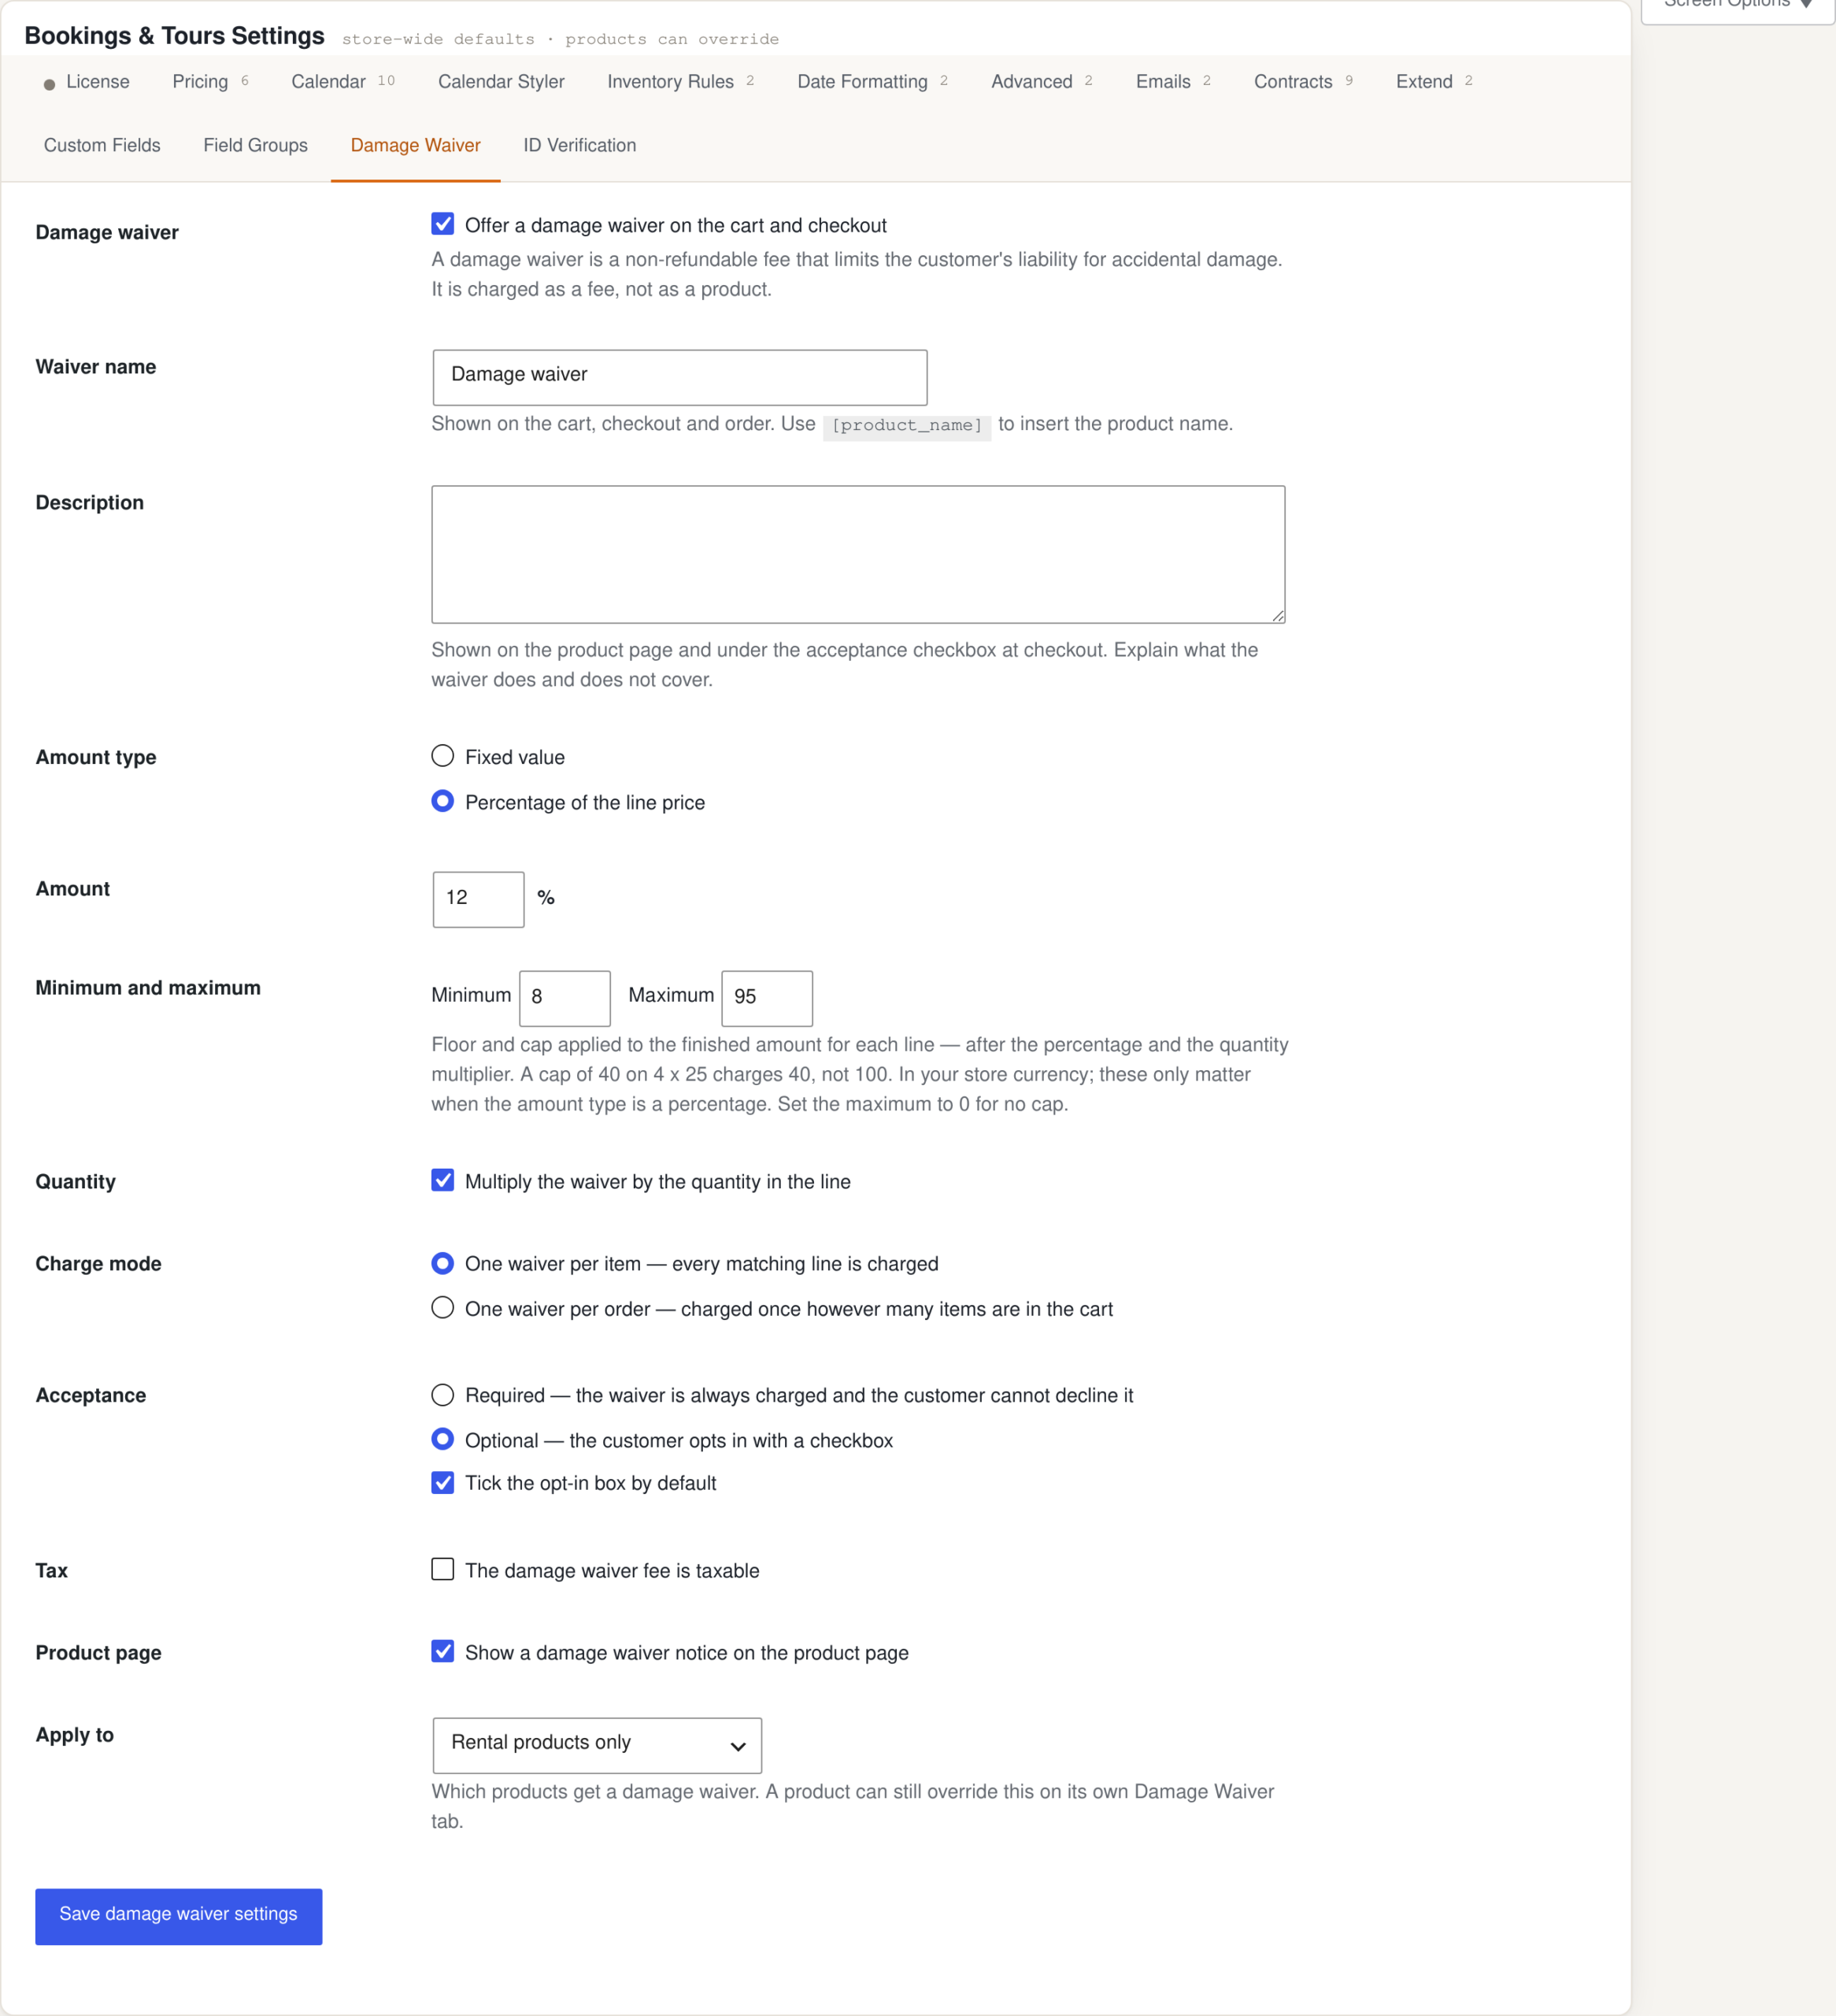
The decisions worth thinking about, rather than accepting the defaults:
| Decision | What to consider |
|---|---|
| Flat fee or percentage | A percentage scales with the hire, which is right when one booking might be a hedge trimmer or a mini digger. A flat fee is easier to explain and suits a catalogue where everything is worth roughly the same. |
| Minimum and maximum | Only relevant to a percentage, and both matter. Without a floor, a cheap one-day hire carries a waiver of pennies that is not worth collecting. Without a cap, a long hire on an expensive item produces a number that loses you the booking. |
| Per item or per order | Per item is the honest model when each item carries its own risk. Per order is friendlier when a customer routinely takes twenty chairs and four tables and would otherwise see twenty-four waiver lines. |
| Required or optional | Required is simpler to administer and predictable to price. Optional converts better and reads as fairer, but you must then handle the customer who declines — see the next step. |
| Which products | All products, rental products only, chosen categories, or a hand-picked list. “Rental products only” is usually what you want if you also sell consumables or accessories outright. |
As a rough benchmark, damage waivers on equipment hire commonly land somewhere between eight and fifteen per cent of the hire value, and vehicle hire often runs higher. Treat that as a starting point to test rather than a rule — your own damage rate and replacement costs are the only figures that matter, and you will not know them properly until you have a few months of returns recorded against orders.
Then override where the rule does not fit. A drone, a marquee, anything where your actual exposure is different from the catalogue average, gets its own amount — or no waiver at all.
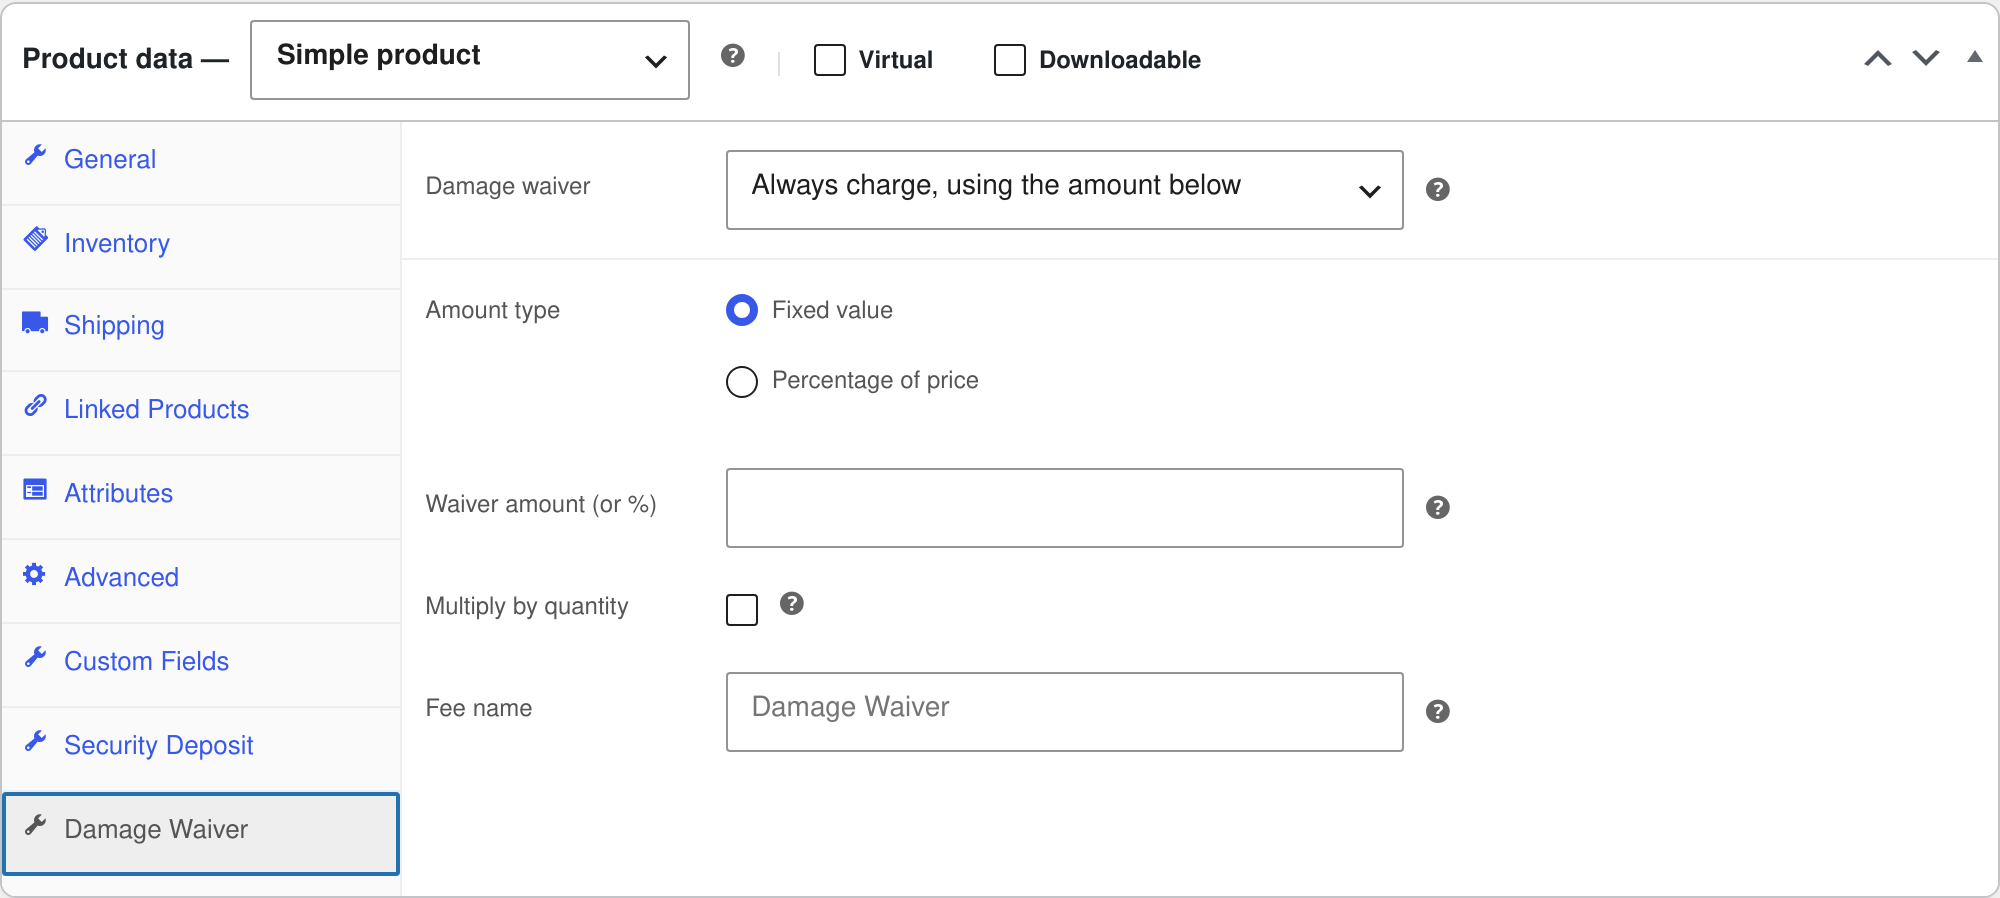
Step 4: If they can decline it, be able to prove they did
An optional waiver is only worth offering if the refusal is recorded. When the customer unticks the box, the decision is stored on the order and an order note records it, so months later there is an answer to “nobody told me about that”.
The rule that applied is also snapshotted onto the order. If you raise the waiver from 10% to 14% next quarter, past orders still show what was actually agreed rather than being quietly rewritten — which is the difference between a record and a liability.
Step 5: Verify who you are handing the item to
For anything you physically hand over — a vehicle, expensive equipment, keys to a venue — the waiver and the questions are worth very little if you cannot show who took it. ID verification collects a document at checkout, holds it securely, and gives you a queue to work through.
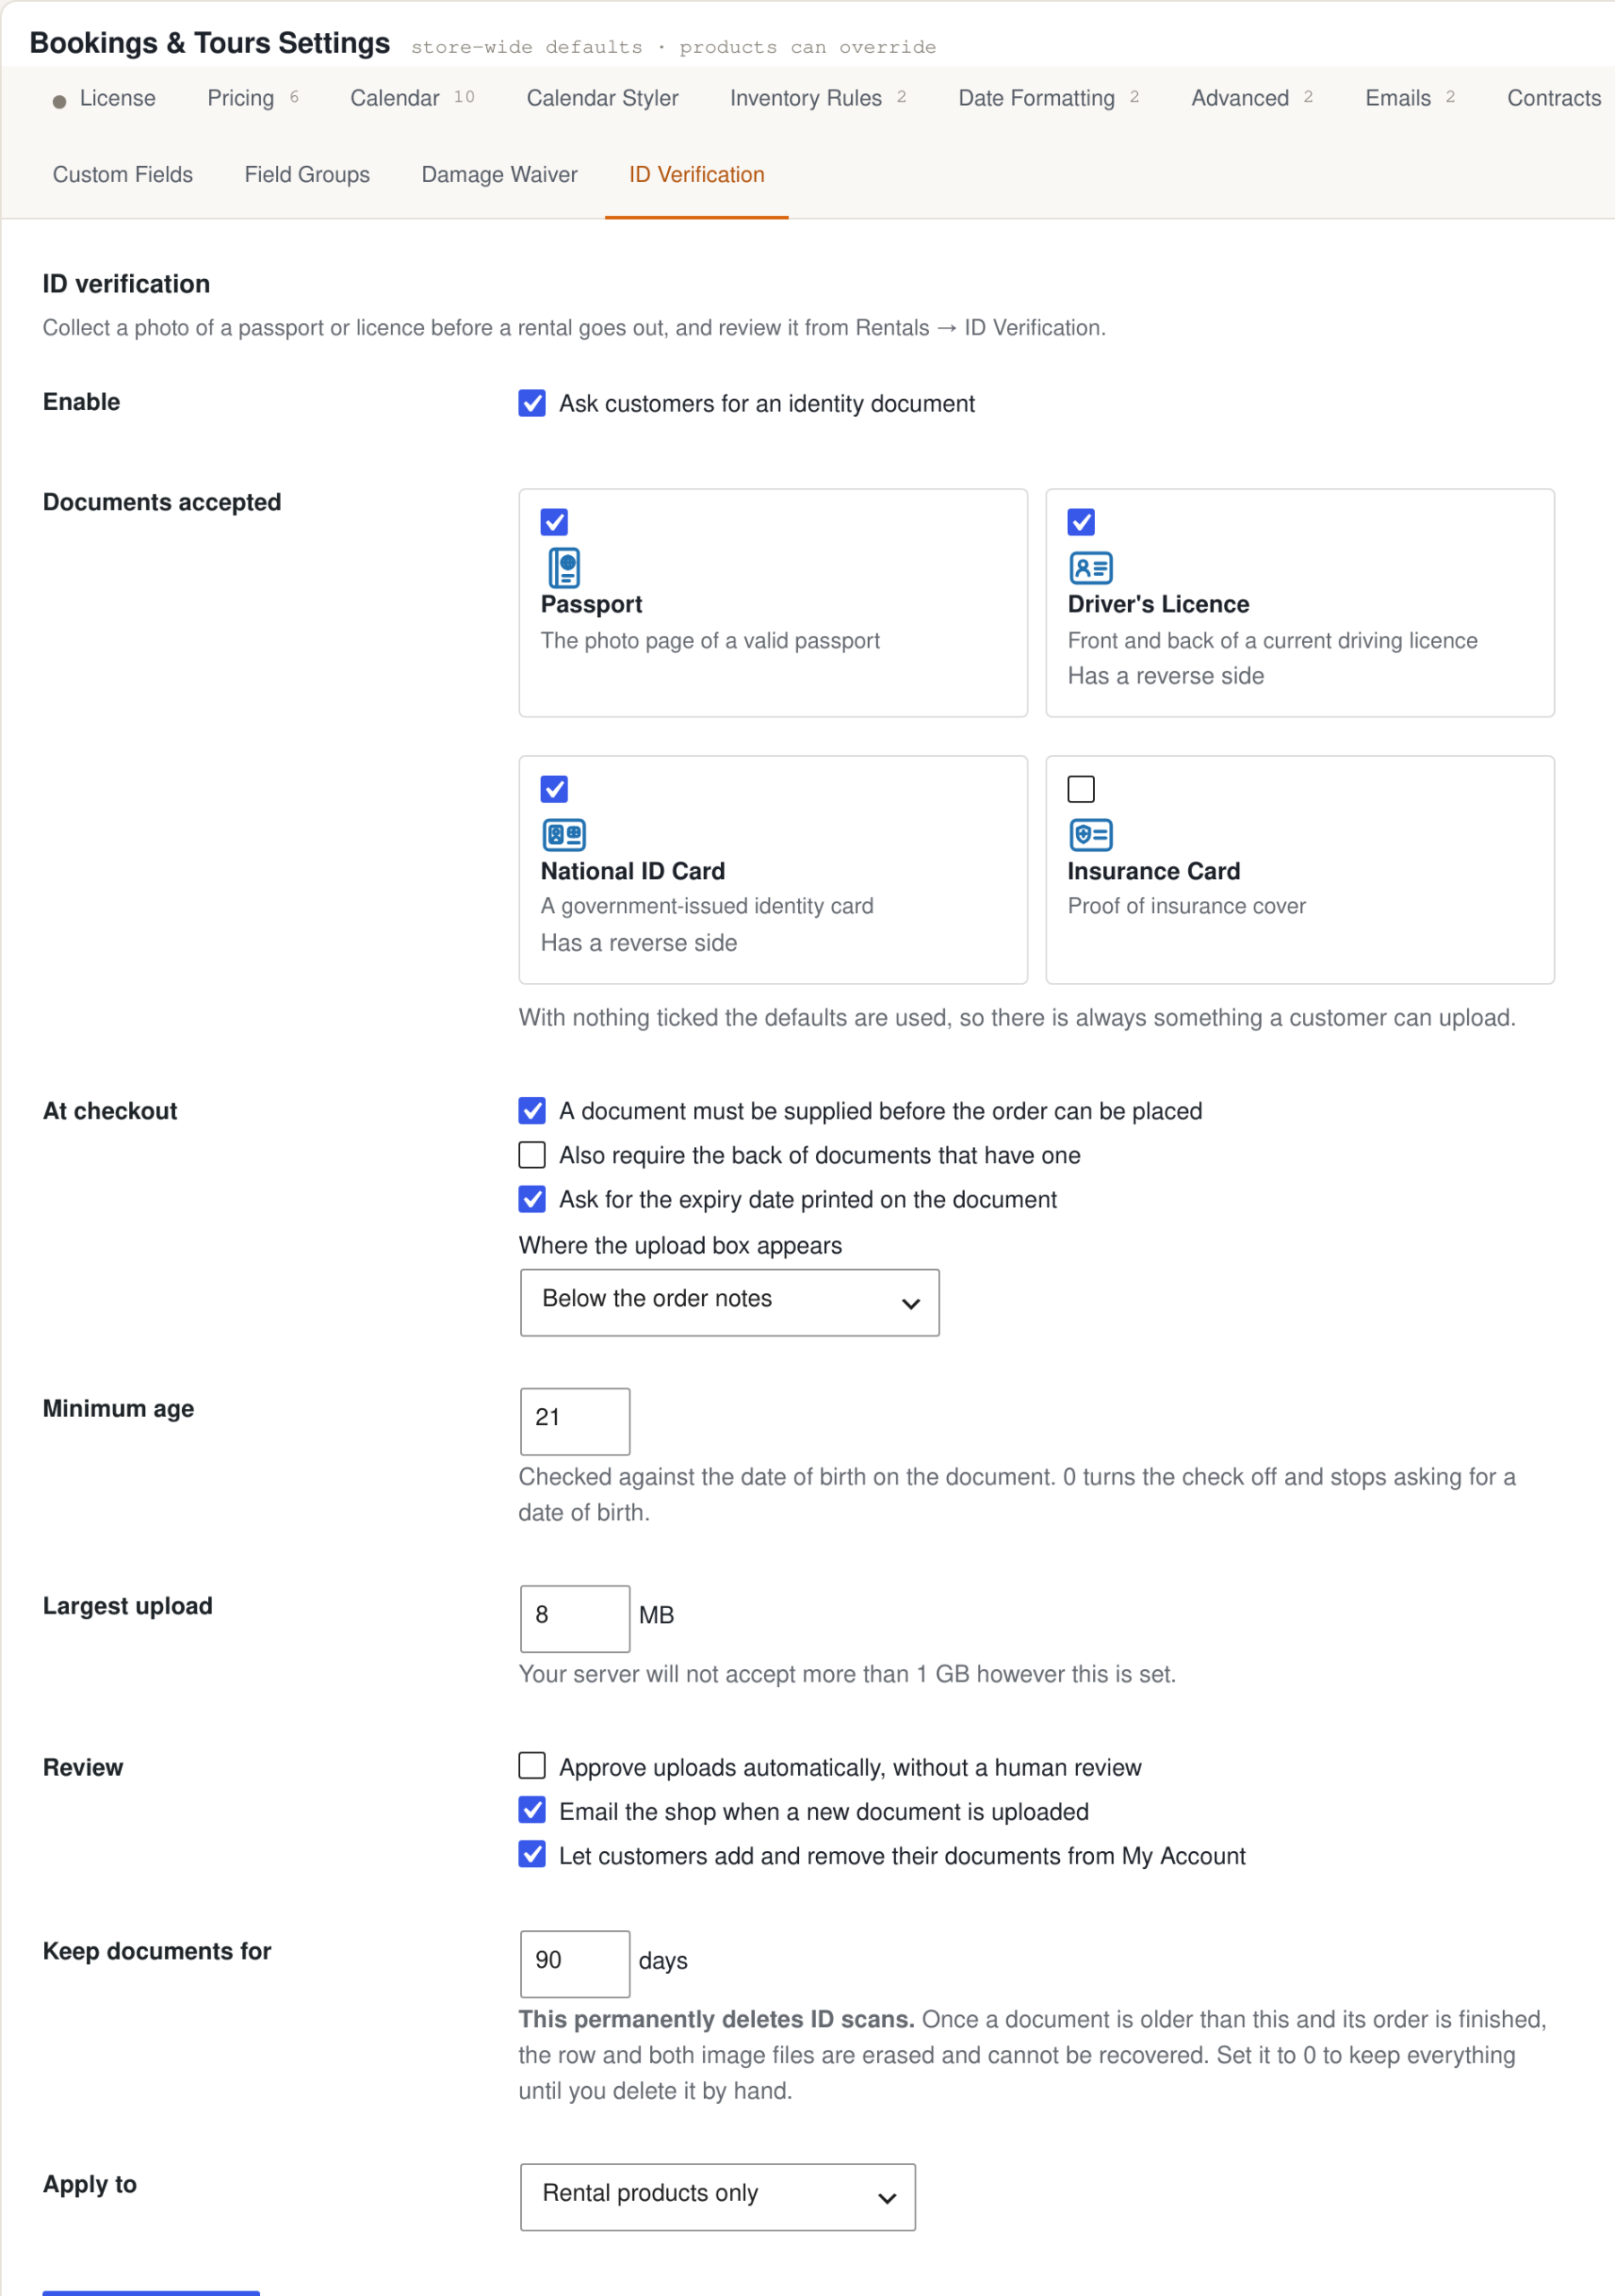
Uploads land in a review queue. Approve or reject each one; a rejection asks for a reason, and that reason is emailed to the customer, so they know to send the back of the licence rather than guessing. Approvals can also be automatic if you would rather eyeball them at collection.
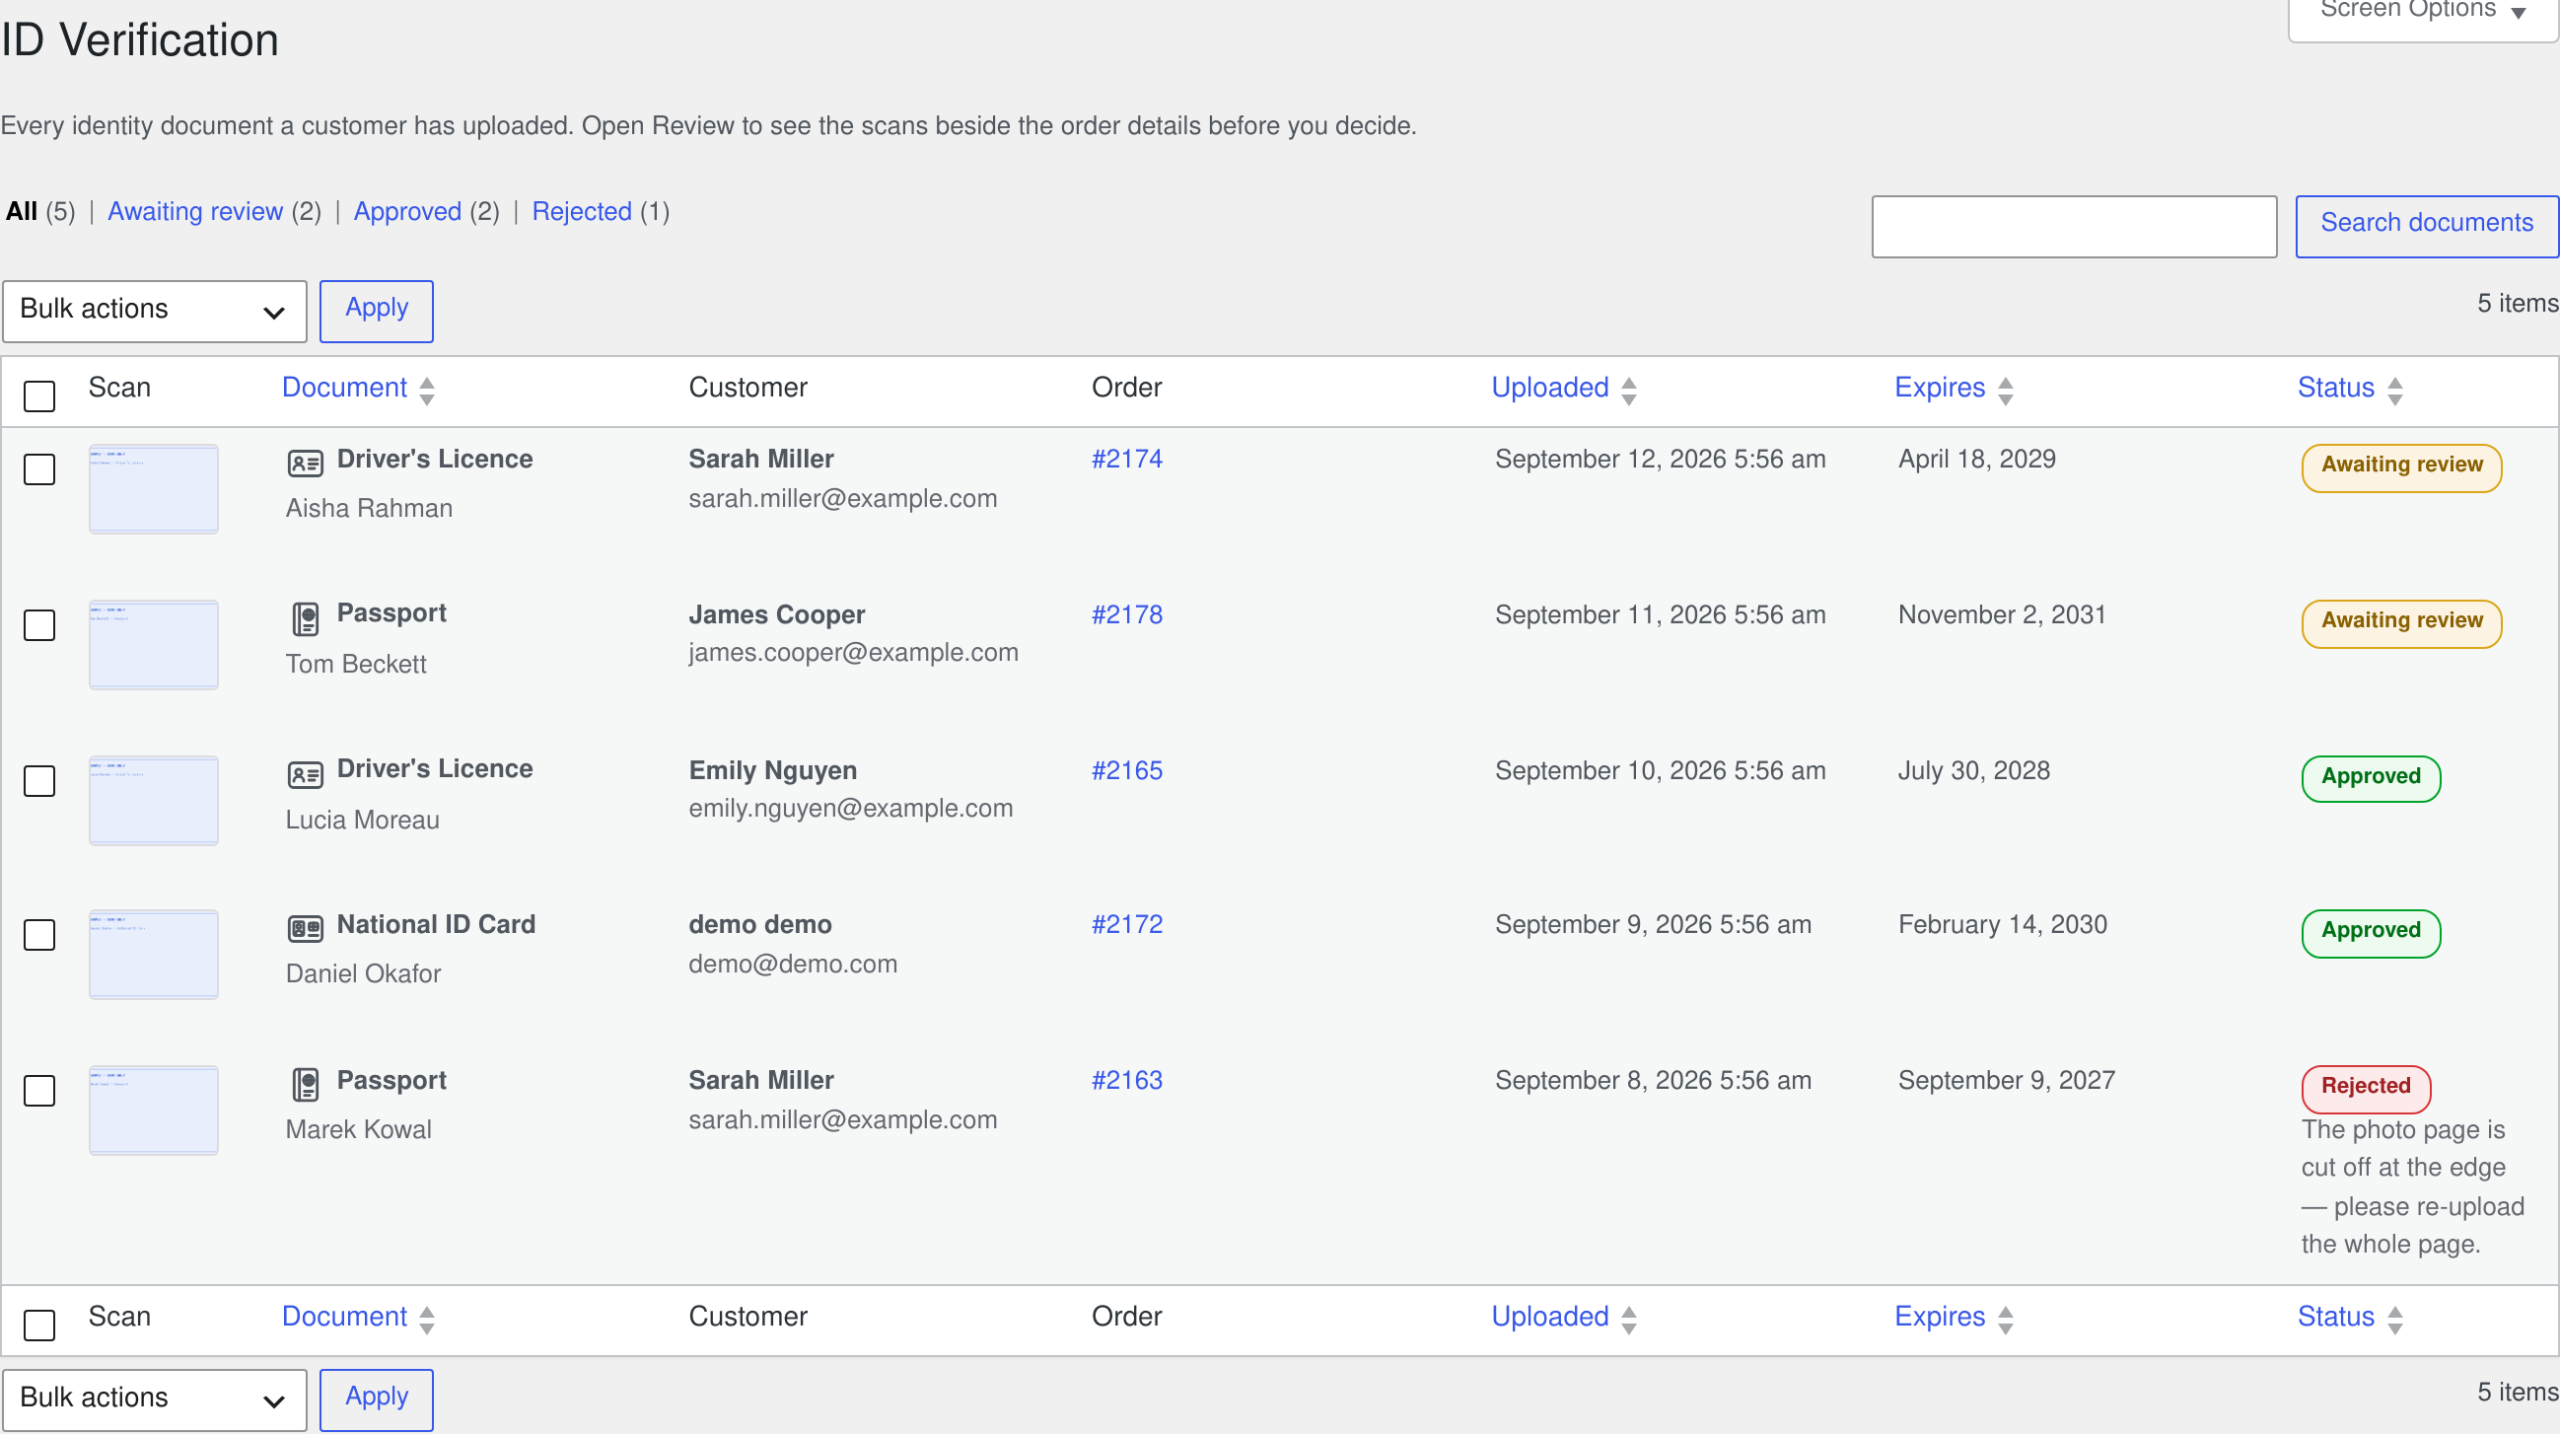
Storing identity documents is not like storing product photos
This is the part most stores get wrong. A scan of a passport must not become a Media Library attachment: that gives it a predictable URL, lists it in the Media Library, puts it in search, and exposes it through the REST API. Identity documents are handled separately — written to a directory whose name carries 32 random characters, renamed to random characters so the customer’s own filename never touches your disk, checked by inspecting the file contents rather than trusting the extension, and served only through a link that verifies both a one-time token and your permission to see it.
Set a retention period as well, so documents are purged automatically a set number of days after the order completes. Keeping a scanned passport indefinitely because nobody chose a number is a data protection problem waiting to happen. The ID verification documentation covers the storage model in full, including what to ask your host to do on nginx.
Where it all ends up
Everything lands on one order. The hire, the deposit, the waiver and any priced extras appear as separate lines, so the customer can see what is a charge, what is refundable and what they chose.
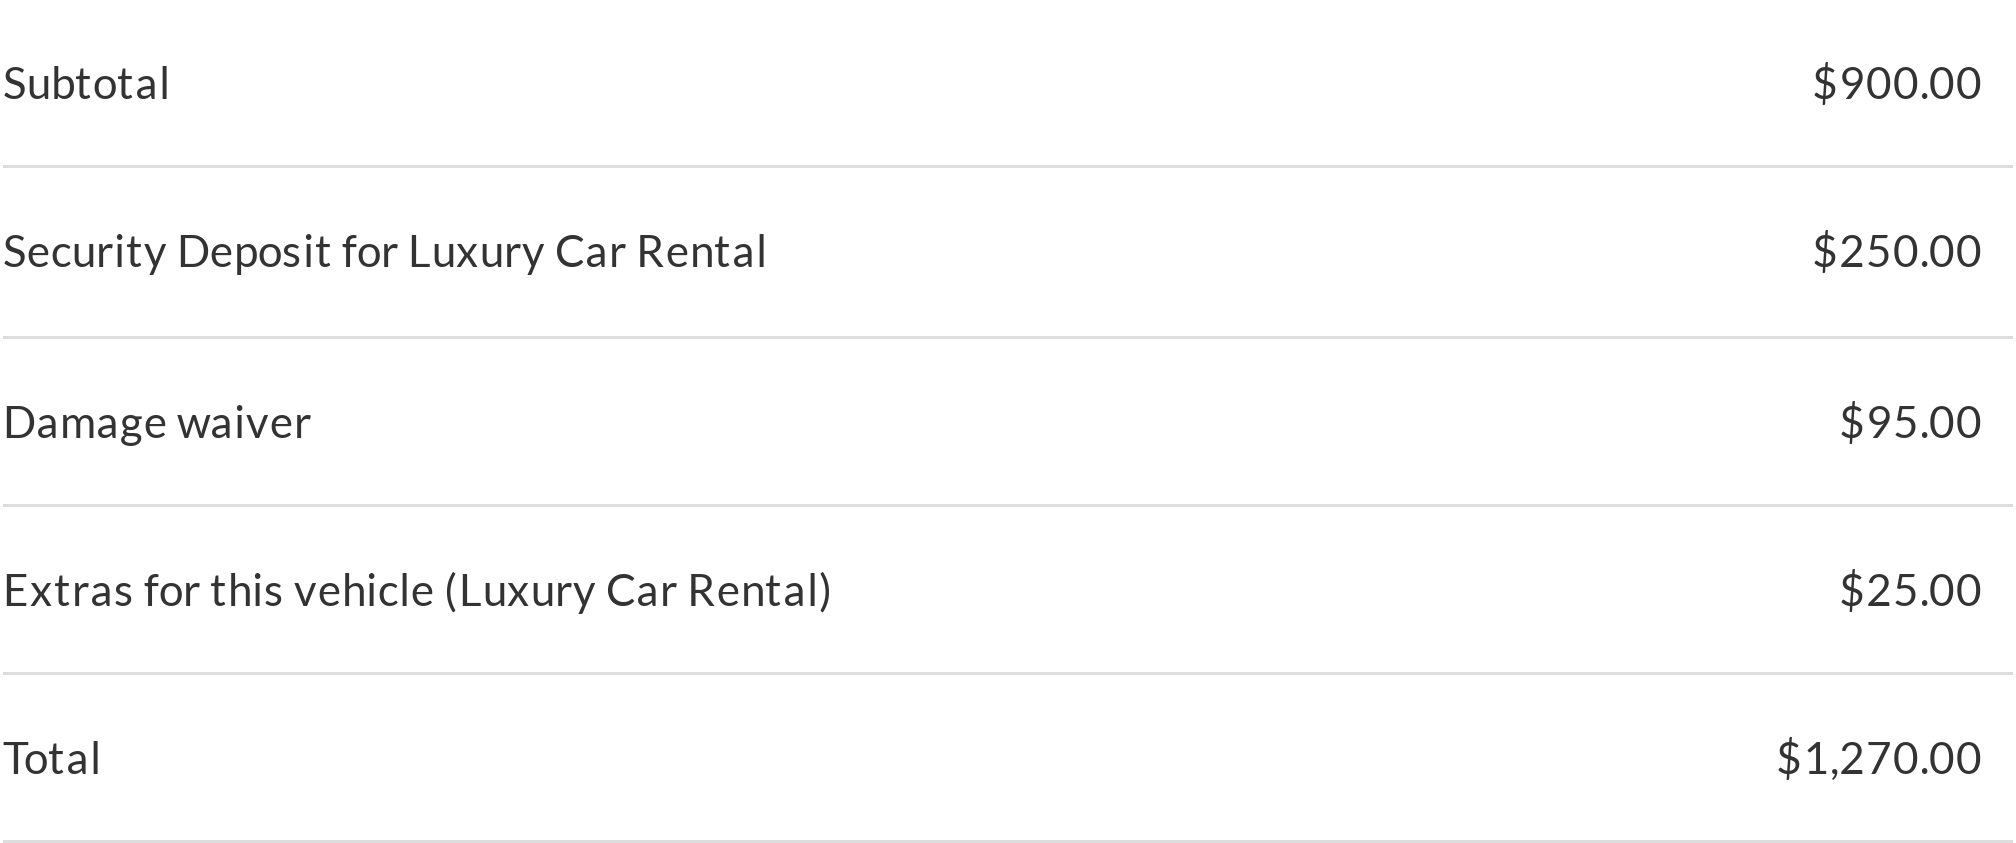
The custom fields data is stored against the order along with the label that was used at the time, so renaming a field later does not rewrite old orders. It appears on the admin order, on the customer’s order, and optionally in the order emails, which is what makes it usable by whoever is actually loading the van. See viewing custom fields from customers for where each one shows.
What this looks like in four kinds of rental business
| Business | What it asks | Waiver shape | ID |
|---|---|---|---|
| Car and van hire | Licence number and country, age, second driver, excess reduction | Percentage, per item, usually required | Driving licence, minimum age enforced |
| Party and event hire | Delivery address, site access, setup and takedown, marquee pegging surface | Flat fee, per order — nobody wants a waiver line per chair | Rarely needed; deposit usually does the work |
| Tool and plant hire | Certification held, site contact, delivery floor, fuel supplied | Percentage with a floor and a cap, per item | Photo ID for high-value plant only |
| Boat, jet ski and powersports | Experience and licences held, number in the party, safety briefing acknowledged | Percentage, per item, required — exposure is high | Licence or passport, minimum age, expiry recorded |
The pattern across all four is the same: the questions and the waiver differ, but both are settled before the item leaves, and both are attached to the order rather than living in somebody’s inbox.
Try the whole thing
All of this is on the live demo, with a car hire product already carrying a field group, priced extras and a deposit — book it and watch the lines appear at checkout. The feature set is described on the custom fields, damage waiver and ID verification page, and it is included with the WooCommerce rental and bookings plugin.
Two related guides worth reading next: how to take security deposits on WooCommerce rentals, which is the other half of the damage story, and how to add equipment rentals to your WooCommerce store if you are still setting the catalogue up. The rest are on the rental software how-to guides index.