Adding Rental Products #
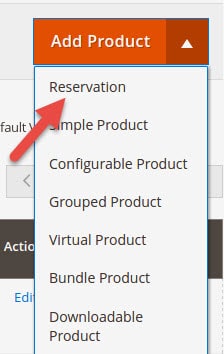
From the admin > products > catalog page click the down arrow on the add product button and chose “Reservation”
On the page after that make sure you set this setting as follows:

Inventory #
You can add the rental inventory and serial numbers if desired. First though we need to turnoff manage stock since this is used for sale type products (not rentals)
You need to set “Advanced Inventory” to not manage stock.
If you have more than one inventory source, this can be done by going to source > advanced inventory button:

If you only have one inventory source you’ll see this here:

Click on the Advanced Inventory and set it like this:

Adding Serial Numbers #
Basic Idea: You have 1 product entered in the admin with 1 sku, but this product may have 10 qty in inventory. Each of these inventory items corresponds to one serial number.
Serial numbers are an optional way of tracking inventory and usually used for higher value products. The advantage to using serial numbers is you can track damages or other data about an individual rental items. You first need to enable serial tracking, and then add each of your serial numbers:

One method of naming your serial numbers is to take the sku and add a _1 or _2 for each serial as shown in the screenshot above.
Setting Pricing #
Pricing is very flexible and allows you to enter as many price points as you like. Each in-between rental length is calculated automatically. Please see our pricing page for full information.
Buyout #
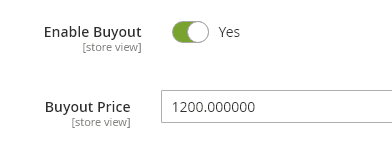
Buyout means a rental product that you also want to sell. This can be set on the Rental section:
On the product page you’ll see a buyout button:
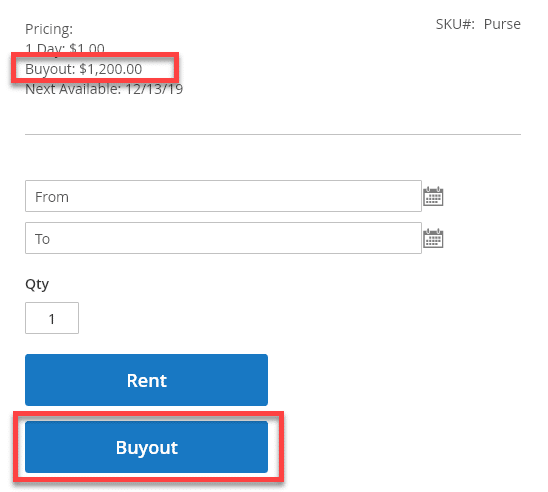
and on the shopping cart when added it will show it’s a buyout rather than a rental:

Setting Calendar Display Options #
Please see our Calendar docs. This can also be set globally in Rentals > Settings or by product on edit product > rental section.
Turnover, Padding, Store Hours, Min/Max Rental, Hotel Mode, Excluded Dates #
All of the many additional settings that you find under edit product > rental section are described in our rental settings section. These settings can be defined per product or globally.
Adding For Sale Products #
From the admin > products > catalog page click the down arrow on the add product button and chose “Simple Product”

Adding Configurable Products #
1. Setup The Configurable Attribute #
in admin > stores > product (under the attributes menu) add a new attribute the the add new attribute button. The main thing is to make sure the Catalog Input Type for Store Owner is set to “dropdown”, Values Required is set to “Yes” and Scope is set to “Global”. fill in the “Manage options” area with some options for example:

Now go to admin > stores > attribute set and click o the “default” (or the attribute set you are using for the product) on the right side of the page you should see the new attribute you made under “unassigned attributes” click and drag your attribute to the middle column under “general”. Click save.
2. Add Some Products That Use The Attribute #
Go to admin > products > catalog page and add some reservation products
3. Add the Configurable #
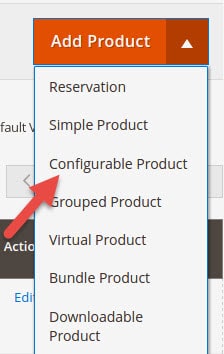
From the admin > products > catalog page click the down arrow on the add product button and chose “Configurable”
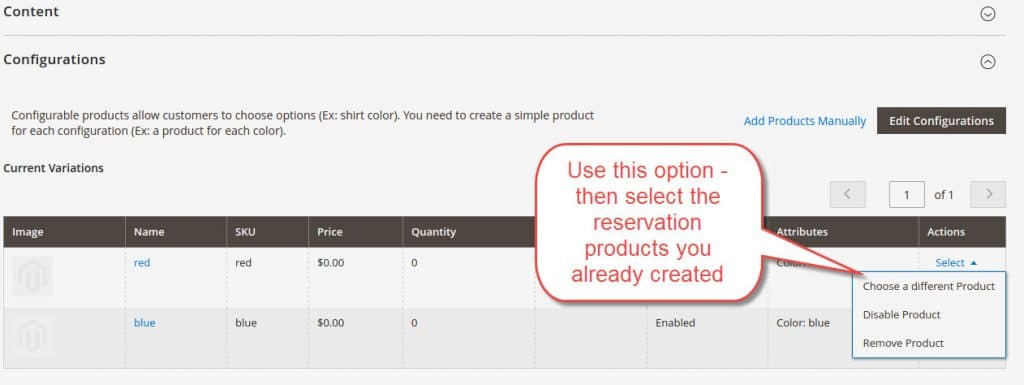
Go to the configurations tab and click “Create Configurations” it will automatically generate the products. After this, you will need to switch out these auto-generated products for the reservation ones. (Yes this is a strange workflow, Magento is working on a fix so you don’t have to auto-generate products first see the issue here on github)
That should be it. Your configurable product will look something like this:
Adding Bundle Products #
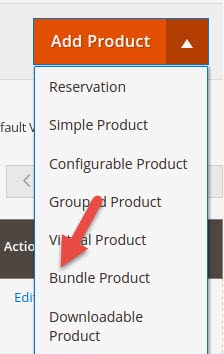
You will first need to add the products that you want to be part of your bundle one by one. After that From the admin > products > catalog page click the down arrow on the add product button and chose “Bundle Product”
To make sure that shipment tracking works properly with rentals, make sure that “Ship Items” is set to Separately. Otherwise shipments will not work properly with serial numbers and shipment dates tracking.

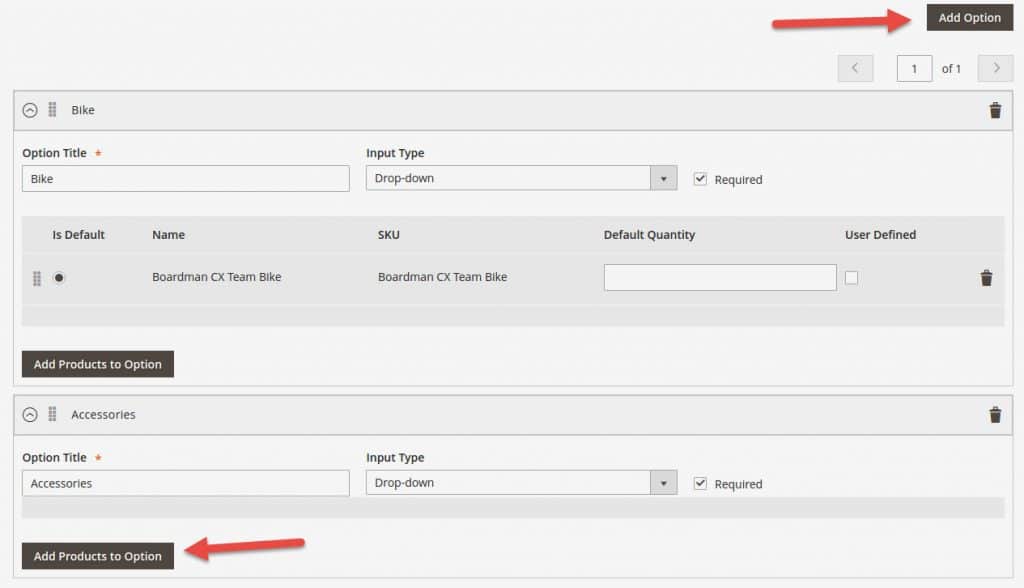
On the product edit page on the bundle items area you can “Add Option” to add the options you want, and then from each option you can choose the input type and “Add Products to Option” to choose what products go on each one.
Pricing #
Notice the pricing option on the product edit page

The pricing for the bundle can be either per product, or per bundle. Per product means that he prices are added together.
Product 1: $10/day
Product 2: $10/day
so if you rent for 1 day it would add together those prices and give you a price of $20. If using “Per Product” bundle pricing, we recommend setting something on Product Edit > Rental > Replace price points text with custom text because otherwise it will not be able to display anything about pricing since it depends on the products in the bundle. You could put something like “Starting at $10/day” as an idea.
You can also choose to do a price for the whole bundle. To do this choose “For all” and in this case it will use the pricing that is entered on the edit bundle page.
Converting Product Type #
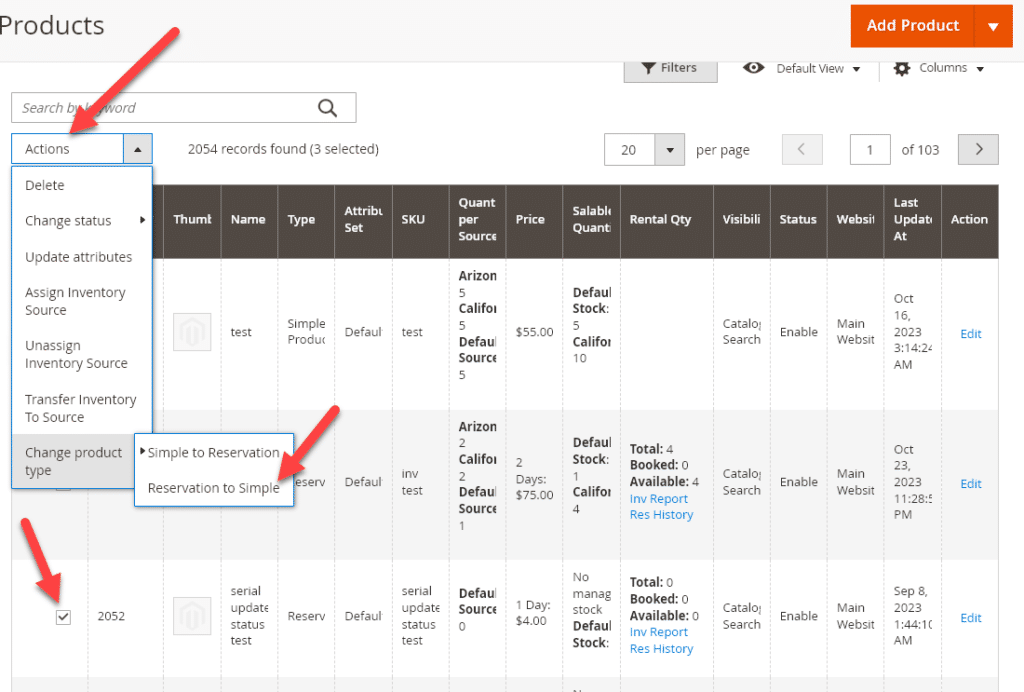
To save time you can convert product types from simple to reservation or reservation to simple. You will still need to enter the rental pricing though when converting from simple to reservation as well as the inventory. When converting from reservation to simple you will also need to enter the pricing and inventory levels. To convert product type from one to another use the Actions drop down on the Catalog > Products grid as shown here:
