The following applies if you have the Multi Inventory version of our Rental Booking System. This is just general guidelines to follow.
Setup #
Source: Separate inventory tracking location
Stock: Can be 1 or more Sources. For example you might have a “West Coast” Stock that contains 3 of your “West Coast” sources (Like California, Oregon, Washington). When inventory is checked it will add together the inventories for these 3 locations.
Web Site: A Web Site is tied to a Stock for inventory checking
- You will want to setup in Stores > Inventory > Sources a source for each of your inventory locations for which you want to track inventory separately
- (optional if using multiple websites) Now in Stores > All Stores add a Store View, Store, and Website for each website that you need to track stock separately, or that you want to use different payment/shipping settings, products, or design templates for. A website does not have to use a different domain it can be set to just be a different sub-domain and you could add a simple store switcher in your website header if you want. More information on Multi Web Site Setup: https://devdocs.magento.com/guides/v2.3/config-guide/multi-site/ms_over.html Terminology:Web Site: In Magento 2 this means a website that can have different products, shipping methods, payment methods, but can still share the same admin panel. For example you might have usa.mywebsite.com, uk.mywebsite.com, france.mywebsite.com if you wanted people to have different websites for different locations that also have different products.Store: May contain a different catalog structure (Root Catalog) and priceStore View: May vary the presentation of content, for example templates and language
- Next you go to Stores > Inventory > Stocks and setup your Stocks. A Stock can contain multiple Sources.
- (Optional) You can use Priority or Distance Based fulfillment. Priority is the Priority that you set for the Stock. If you want to use Distance based calculations for shipping orders to determine which Source is closer to the customer when shipping, you’ll want to fill out Stores > Configuration > Inventory > Google Distance Provider and put your API key there.
This is easier to understand with an example.
Use Case #
User Case: You have 3 stores that you will also use as your inventory locations. These are in California, New York, and Texas.
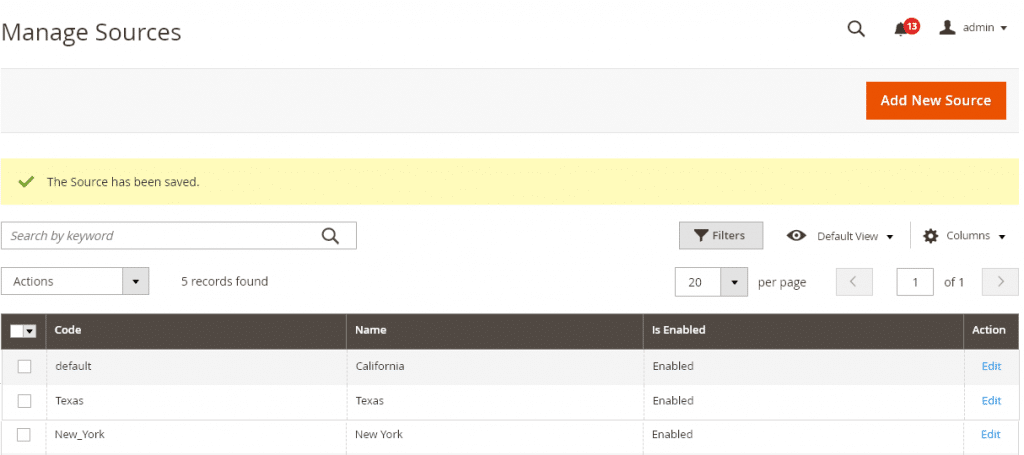
- So in Stores > Inventory > Sources you would add set these 3 Sources. Since there is a default Stock that can’t be changed you can just change the name of that one. The other 2 new ones can be added. When you are done it would look like:
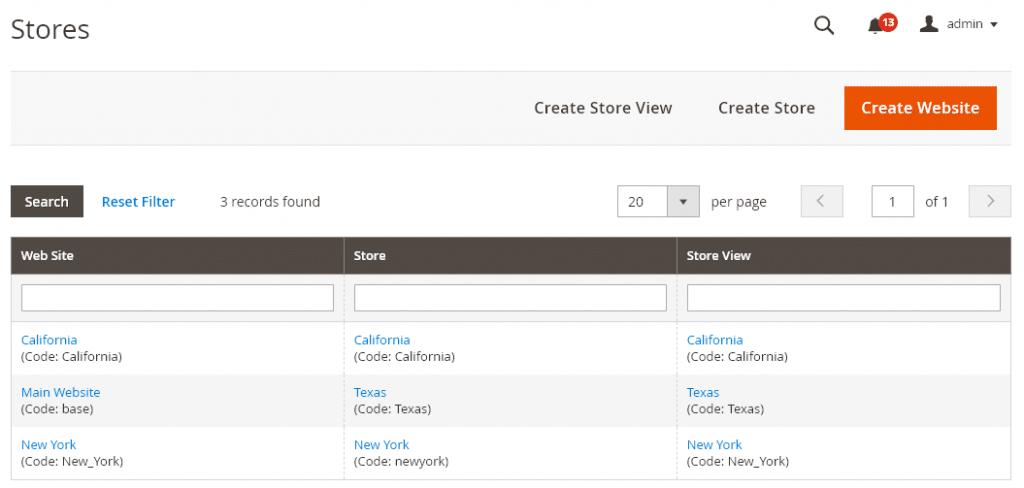
2. Next in Stores > Settings > All Stores add a Store View, Store, and Web Site for each location. It might look something like this:
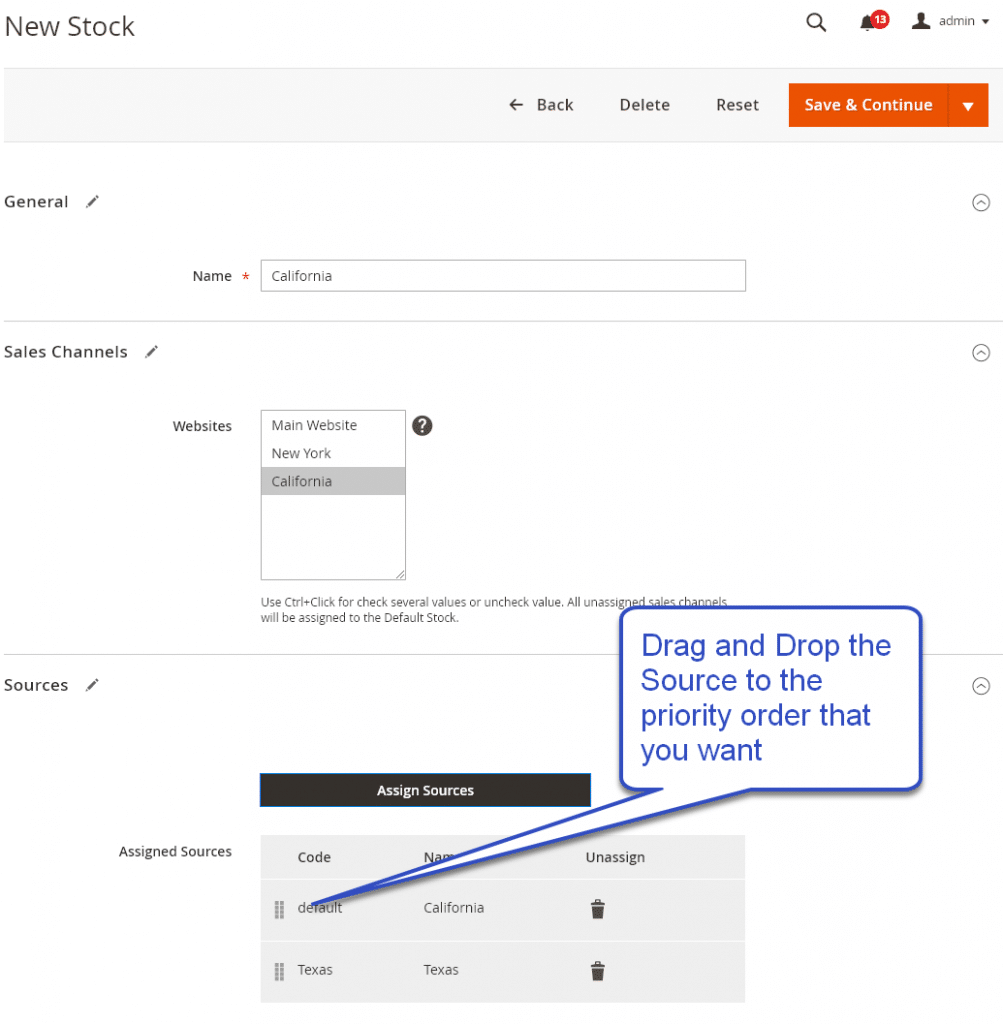
3. Now you want your California store to also share inventory with the Texas store, but when browsing the California website you want California’s inventory source to take priority, and vice versa for Texas. So in Stores > Inventory > Stock you would make 3 Stocks. When you make the Stock for California and Texas you want to make sure that you put the Source with higher priority first. So for California Stock it would look like:
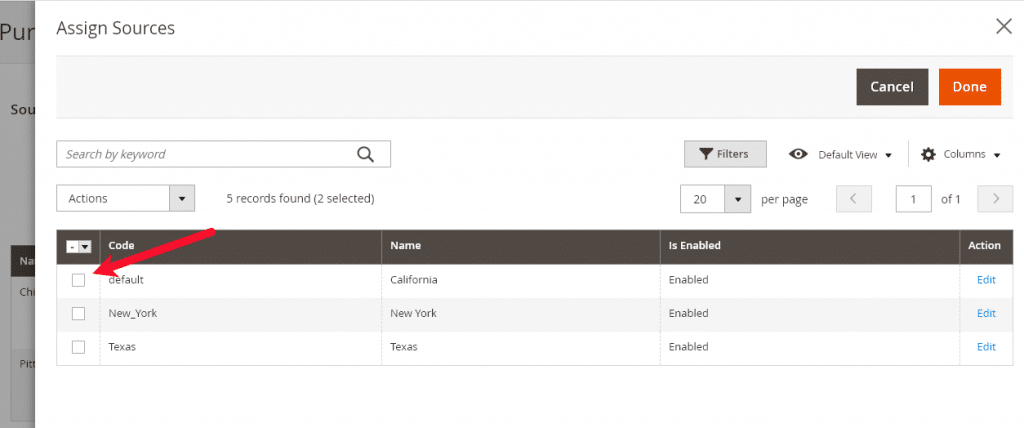
4. Now when editing products you can Assign Sources to the product, and set inventory for each. So when adding / editing products click the “Assign Sources” button and checkbox each source to assign:
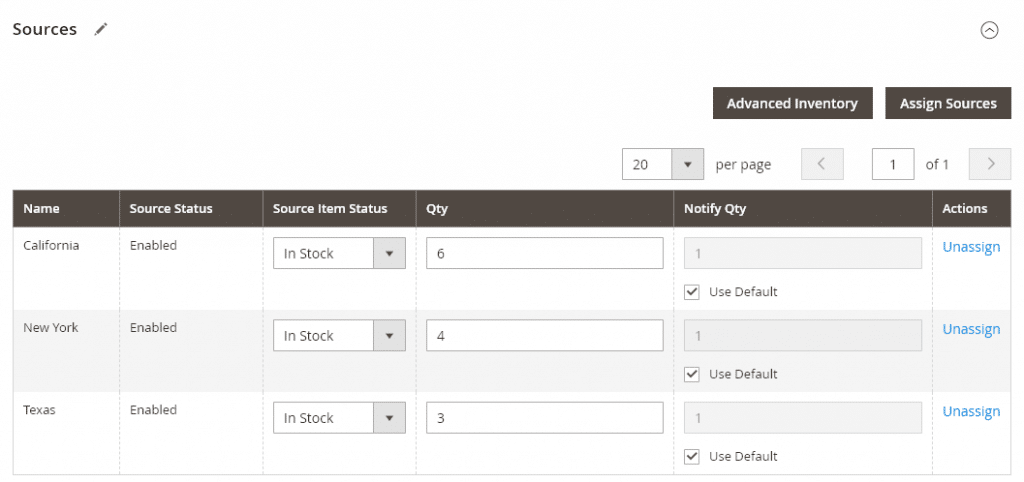
5. Now you can enter a stock for each source:
6. Also notice when editing your Store configuration there is a Configuration drop down so you can change a setting for a Web Site instead of globally if needed:

