A rental product can be tracked in two ways: as a quantity of identical units, or unit by unit, with a serial number for each one. This guide explains the difference, helps you choose, and then walks through setting up a serial-tracked product from the first unit to the Usage report.
Quantity or serials? #
Quantity-based tracking is the default. The product has a rental quantity, the number of identical units you own, and availability is a number: 20 chairs, 6 booked on Saturday, 14 free. When an order goes out you send a quantity and when it comes back you return a quantity. No unit has a code of its own, so there is nothing to pick or scan, and nothing is recorded about any particular unit.
Serial (unit-based) tracking is switched on per product with Use Serial Numbers? on the product’s Rental tab. Each physical unit then gets its own serial code, the one printed on its label, and at Send and Return you choose or scan which units are going out and which came back. Every unit has its own:
- status: Available, Out, Maintenance, Broken or Retired;
- page, with the unit’s details and a history of every rental it went out on;
- serial custom fields: odometer or hour meter readings, fuel level, checks and photos, recorded as it goes out and comes back;
- maintenance tickets, with the Maintenance extension in Rental Booking Pro;
- QR code or barcode label;
- line in the Usage report and the Serial Number Report.
When to use each #
- Use quantity for interchangeable, low-value or bulk items where it does not matter which one a customer had: chairs, tables, linens, traffic cones, extension leads.
- Use serials when the units are not interchangeable or you need to know which one went where: vehicles with odometers, machines with hour meters, cameras and electronics, anything that is insured, inspected, damage-checked or serviced unit by unit, and anything you would chase a customer for by its serial number.
| Quantity-based | Serial (unit-based) | |
|---|---|---|
| Switched on by | the default | Use Serial Numbers? on the product |
| Availability | from the product’s rental quantity | also from the rental quantity: keep it equal to the number of units you can rent |
| At Send and Return | how many | which ones: chosen from a list or scanned |
| Per-unit status and history | no | yes |
| Readings and photos per unit | no | yes, with serial custom fields |
| Labels | no | QR code or C39E barcode per unit |
| Reports | per product | per product and per unit |
You can mix both in one catalogue. The setting is per product, so a party-hire shop can rent tables and chairs by quantity and its generators and heaters by serial number. The Send and Return screens show the serial boxes only on the rows that need them.
Things to know before switching a product #
- Availability still comes from the product’s rental quantity. Serial numbers decide which units go out, not how many can be booked. Add one serial for each unit you own and keep the quantity equal to that number. When you set a unit to Broken or Retired it is no longer offered at Send, but the product’s quantity is not lowered for you: lower it yourself if the unit will be out of action for a while.
- If you choose fewer units than the quantity being sent, the rest are picked for you from the product’s available units, so the record always says which units went.
- Switching an existing product on converts nothing. Rentals that are already out went out without codes, so they come back by quantity as before; from the next send on, every unit is chosen or scanned.
- Switching a product off keeps its serials on record, with their history, in the Serials grid, but Send and Return stop asking for units and the units’ statuses no longer change.
Setting up a serial-tracked product #
1. Switch on serial numbers and add the units #
Open the product, go to its Rental tab and set Use Serial Numbers? to Yes. In the Serial Numbers grid below it, click Add once for each unit and give it its code, the date you acquired it and its status, then save the product.
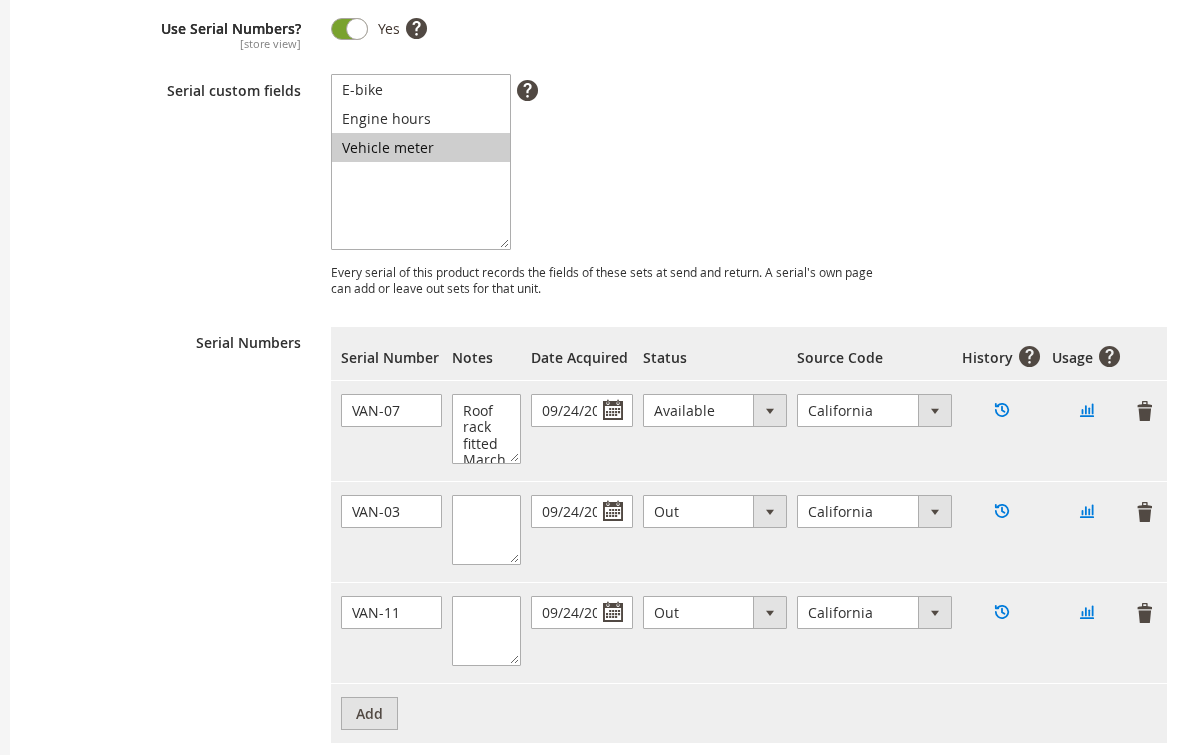
You can also add units one at a time, without opening the product, from Rentals > General > Serials > Add serial. See Adding and Editing a Serial and The Serials Grid.
2. Optionally, give the product a field set #
A field set is the list of things staff record for each unit when it goes out and comes back: the odometer, the fuel level, whether it came back clean, photos. Start from one of the ready-made templates under Rentals > General > Serial Custom Fields, then choose the set in Serial custom fields on the product’s Rental tab.
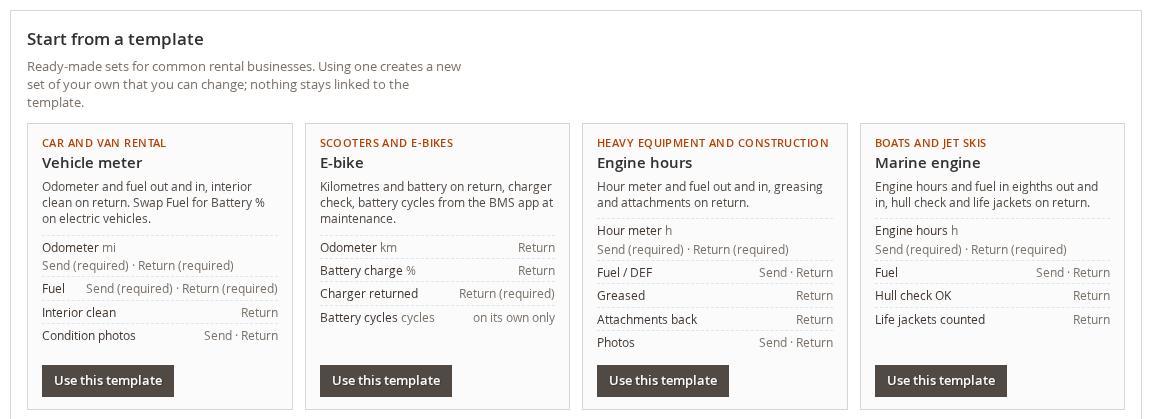
See Serial Custom Fields and Field Sets. A product without a field set works exactly the same, just without readings.
3. Send an order and choose or scan the units #
In Rentals > Send and Return > Send Rentals, the order’s row has a Serial box: type the codes of the units going out, or let a barcode scanner type them. If the product has a field set, click Custom fields to enter the readings, then tick the row and choose Actions > Send.

See Recording Readings and Photos at Send and Return.
4. Return it, with readings and photos #
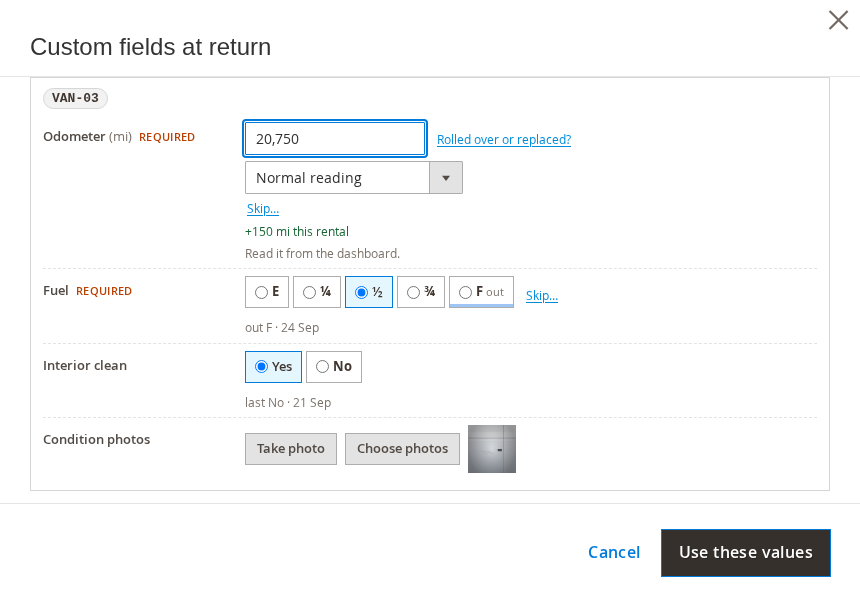
In Rentals > Send and Return > Return Rentals the units out on the order are already filled in, because usually everything comes back; remove any that did not. Enter the readings under Custom fields, add photos of any damage, then tick the row and choose Actions > Return. Or scan each unit’s label on Scan Returns, one scan per unit.
5. Look at the unit’s page and history #
Click the unit’s code in the Serials grid or on the order screen, or its History icon in the product’s Serial Numbers grid, to open its page: its details at the top, then its photos, its current readings and the history of every send and return with what was recorded.
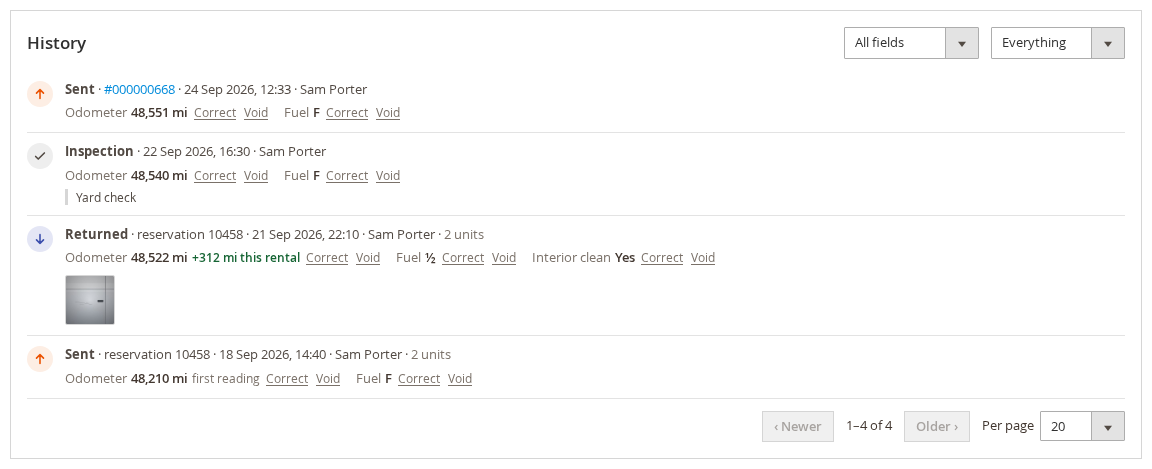
See Serial History, Corrections and Voids.
6. Print labels #
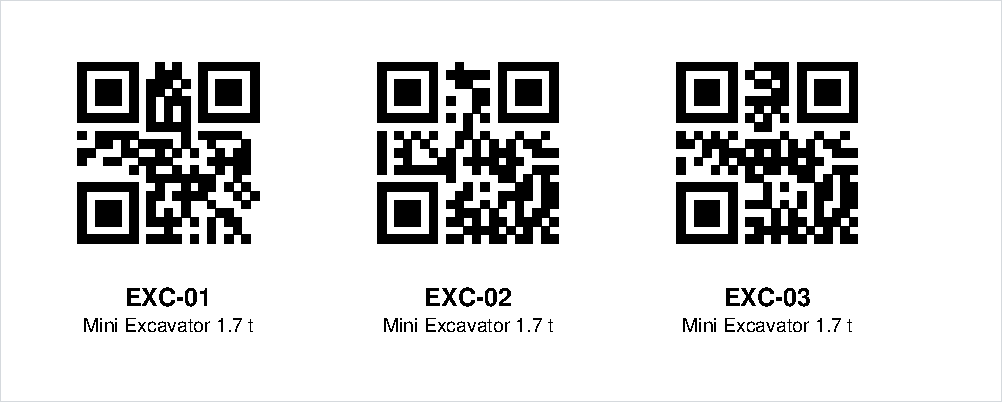
In The Serials Grid, tick the units and choose Actions > QR code labels (PDF) or C39E barcode labels (PDF), with or without the product name. Stick a label on each unit, and a USB or Bluetooth scanner can then read it at Send, Return and Scan Returns.
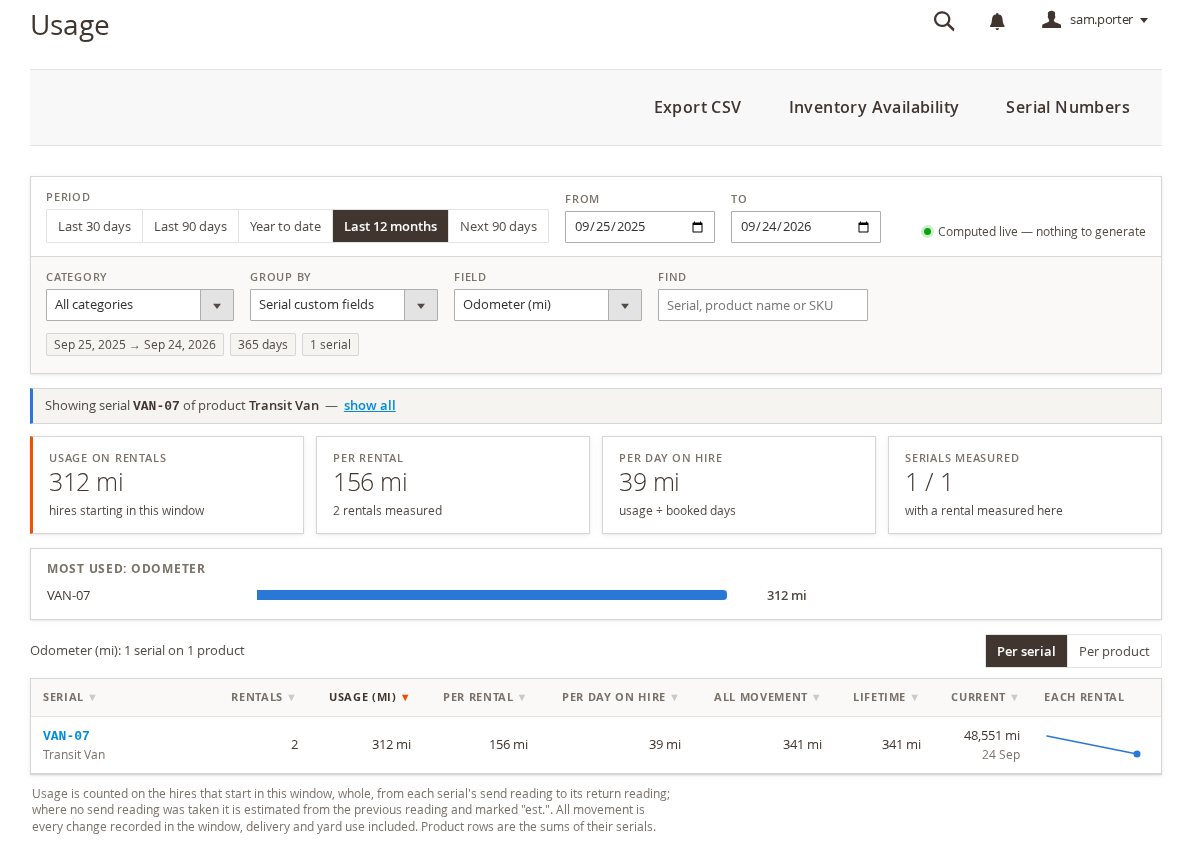
7. Check the Usage report for the unit #
The Usage report button on the unit’s page, or the Usage icon in the product’s Serial Numbers grid, opens Rentals > Reports > Usage Report on that one unit: how often it goes out, and with a field set, how far it travelled or how many hours it ran on each rental.