Every serial has a page of its own. The top of the page holds the unit’s details, which you can edit there; below them come its photos and custom fields and its history.
Open a serial’s page from:
- the Serials grid: click the code, or Edit;
- the product’s Serial Numbers grid: the History icon on the unit’s row;
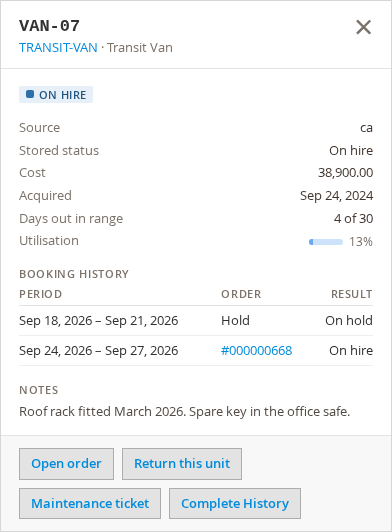
- the Serial Number Report: click a unit, then Complete History in the panel that opens.

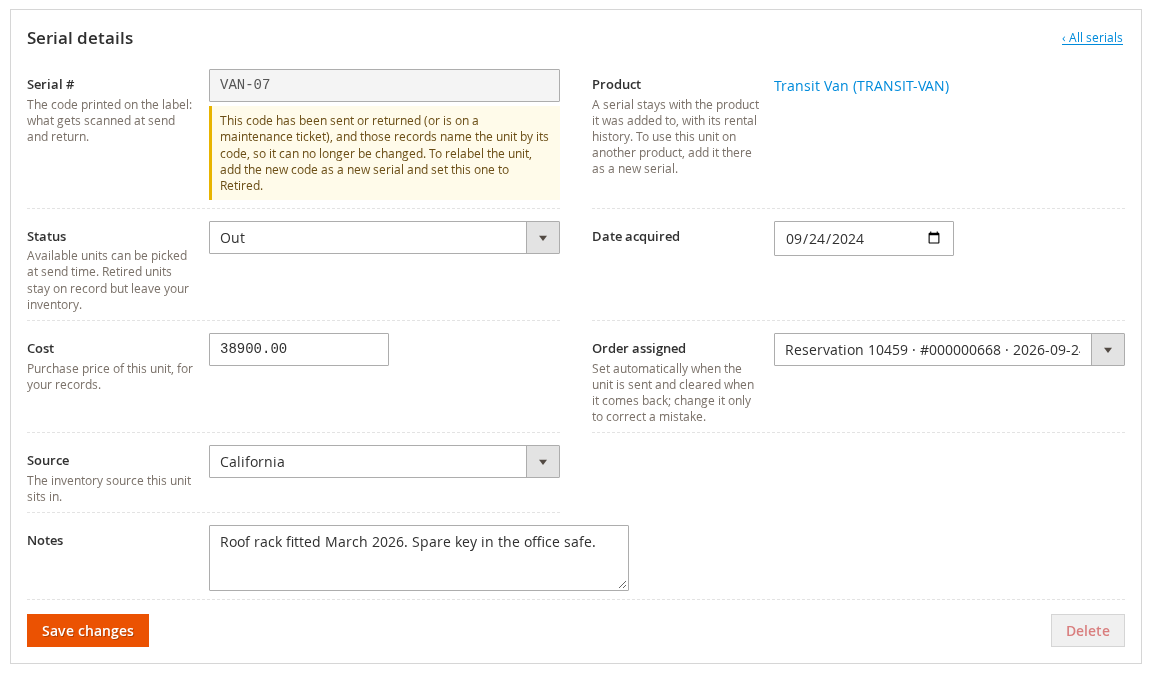
The serial’s details #
| Field | What it is |
|---|---|
| Serial # | The code printed on the unit’s label, which is scanned at send and return. It must be unique within its product; the same code on a different product is allowed. |
| Product | The product the unit belongs to, linked to it. It cannot be changed here: a serial stays with the product it was added to, together with its rental history. To use the unit on another product, add it there as a new serial. |
| Status | Available units are offered when you send a rental. Out is set when the unit is sent and cleared when it comes back. Maintenance is set and cleared by a maintenance ticket. Broken keeps a faulty unit off hire without writing it off. Retired takes the unit out of your inventory but keeps it, and its history, on record. |
| Date acquired | When the unit joined your inventory. With the Usage report’s capacity basis set to From acquisition date, the unit is measured from this date, so a unit bought last month is not counted as idle for the months before you owned it. |
| Cost | The purchase price, for your records. |
| Order assigned | The rental the unit is out on. It is set automatically when the unit is sent and cleared when it comes back, so change it only to correct a mistake. The list offers this product’s reservations. |
| Source | With Multi-Source Inventory only: the source the unit sits in. |
| Maintenance ticket | Shown only while a maintenance ticket holds the unit, with a link to it. The ticket sets and clears it. |
| Notes | Anything worth knowing about the unit. |
Click Save changes. The page is not reloaded, so photos uploading further down the page carry on. If something is not accepted, the reason appears next to that box and nothing is saved.
When the code cannot be changed any more #
Once a unit has been sent or returned, or put on a maintenance ticket, those records name it by its code. Changing the code would cut the unit off from its own history, so the Serial # box becomes read-only and says why.
To relabel a unit, add the new code as a new serial and set the old one to Retired. The same rule applies in the product’s Serial Numbers grid and through the GraphQL API.
Adding a serial #
In Rentals > General > Serials, click Add serial.
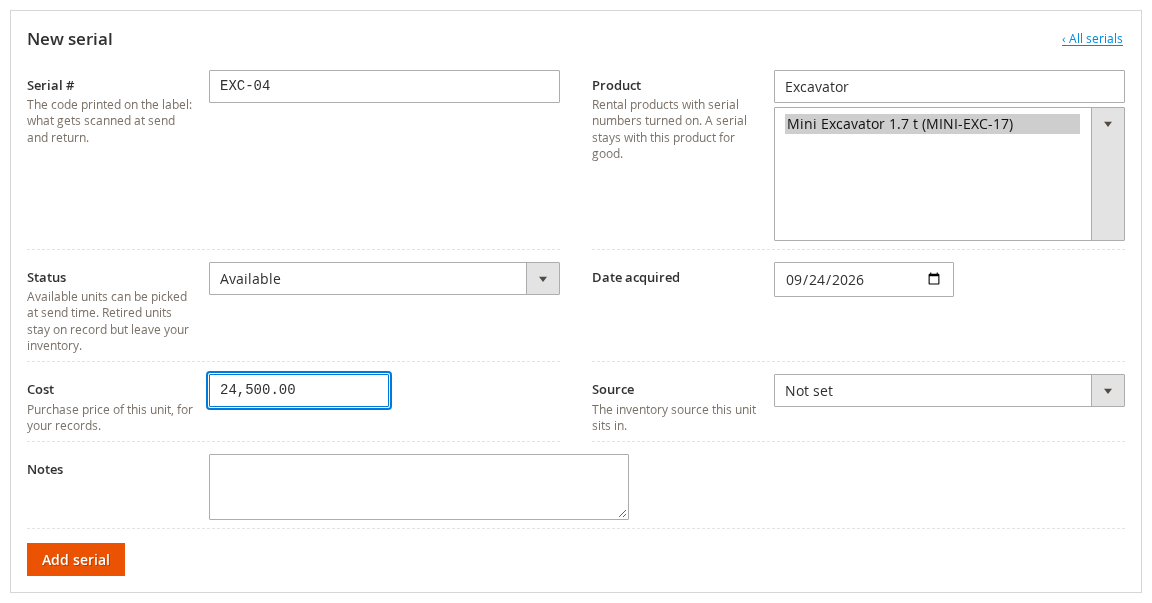
- Type the unit’s code in Serial #.
- Choose the Product. Type part of its name or SKU to narrow the list. Only rental products with serial numbers turned on are listed: switch on Use Serial Numbers? on the product’s Rental tab first.
- Set the Status (Available by default), the Date acquired (today by default), the Cost, the Source and any Notes.
- Click Add serial. The new serial’s page opens.
You can still add serials on the product itself, as before: the Rental tab of every serial-tracked product has the Serial Numbers grid. Both places run the same checks, so a code that one refuses the other refuses too.
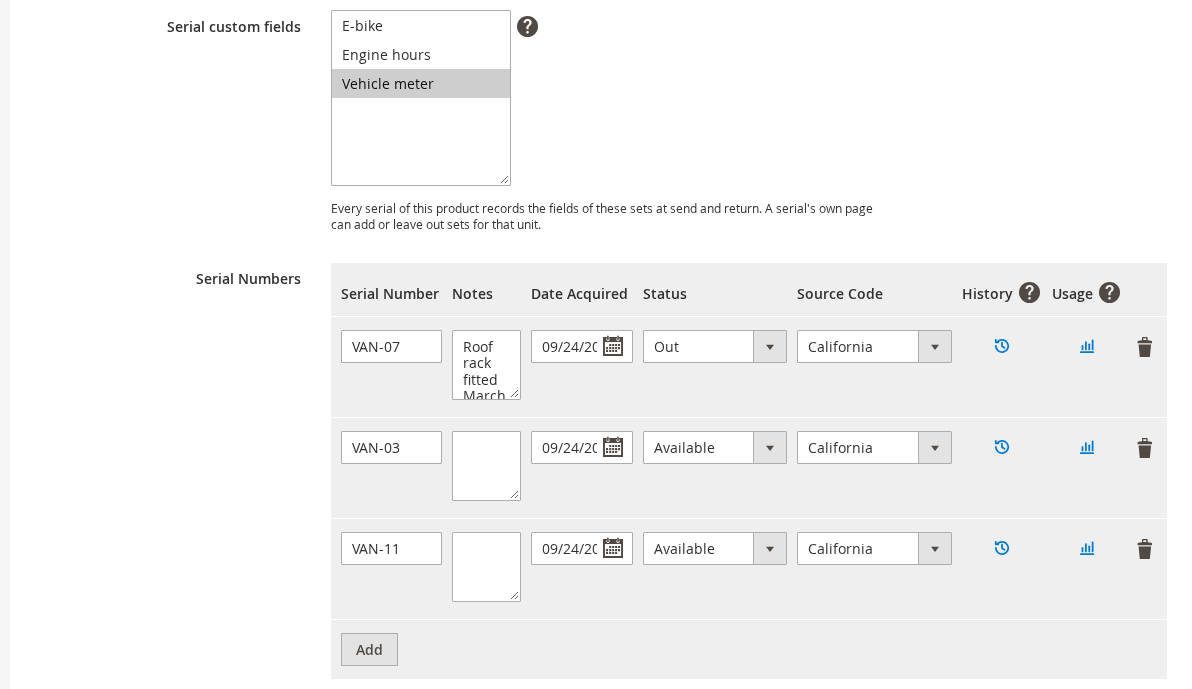
The History and Usage icons on each saved row open the serial’s page and the Usage report for that unit.
Deleting a serial #
Delete, at the bottom of the details, asks first and says what goes with the serial: its custom field readings and its photos are deleted with it, for good. The button is greyed out, with the reason, while the unit is out on a rental or held by a maintenance ticket.
For a unit that is leaving your inventory, Retired is usually better than deleting: it keeps the unit’s history and cost for the reports.
From the Serial Number Report #
Rentals > Reports > Serial Number Report shows what every unit is doing, day by day. Click a unit to open its panel: Complete History opens its serial page.