
When a product’s serials carry serial custom fields, the Send Rentals, Return Rentals and Scan Returns screens ask for them as units go out and come back. Staff need nothing beyond their usual Send or Return permission.
Sending and returning otherwise work exactly as before; see Processing Orders for the screens themselves.
At send #
Go to Rentals > Send and Return > Send Rentals. A row whose product has custom fields has a Custom fields button, with a note under it when some of them are required.

- Choose the units in the row’s Serial box, as usual.
- Click Custom fields. A dialog lists the fields of each unit you chose.
- Enter what each unit reads.
- Click Use these values. The values are checked before the dialog closes, and anything not accepted is explained next to its box.
- Tick the row and choose Actions > Send, as usual.
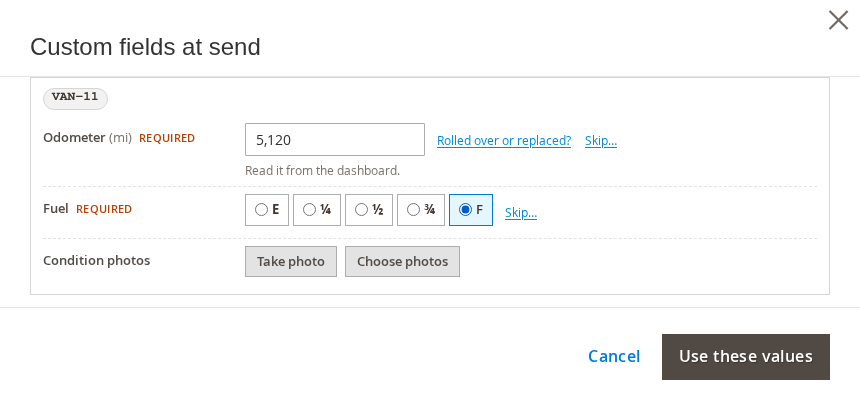
The send and its readings are saved together. If anything is refused, nothing is sent, so a unit is never out without the readings you asked for. If you change the units in the row afterwards, open Custom fields again: the values belong to the units they were entered for.
At return #
Rentals > Send and Return > Return Rentals works the same way, with a little more help:
- Under each box is what the unit read when it went out, or the last value recorded, as a reminder. It is never filled in for you.
- A meter shows how far the unit went on this rental as you type, for example +150 mi this rental.
- A choice field marks the value the unit went out with, so staff can see at a glance that it came back with half a tank instead of a full one.
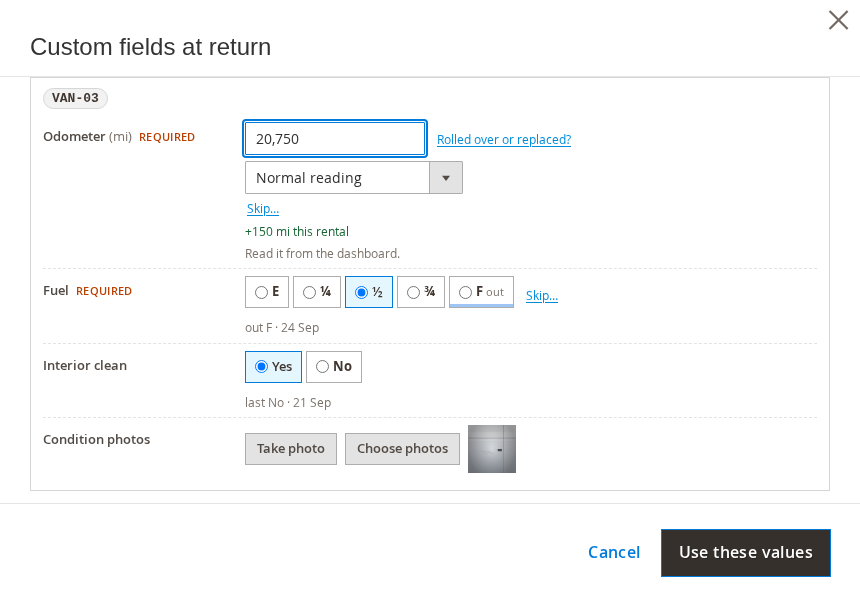
A meter reading lower than last time #
A meter only goes up, so a lower reading is refused and the dialog says what the last reading was. It is usually a typing mistake.
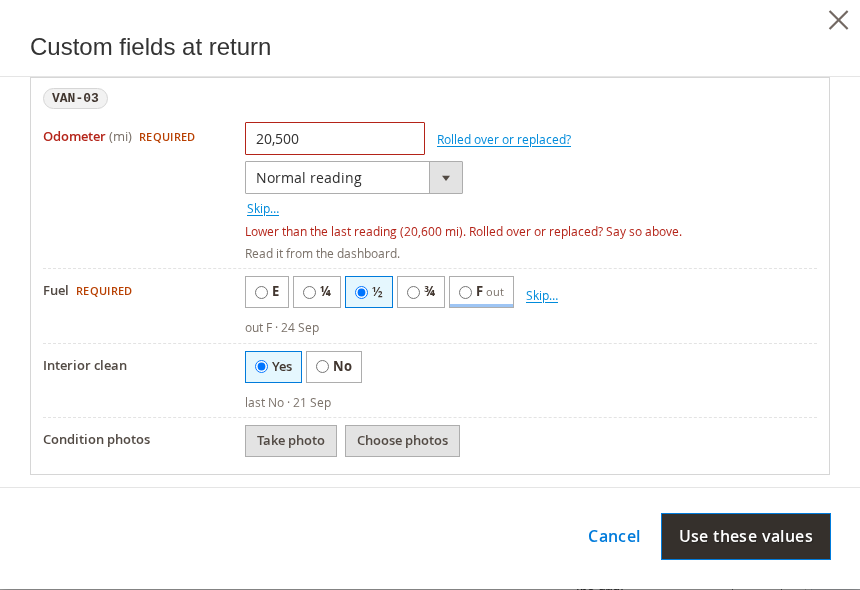
If the meter really did go back, click Rolled over or replaced? and choose The meter rolled over (offered when the field has a roll-over value) or The meter was replaced. For a replaced meter you can also give the old meter’s final reading and what the new one started at. The usage is then worked out correctly instead of going negative.
Skipping a field #
When a required value cannot be read, a broken gauge for example, click Skip… and give a reason. That satisfies the required field, and the reason is kept in the unit’s history. A field that is not required can simply be left empty.
Photos #
Take photo opens the camera on a phone or tablet, and Choose photos picks files from the device. A photo is uploaded straight away and attached when the send or return is saved; one that never gets attached is removed after a day.
JPEG, PNG and WebP photos are accepted, and HEIC where your server can read it, up to 15 MB each. They are stored at 2048 pixels with a thumbnail, which is plenty to read a dashboard or show a scratch. Photos are private: customers never see them. Where they are stored is set in Serials Settings and Permissions.
Scan Returns #
On Rentals > Send and Return > Scan Returns, scan the unit’s label. If the unit has fields to record at return, the form opens right there, with the same hints as the Return dialog.
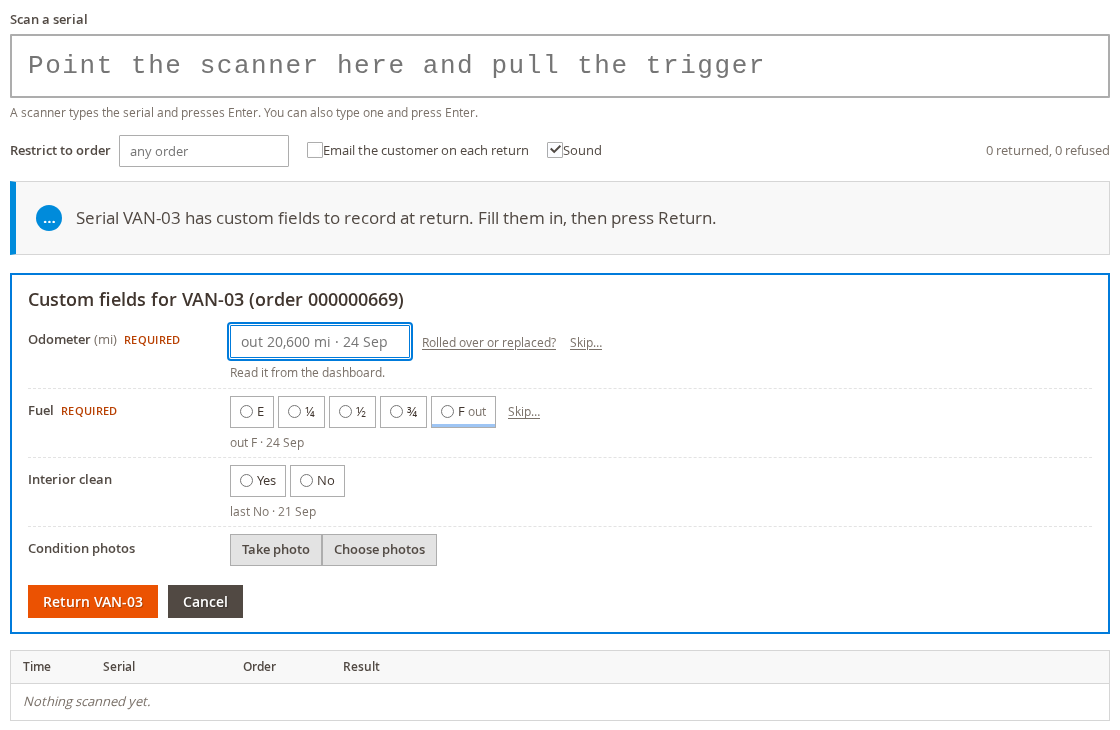
Fill it in and click Return VAN-03 (the button names the unit), or Cancel to scan something else. A unit without custom fields is returned as soon as it is scanned, as before.
Where the readings go #
- The unit’s page: its current values, its meters’ lifetime totals and its history.
- The order: Rental usage and photos shows what each unit did on that hire.
- The Usage report: usage per unit, per product and per rental.
- The Serials grid: the Readings column.


