
A rental kit rents several rental items as one product: “Camping kit = 1 × Tent, 2 × Sleeping bag, 1 × Stove”. Customers pick dates once. The calendar only offers days when every item is free, the price covers the whole kit, and each item is held and booked from its own stock. The items can still be rented on their own.
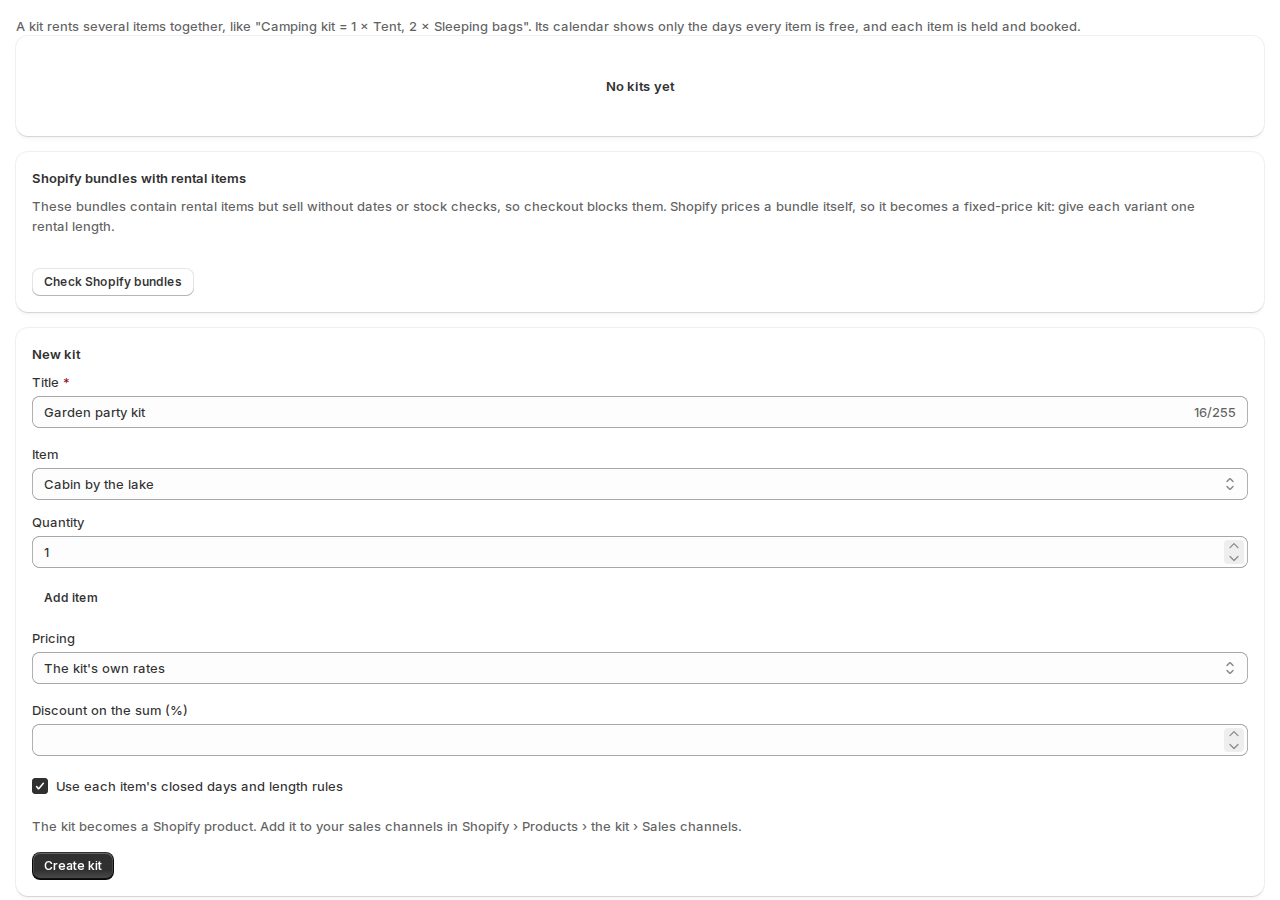
Create a kit #
- Make each item rentable first: kits are made of rental items.
- Open Kits in the app’s menu and go to New kit.
- Enter the Title.
- Under Items, choose an Item and its Quantity. Click Add item for each one (up to 30).
- Choose the Pricing:
- The kit’s own rates: the kit has its own rental price. It starts with the rental type and rates of its first item; change them in the kit’s Rental Settings.
- Sum of the items: the price is the items’ rental prices for the dates added up, with an optional Discount on the sum (%).
- Leave Use each item’s closed days and length rules ticked to apply each item’s closed days and minimum and maximum lengths to the kit.
- Click Create kit.
The kit becomes a Shopify product. Add it to your sales channels in Shopify › Products › the kit › Sales channels, or customers won’t see it.
What the calendar shows #
- Kits in stock = the smallest number of whole kits the items can make. With 4 tents and 6 sleeping bags, a kit of 1 tent and 2 sleeping bags has 3 kits.
- On each day, the kit is free only as far as every item is free, counting each item’s bookings, holds and its own turnaround time.
- Days on which any item can’t cover one kit can’t be picked.
- The kit’s minimum length is the longest minimum of its items, and its maximum the shortest maximum. Store closed days, the kit’s own and (by default) each item’s apply.
- The same checks run when the price is worked out, when the kit is added to the cart and when the order comes in.
Items with unlimited stock, or with Allow overbooking on, never limit a kit.
On the order #
The order lists the items as separate lines, grouped under the kit. The kit’s price is split over the items in proportion to their own prices for the dates, so every item line carries its share. Refunds and returns work per item.
At the desk and in reports #
- The Send & Return desk shows a kit as one row, “Kit: Camping kit × 1 (4 items)”, with Check out kit and Check in kit.
- The product page’s Rental card shows a kit’s items (“Kit: …”) with Edit kit, and on an item, the kits it is in (“In kits: …”).
- Reports has a Kits section with bookings, kits rented and revenue.
Shopify bundles with rental items #
A Shopify bundle made elsewhere (for example with the Shopify Bundles app) that contains rental items would sell without dates or stock checks, so checkout blocks it and asks the customer to choose rental dates.
To rent it, open Kits › Shopify bundles with rental items and click Check Shopify bundles. For each bundle found, give each variant one Rental length (2d, 1w, 4h) and click Make it a kit. Shopify prices a bundle itself, so it becomes a fixed-price kit: each variant is one length at its Shopify price.
Change or delete a kit #
- Changing a kit’s items doesn’t change bookings you already have.
- A kit with bookings that aren’t over can’t be deleted.
- Delete asks first, then archives the kit’s product in Shopify.
Good to know #
- An item can be in several kits and still be rented on its own. They all share one stock.
- With stock at several locations, a kit is free at a location when every item is free there. See Rental locations and stock by location.
- Kits can also be listed, created, changed and deleted through the API. See Shopify Flow, API and headless storefronts.


