
The Rentals & Bookings app turns Shopify products into rentals. You say how a product is rented, what it costs and how many you own. Customers pick dates on a calendar on the product page, the price is worked out for those dates, and checkout checks the dates and the price again before the order goes through. Bookings, a calendar, stock by day, the Send & Return desk, reminders and reports all live in the app, inside your Shopify admin.
This page walks you through the setup guide. Each step links to a page with the details.
Before you start #
- Your store needs the Online Store sales channel. The calendar is added to your theme.
- The app works on every Shopify plan. A few extras only appear on Shopify Plus stores; nothing on this page needs Plus.
- Rent variants don’t use Shopify’s own stock count. The app counts rental stock per date itself (see Inventory and stock).
Install the app #
- Open the app’s page on the Shopify App Store and click Install.
- Shopify lists what the app can see and change in your store. Click Install again.
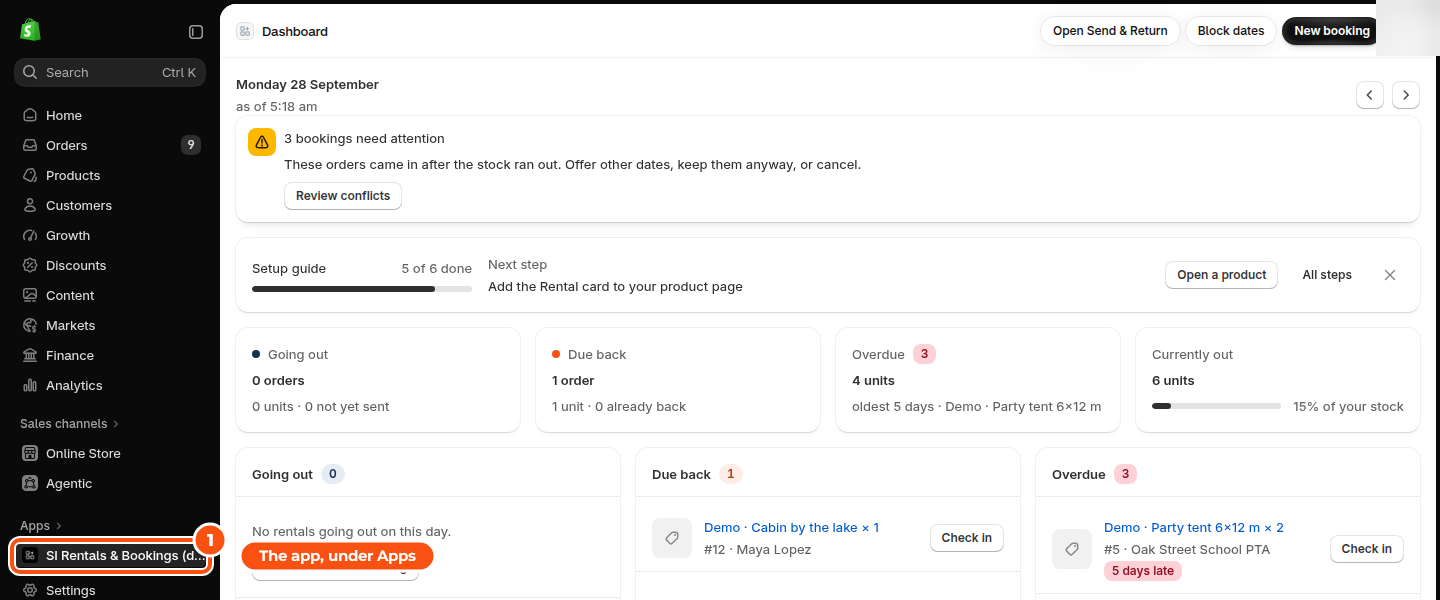
- The app opens in your Shopify admin. Later you’ll find it under Apps in the left-hand menu.
The setup guide #
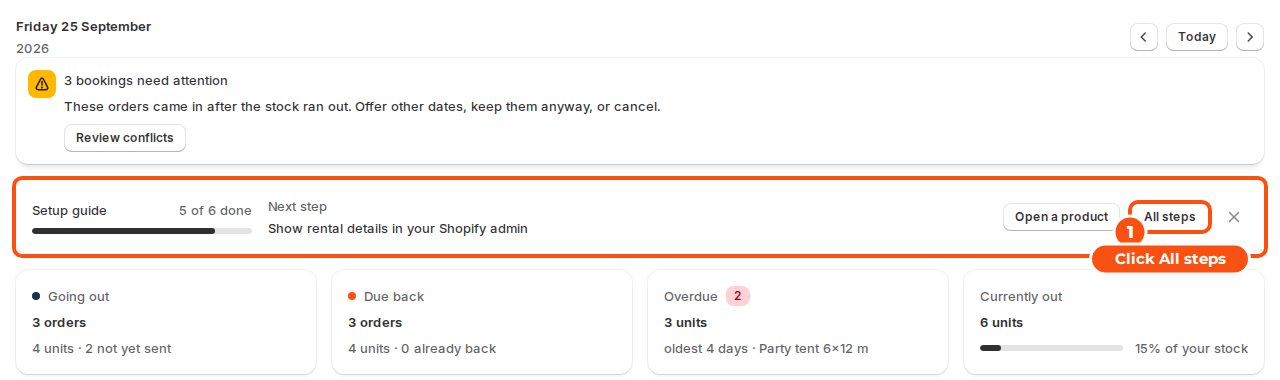
Open the app. The Dashboard shows the Setup guide as one slim row: how many steps are done, the next step and its button. Click All steps to see the whole list, or the cross to hide the guide. There are six steps.
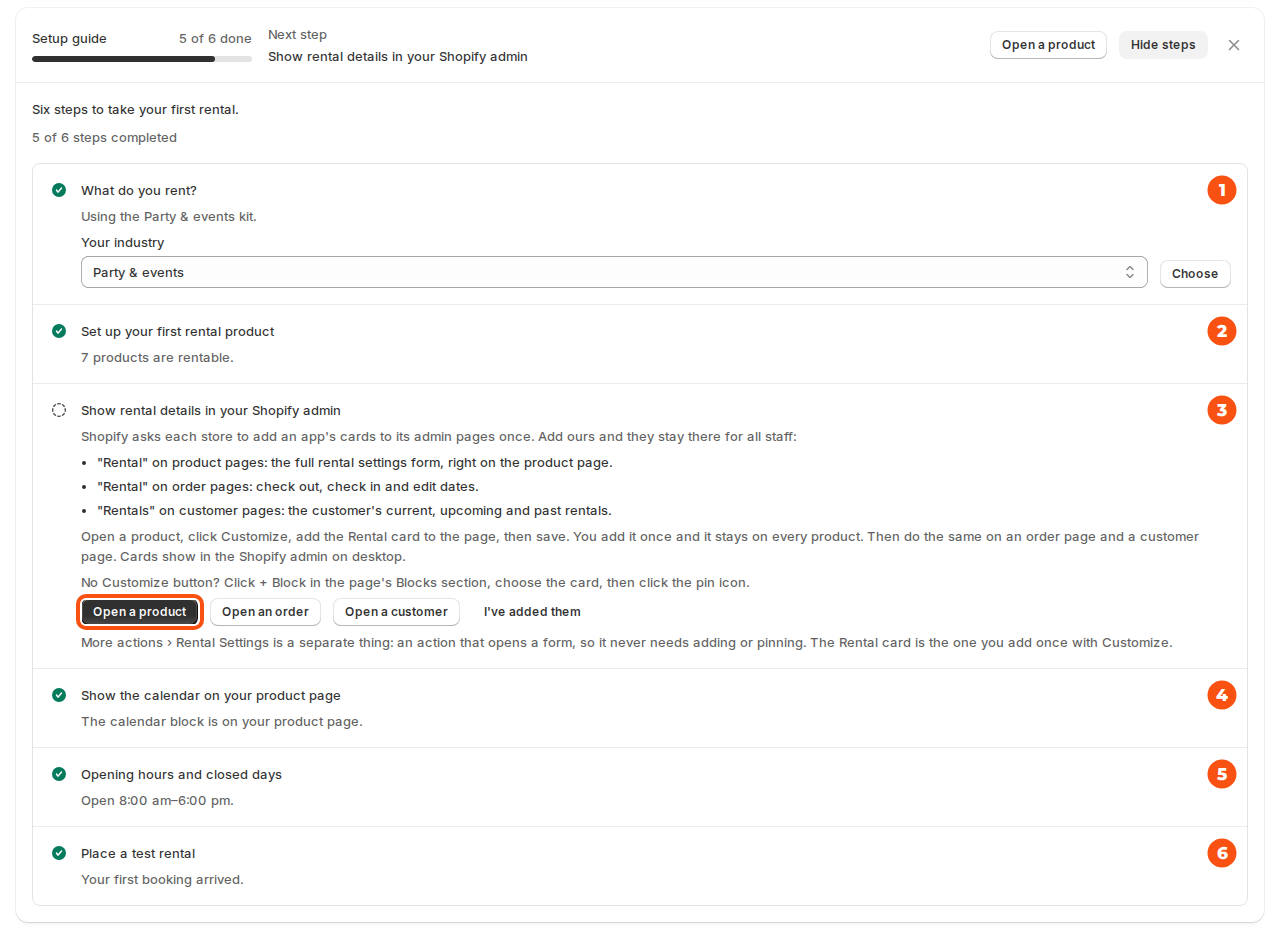
| Step | What you do | Done when |
|---|---|---|
| What do you rent? | Pick the closest industry. It fills in your calendar look, labels and price points. You can change any of it later. | You chose an industry. |
| Set up your first rental product | Click Pick a product and fill in its Rental Settings: how it’s rented, what it costs and how many you own. | At least one product is rentable. |
| Show rental details in your Shopify admin | Add the app’s cards to the product, order and customer pages of your Shopify admin. | You tick I’ve added them. |
| Show the calendar on your product page | Click Open theme editor, add the Rental calendar block to your product template and save. Also turn on the Rentals app embed. | The app finds the block, or you tick I’ve added it. |
| Opening hours and closed days | Click Set hours. Customers can only start or end a rental while you’re open. | Open and close times are set. |
| Place a test rental | Click View your store and book a rentable product as a customer would. | Your first booking arrives. |
1. Pick your industry #
The industry kits are Party & events, Cameras & AV, Bikes, Cars & motorbikes, Baby gear, Boats, Equipment & tools, Dresses & costumes, Golf carts, Inflatables, Library of things, Mobility & medical, Ski & outdoor, Vacation stays, Trailers & campervans and Dumpsters. A kit only fills in defaults. It never changes a product you already set up.
2. Set up a product #
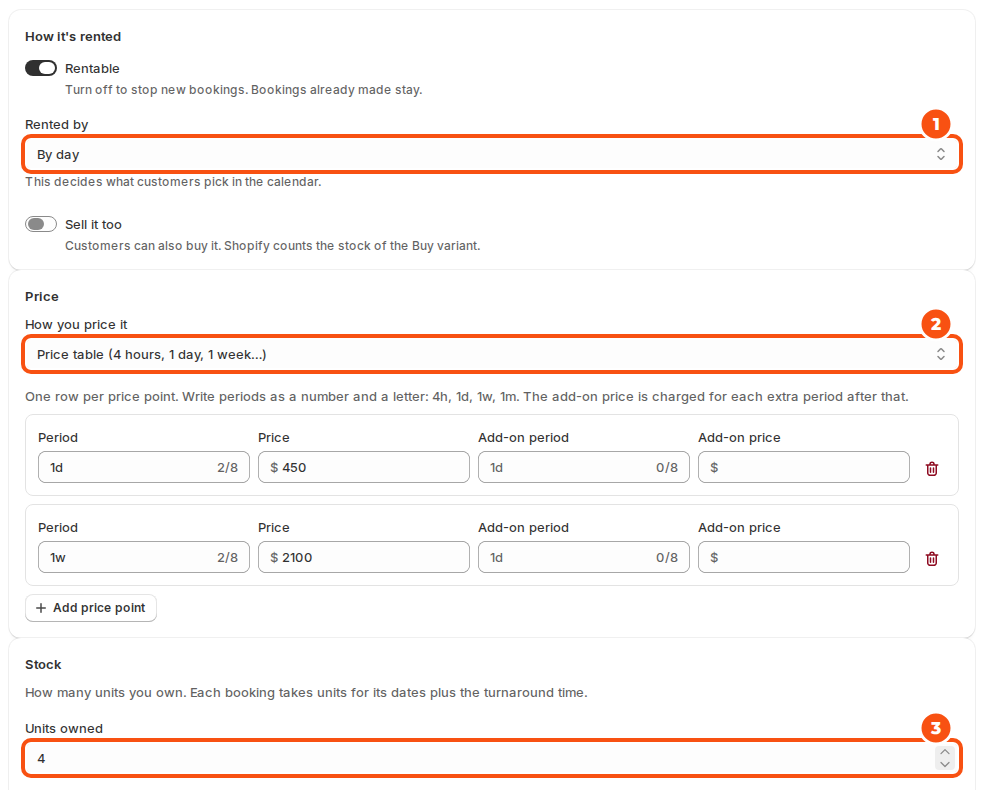
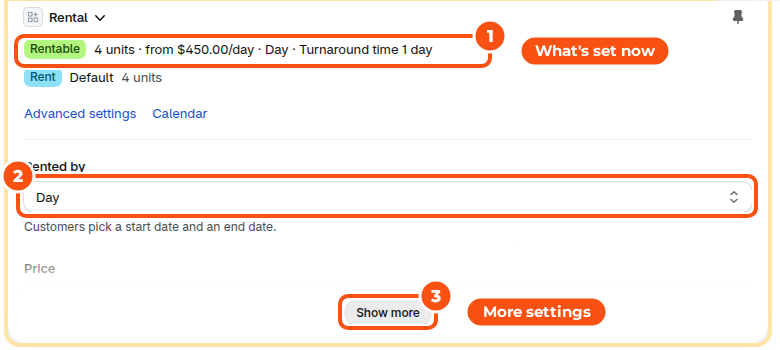
Pick a product and answer three questions: Rented by (1), Price (2) and Units owned (3). Turnaround time and “Sell it too” are optional. Setting up a rental product explains every setting.
3. Add the rental cards to your Shopify admin #
Shopify asks each store to add an app’s cards to its admin pages once. Add these three and they stay there for all staff:
- Rental on product pages: the full rental settings form, right on the product page.
- Rental on order pages: check out, check in and edit dates.
- Rentals on customer pages: the customer’s current, upcoming and past rentals.
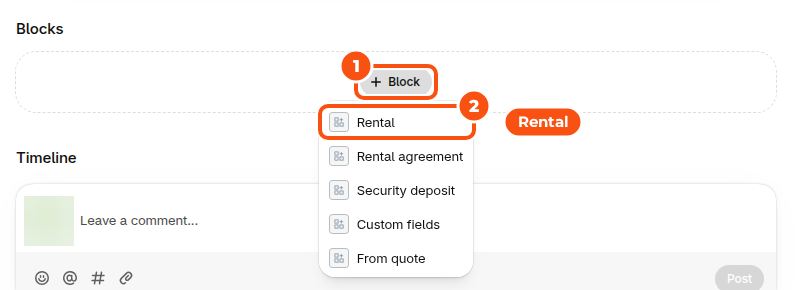
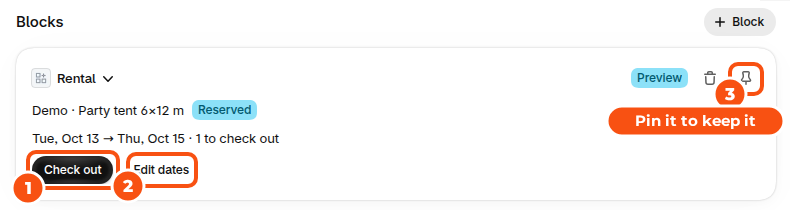
- Open a product. In the Blocks section near the foot of the page, click + Block and choose Rental.
- The card appears with a Preview label. Click its pin icon to keep it: a pinned card shows on every product, for all staff.
- Do the same on an order page (Rental) and a customer page (Rentals).
Some admins show a Customize button at the top of the page instead; add the card there and save. Cards show in the Shopify admin on desktop.
More actions › Rental Settings on a product is something else: an action that opens a form, so it never needs adding or pinning.
4. Add the calendar to your theme #
Click Open theme editor in the guide. The Rental calendar block is added to your default product template. Place it where you want it and click Save.
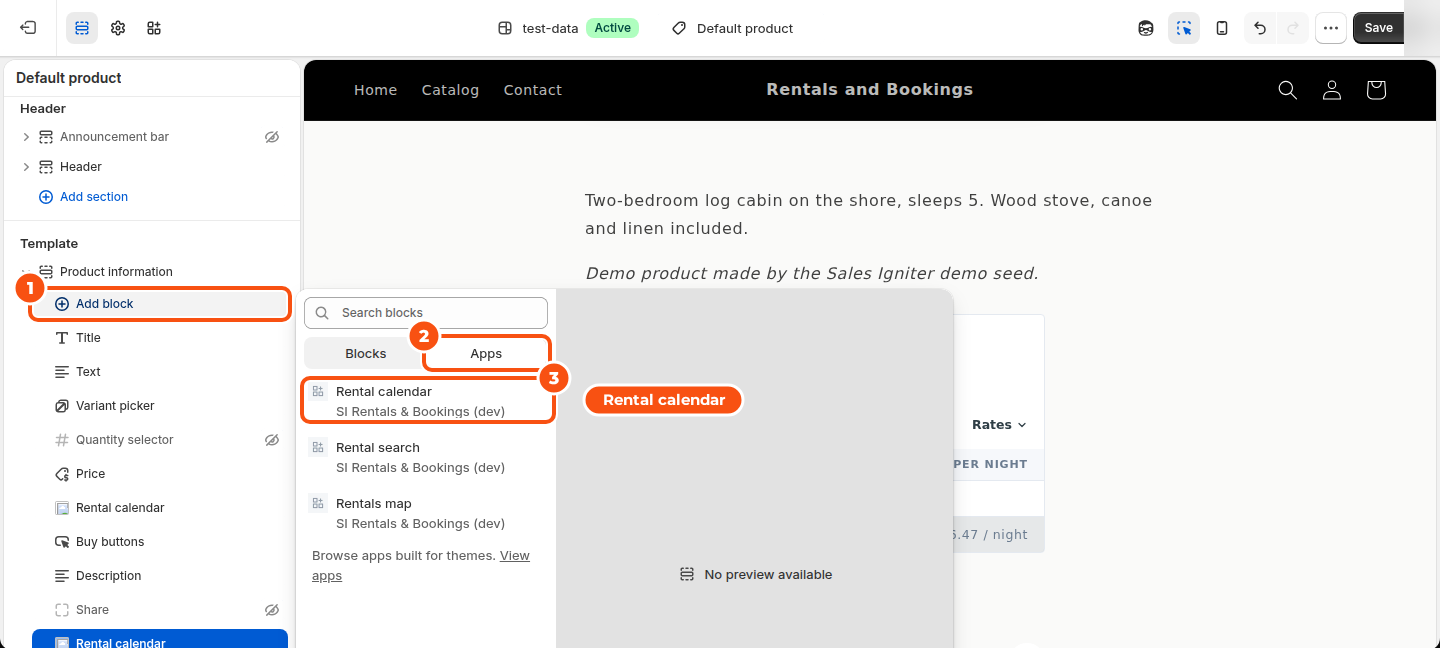
To add it by hand: open Online Store › Themes and click Edit theme. In the theme editor, open Products › Default product from the menu at the top, click Add block under Product information, choose the Apps tab and pick Rental calendar. Drag it above the Buy buttons and click Save.
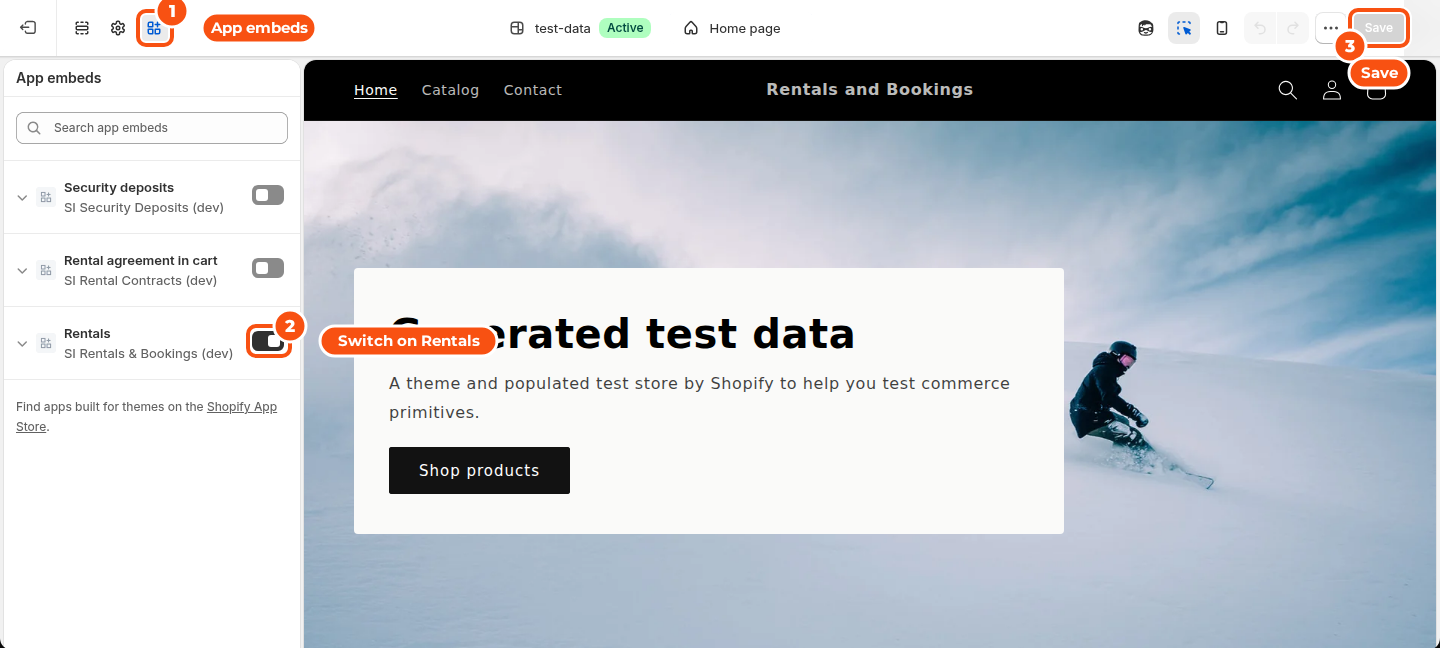
Then click Turn on the app embed in the guide. It opens App embeds in the theme editor. Make sure Rentals is switched on and click Save. The embed keeps rental carts correct, and shows the calendar on older themes that can’t add blocks.
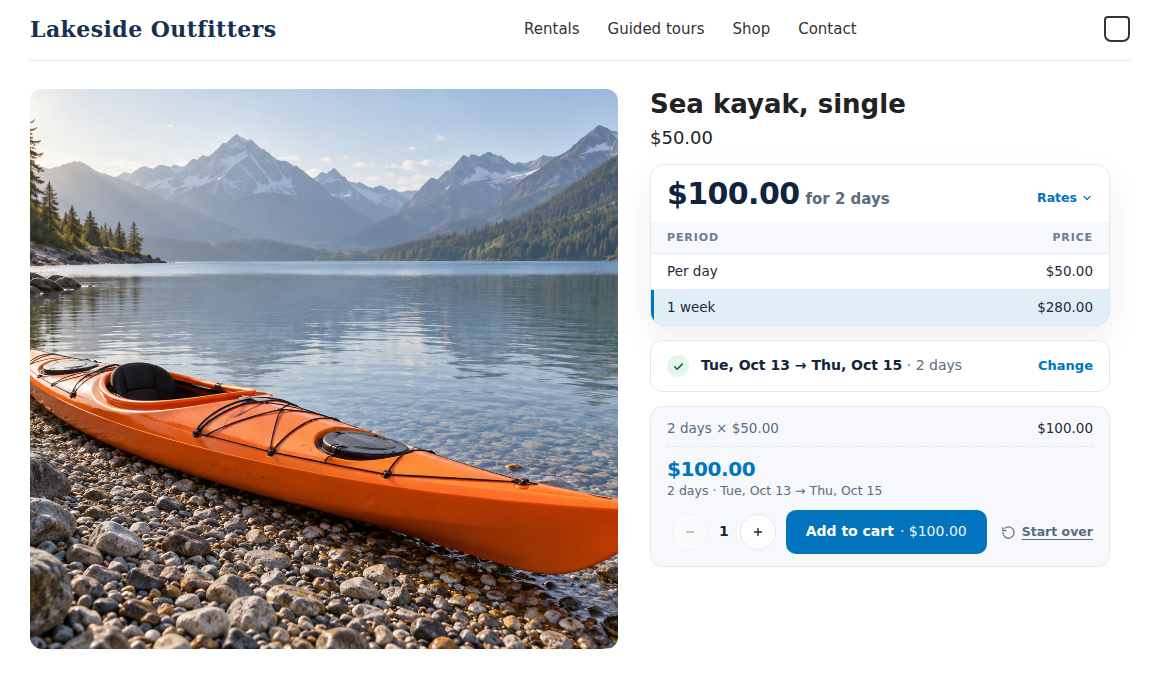
On your store, the product page now shows the calendar. Customers pick a start and an end date and see the price for those dates. See The rental calendar on your store.
5. Set your opening hours #
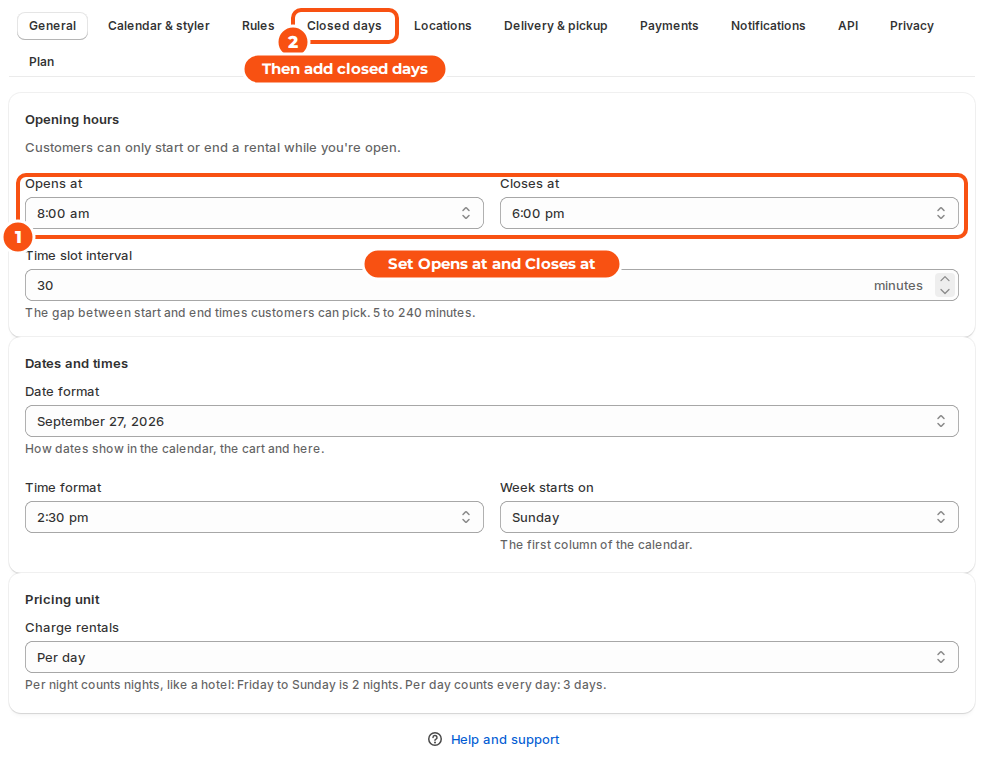
Click Set hours to open Settings › General. Set Opens at and Closes at (1), then add your closed days under Settings › Closed days (2). See Opening hours, closed days and booking rules.
6. Place a test rental #
Open the product on your store, pick dates, add it to the cart and check out. The booking shows up in the app within a minute. You’ll find it under Bookings, on the order page in the Rental card, and on the dashboard.
The app’s menu #
The app opens from Apps in the left-hand menu of your Shopify admin.
| Menu item | What it’s for |
|---|---|
| Dashboard | Today’s rentals going out, due back and overdue, the next 7 days, revenue and the setup guide. |
| Bookings | Every booking, with tabs for Upcoming, Out, Overdue, Returned and Conflicts. Manual bookings and blocked dates. |
| Calendar | A month or week view of rentals going out and coming back. |
| Inventory | Units still free per day for every rental product. |
| Serial numbers | Where each serial number is. Only shows once a product tracks serial numbers. |
| Kits | Rental kits: several items rented as one product. |
| Send & Return | The desk where staff check rentals out and in. |
| Reminders | Every reminder and rental email, scheduled, sent or skipped. |
| Balances | Rentals paid in part at checkout, with the rest still due. |
| Reports | Usage by product and exports. |
| Settings | Opening hours, the calendar look, rules, closed days, locations, delivery and pickup, payments, notifications, API and privacy. |
Check the setup line #
At the foot of the dashboard, Setup: all good means the app’s checkout checks are active, your calendar settings reached the storefront, the calendar block is on your product page and your rent variants don’t track Shopify inventory. When something needs fixing, the line says what and how.
Good to know #
- The app’s pages and the admin cards follow your Shopify admin language. The storefront calendar and customer emails follow the customer’s language.
- When a customer asks your store for their data, Shopify tells the app. Settings › Privacy lists these requests with a file to download and send to the customer.
- A Help and support link sits at the foot of the dashboard and of every settings tab.
- Looking for what is next? See the Shopify rental app roadmap, or send us a feature request.


