
This page says what the Counter can use, and how far each part has been checked. We name only what we have actually run. We do not recommend a model we have not tested, and a part that is not on the “tested” list may still work: the Counter uses open ways of talking to hardware, so ask us before you buy. What the Counter does is on the Rental Counter & POS page.
At a glance #
| Hardware | How the Counter talks to it | Checked so far |
|---|---|---|
| Barcode scanner | It types like a keyboard and presses Enter | The scan detection is tested with simulated keystrokes. No scanner model has been tested yet. |
| Camera | The phone, tablet or laptop camera, through the scanner of Rentals & Bookings Regular (https only) | Tested in automated browser tests, with a camera filming a QR label. No device model is named yet. |
| Receipt printer through the browser | The browser’s print dialog | Works with any printer the device can print to |
| Epson receipt printer | Epson ePOS-Print over your network | The print data is tested. No printer model has been tested yet. |
| Star receipt printer | Star WebPRNT over your network | The print data is tested. No printer model has been tested yet. |
| Cash drawer | Opened by the receipt printer’s drawer port | Not tested on a real drawer yet |
| Stripe card reader | Driven from your server through your WooCommerce Stripe plugin | Tested with Stripe’s simulated reader in test mode. No physical reader has been tested yet. |
| Customer screen | A second browser window or a paired tablet or phone | Checked with automated tests |
| Pick-up and returns board | Any screen with a browser: a TV, a tablet or a spare computer, paired with a link | Checked with automated tests |
Barcode scanners #
Use any USB or Bluetooth scanner that works as a keyboard (also called keyboard wedge or HID mode). Set it to send Enter after the code. Tab also works as the end key.
The Counter tells a scan from typing by speed. A run of at least 4 characters, each arriving within a fraction of a second of the one before and ended by Enter or Tab, is a scan. Anything slower is typing. You do not have to click a field first: the Counter listens on the whole screen while you are selling. A code typed in the search box and sent with Enter does the same job.
A scan can find:
- a product or a variation by SKU or barcode (the GTIN field),
- a rental unit by its serial code or QR label,
- a booking or an order by number.
What has been tested: the speed rules, using simulated keystrokes. What has not: any scanner brand or model. Set up your scanner, scan a product in the search box and watch it add. If the scanner types slowly, or does not send Enter, it will be treated as typing.
The camera #
With Sales Igniter Rentals & Bookings Regular on your store, the Counter scans with the device’s camera too: tap Scan with camera beside the search box. It uses Regular’s scanner, which reads barcodes and QR codes with the browser’s own barcode reader where there is one, and with a decoder that comes with Regular where there is not (Safari on an iPhone, for example). The Counter has no decoder of its own, so without Regular there is no camera button.
- The site must be on https: browsers never give the camera to a page opened over plain http. On http the button is greyed out with a sentence saying why.
- The back camera of a phone or tablet reads labels best. Switch camera changes cameras and Torch turns on the light where the device has one.
- The camera stays open for the next item and turns off while the Counter is hidden. The customer screen and the board never use the camera.
What has been tested: the whole path in a real browser, with a camera filming a QR label of a product’s SKU (the scan adds the product once, the camera stays open, Close lets it go, the button is large enough on a phone). What has not: a list of phone and tablet models. Try it on your own device with one of your labels before a busy day.
Receipt printers #
Through the browser #
This is the default and needs nothing else. Print receipt opens the print dialog. Pick Receipt paper (80 mm roll, 58 mm roll or A4 or Letter page) on WooCommerce > Counter so the page matches.
Straight to the printer #
The Counter can print without a dialog to printers that speak Epson ePOS-Print or Star WebPRNT. Both are network protocols: the printer needs an IP address on the shop’s network. The counter device sends the receipt to the printer directly. Your website never does.
The setup steps are in Registers and payment routes. In short: edit the register, choose the Printer, type the Printer address, choose the Paper, and use https where your store uses https.
What has been tested: the receipt data is made correctly for both protocols (text, lines, totals, the QR code of the order number and the drawer pulse) in automated tests, and the printer’s answers, including “cover open”, are understood. What has not: any printer model. The plugin’s own help text mentions the Epson TM-m30 series, because that family speaks ePOS-Print, but we have not run one.
If a printer does not answer, the Counter says why (“it did not answer in time” or “it could not be reached”) and offers the browser print instead.
Cash drawers #
A cash drawer plugged into the receipt printer is opened by the printer. Tick Cash drawer on the register. The drawer then opens after a cash payment, after a cash refund, after a paid in, paid out or cash drop, and on Open drawer. This needs the register’s printer to be an Epson or Star printer set up as above. With the browser as the printer, the drawer does not open by itself.
Not tested on a real drawer yet.
Card readers #
The Counter drives Stripe smart readers from your server through your WooCommerce Stripe plugin. The code is written for the WisePOS E and the S700 and S710 readers.
What has been tested: taking a card payment against Stripe’s test mode with Stripe’s simulated reader, including approval, decline and cancel. What has not: a physical reader. In test mode you can try the same flow with the Test: approve and Test: decline buttons. See Registers and payment routes.
Not covered by the Counter: readers that need Stripe’s phone app, and Tap to Pay. For those, use the WooCommerce app tab, which hands the order to the WooCommerce app. Which readers and countries the app supports is up to WooCommerce and your payment provider.
Card-present payments by reader work in the countries Stripe Terminal supports. Elsewhere, use Card (own terminal) and Cash.
Customer screen #
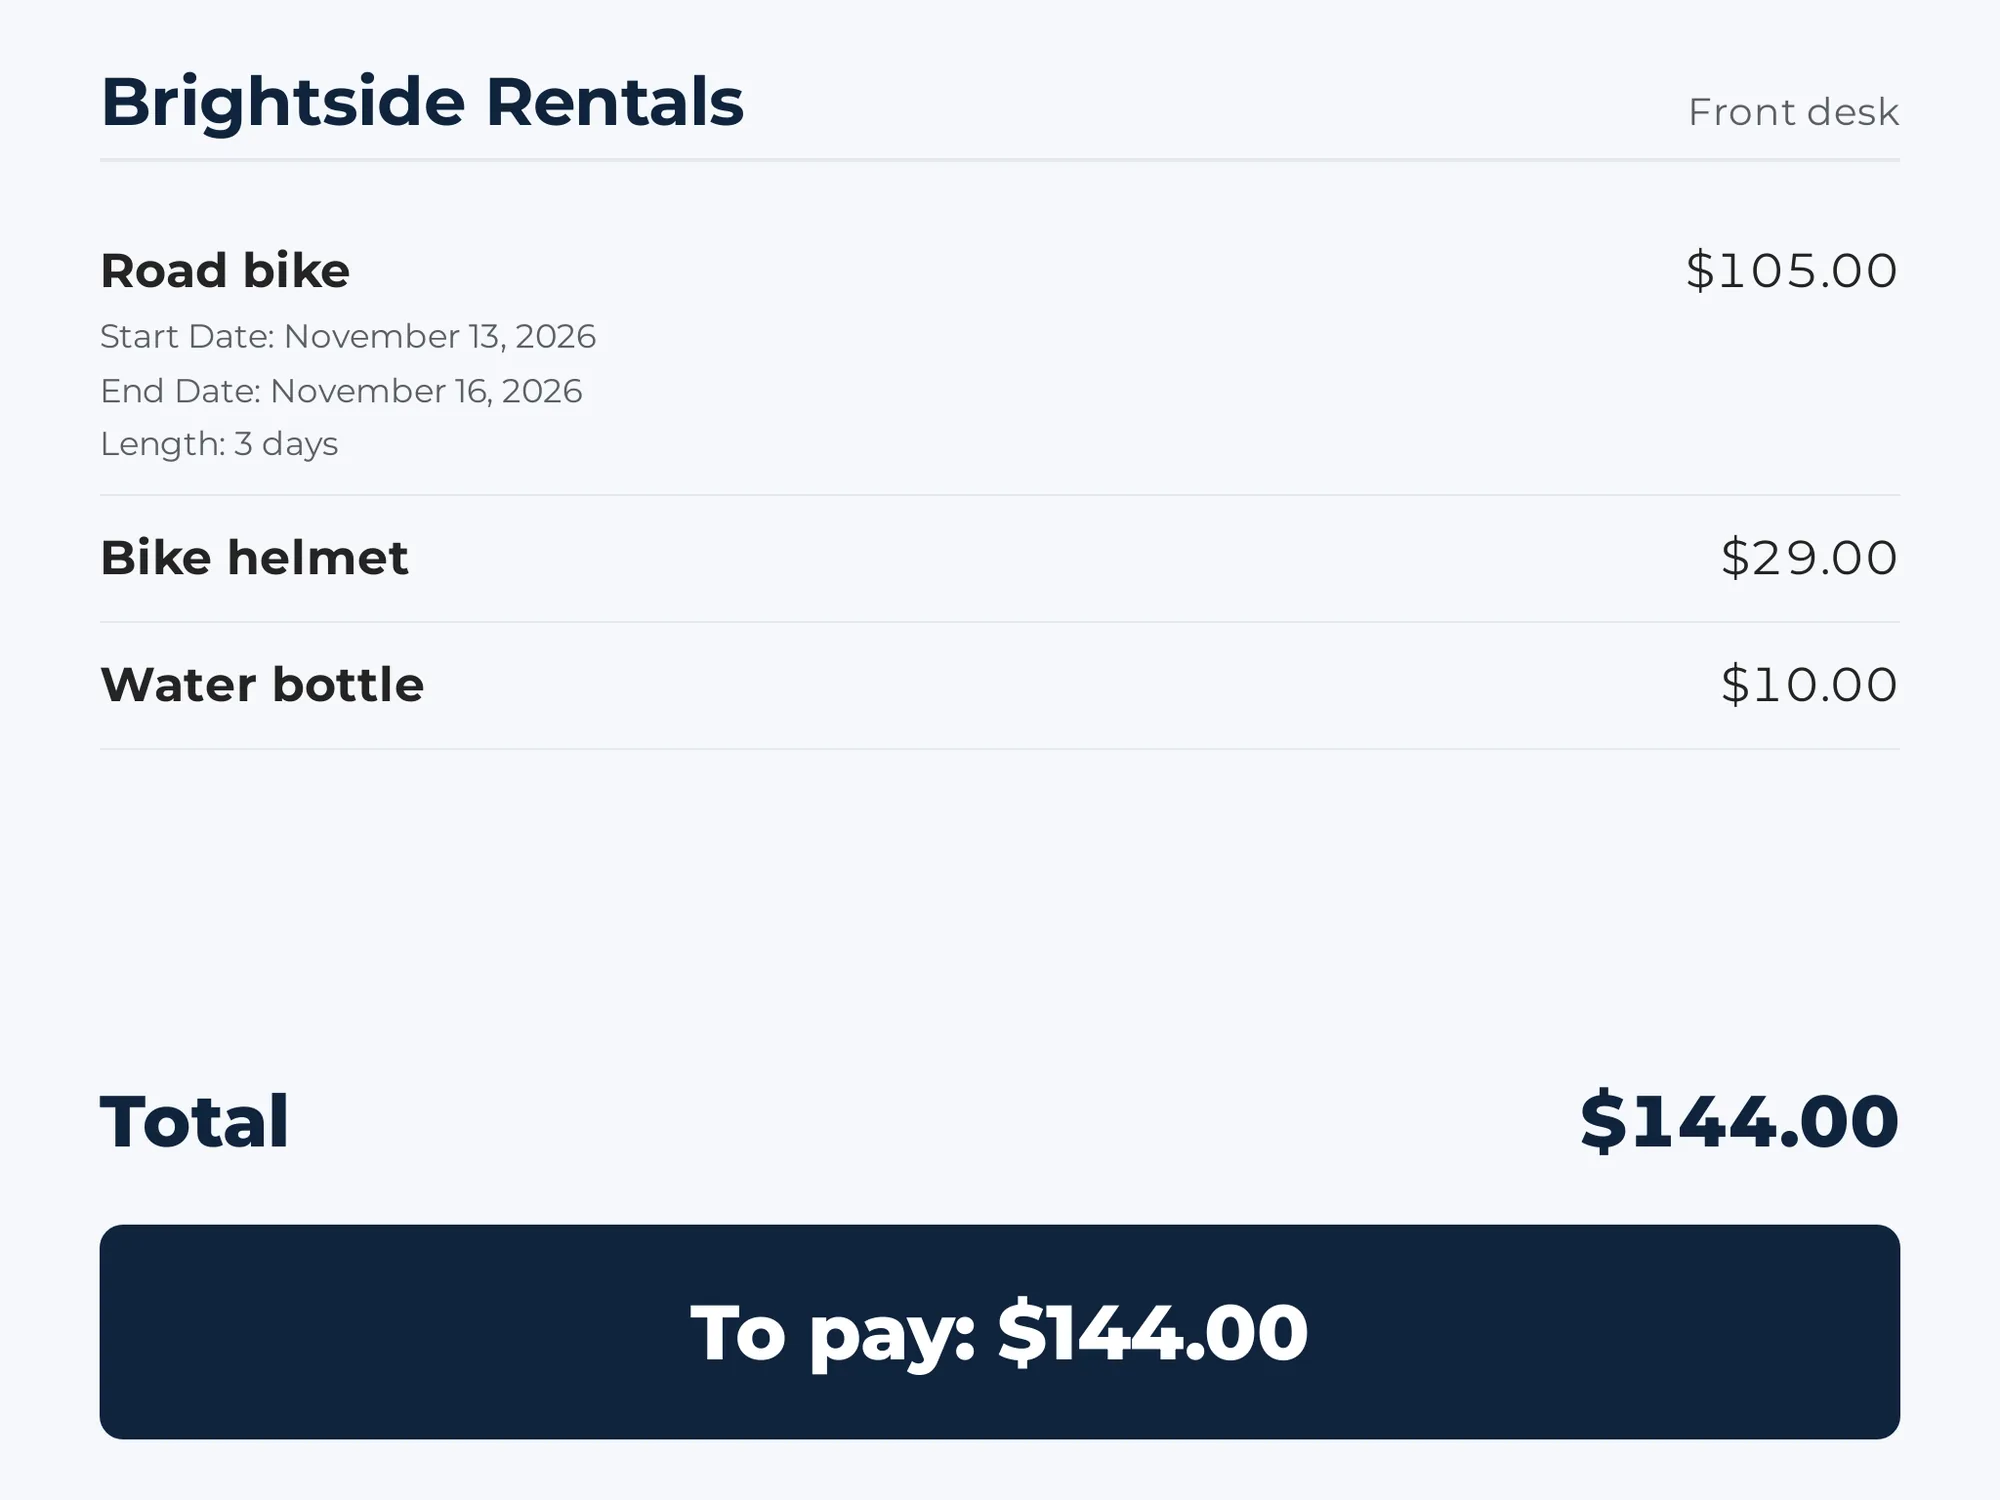
A screen facing the customer shows the sale: the lines, their dates and options, the total, the amount to pay, then Paid with the change. It never shows a customer’s name or contact details.
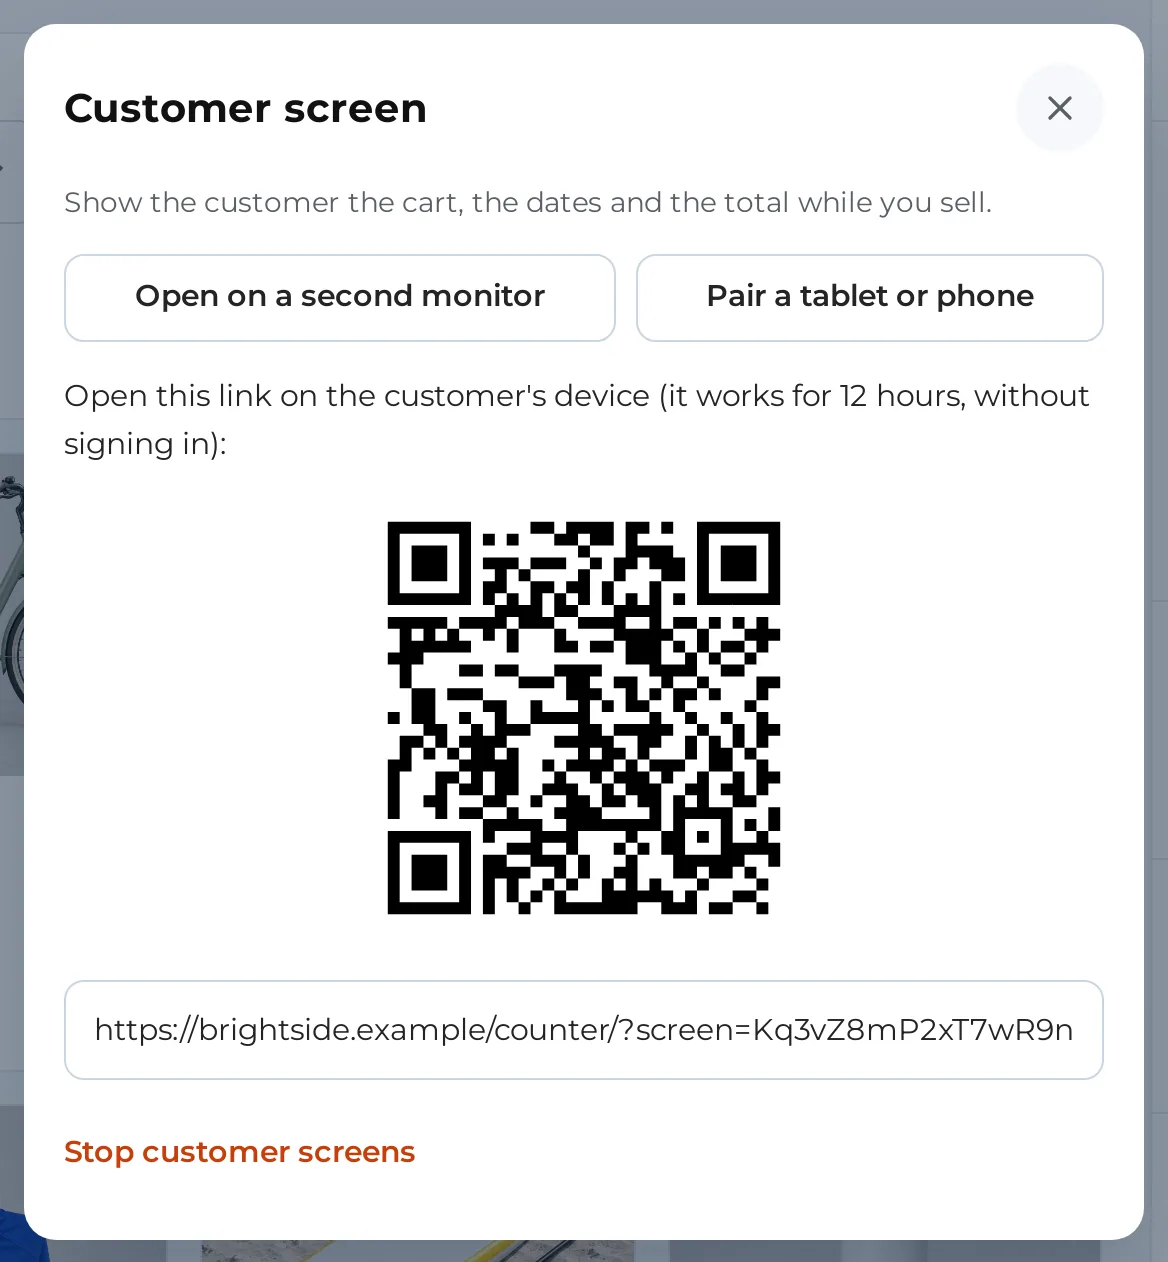
- Open on a second monitor opens a second window on the same device. Drag it to the second monitor.
- Pair a tablet or phone makes a link and a QR code. Open it on the other device. It needs no sign-in and works for 12 hours.
- Stop customer screens ends every paired screen of the register.
Find these on the Shift sheet under Customer screen.
What to check on your own hardware #
Before opening day:
- Scan three products and one rental label.
- Print a receipt. If you use a direct printer, tap Test printer on the Shift sheet.
- If you have a drawer, record an Open drawer move and check it opens.
- Take a small card payment in test mode first, then refund it.
- Pair the customer screen and run a test sale.
If something does not work, write to us with the model and what the Counter showed. We add checked hardware to this page as we run it.


