
Rental Counter is a point of sale for your WooCommerce store. Staff open a screen on a tablet or phone, sell anything in the store, rent by date in the same sale, take the payment and print or email the receipt. This page takes you from install to your first sale. For everything the Counter does, with screenshots, see the Rental Counter & POS page.
What you need #
- WordPress 6.6 or newer, PHP 8.1 or newer, and WooCommerce 9.0 or newer.
- Staff who sign in to WordPress. They do not need wp-admin: the Counter staff role opens the Counter screen and the person’s own profile, and nothing else.
- A tablet, phone or computer with a browser.
Rental Counter works on any WooCommerce store. Without a rental plugin it sells the standard product types in the store (simple, variable and grouped products) and bundles; product types added by other plugins aren’t sold at the counter. When Sales Igniter Rentals & Bookings is active as well, you can also rent by date at the counter. Some rental jobs need more of that plugin (serial numbers, returns with a condition check, late fees, swaps). The Counter shows each job only when it can do it, so a button you do not see means the job is not available on your store yet.
Install and activate #
- In WordPress go to Plugins > Add New > Upload Plugin, choose the Rental Counter zip, and click Install Now.
- Click Activate. WooCommerce has to be active first.
- On the Plugins screen, click License next to Rental Counter and enter your licence key. The key is for updates. If it expires or is missing, the Counter keeps working.
On activation the plugin creates two things for you: a staff role called Counter staff, and a first register called Counter 1.
Give your staff the Counter staff role #
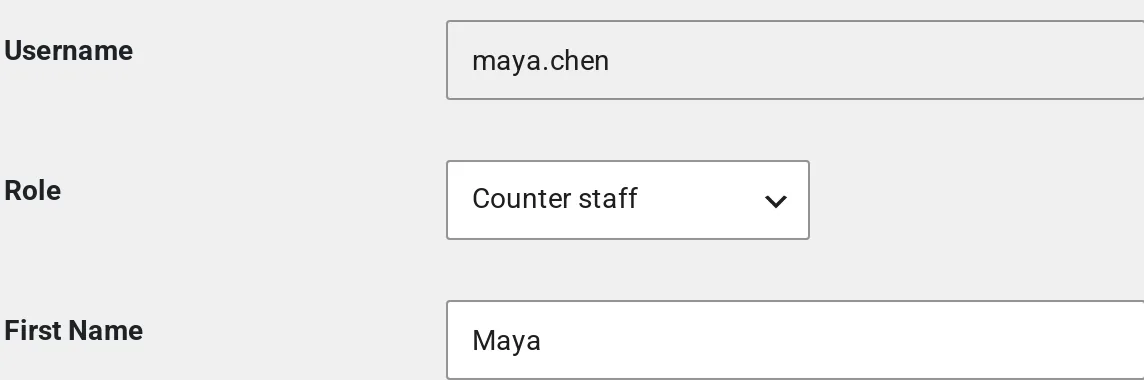
- Go to Users and open the person (or Add New).
- Set Role to Counter staff, then save.
The Counter staff role can use the Counter and nothing else in WordPress. Shop managers and administrators can already use it and hold every Counter permission, so you do not need to change their roles. If someone has another role (for example a rental staff role) and should also use the Counter, give that role the “sipos_use” permission with a role editor plugin. See Who can do what for the full list.
Check the Counter settings #
Go to WooCommerce > Counter. This page holds the settings and the registers. For your first sale you can leave everything as it is. These settings are worth a look now:
- Text under the receipt: for example your returns policy or opening hours.
- Receipt paper: 80 mm roll, 58 mm roll or A4 or Letter page.
- Round cash to: in cents. 1 means no rounding. Use 5 where the smallest coin is 5 cents.
- Hold rental stock for: how many minutes an open sale keeps its rental items, 5 to 240 (the default is 30).
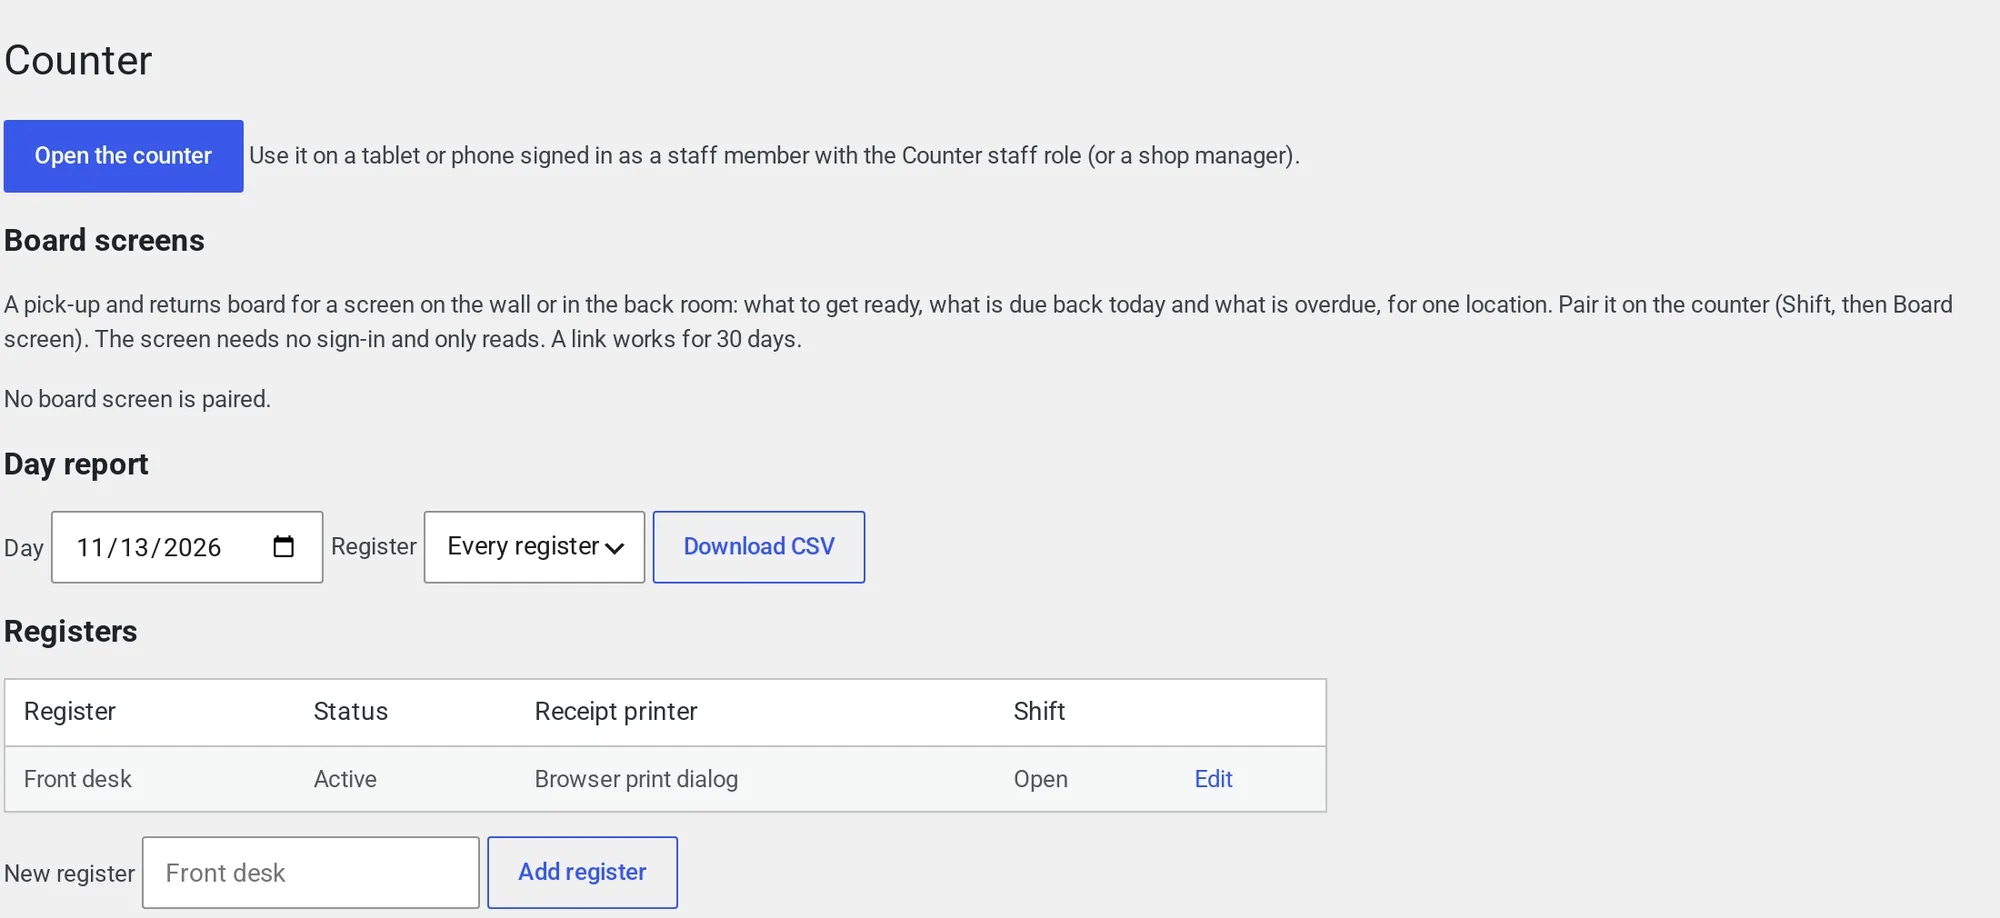
The other settings are explained where they matter: Registers and payment routes, Selling at the counter and Who can do what.
The words customers see #
Every word in the Counter goes through WordPress translations, so the Counter speaks your site’s language once a translation is installed. To change a word customers see without a translation, use the Text screen (Rentals > Settings > Text, or WooCommerce > Text). It lists the Counter’s customer words: the receipt and the refund slip (printed, on screen and emailed), the customer screen, and the signing and consent steps. Staff screens are not on it.
Open the Counter screen #
- On WooCommerce > Counter, click Open the counter. It opens in a new tab. The address is /counter/ on your own domain, so you can also bookmark it on the tablet.
- If you are not signed in, WordPress asks you to sign in and then brings you back to the Counter.
- If your account cannot use the Counter, you see “Your account cannot use the counter. Ask a manager for the Counter staff role.”
The Counter has no theme around it. It fills the screen and is made for touch.
Choose the register #
If your store has more than one register, the first screen is Choose the register. Tap yours. The device remembers it, so you only do this once per device. If the store has one register, it is chosen for you.
Open the shift #
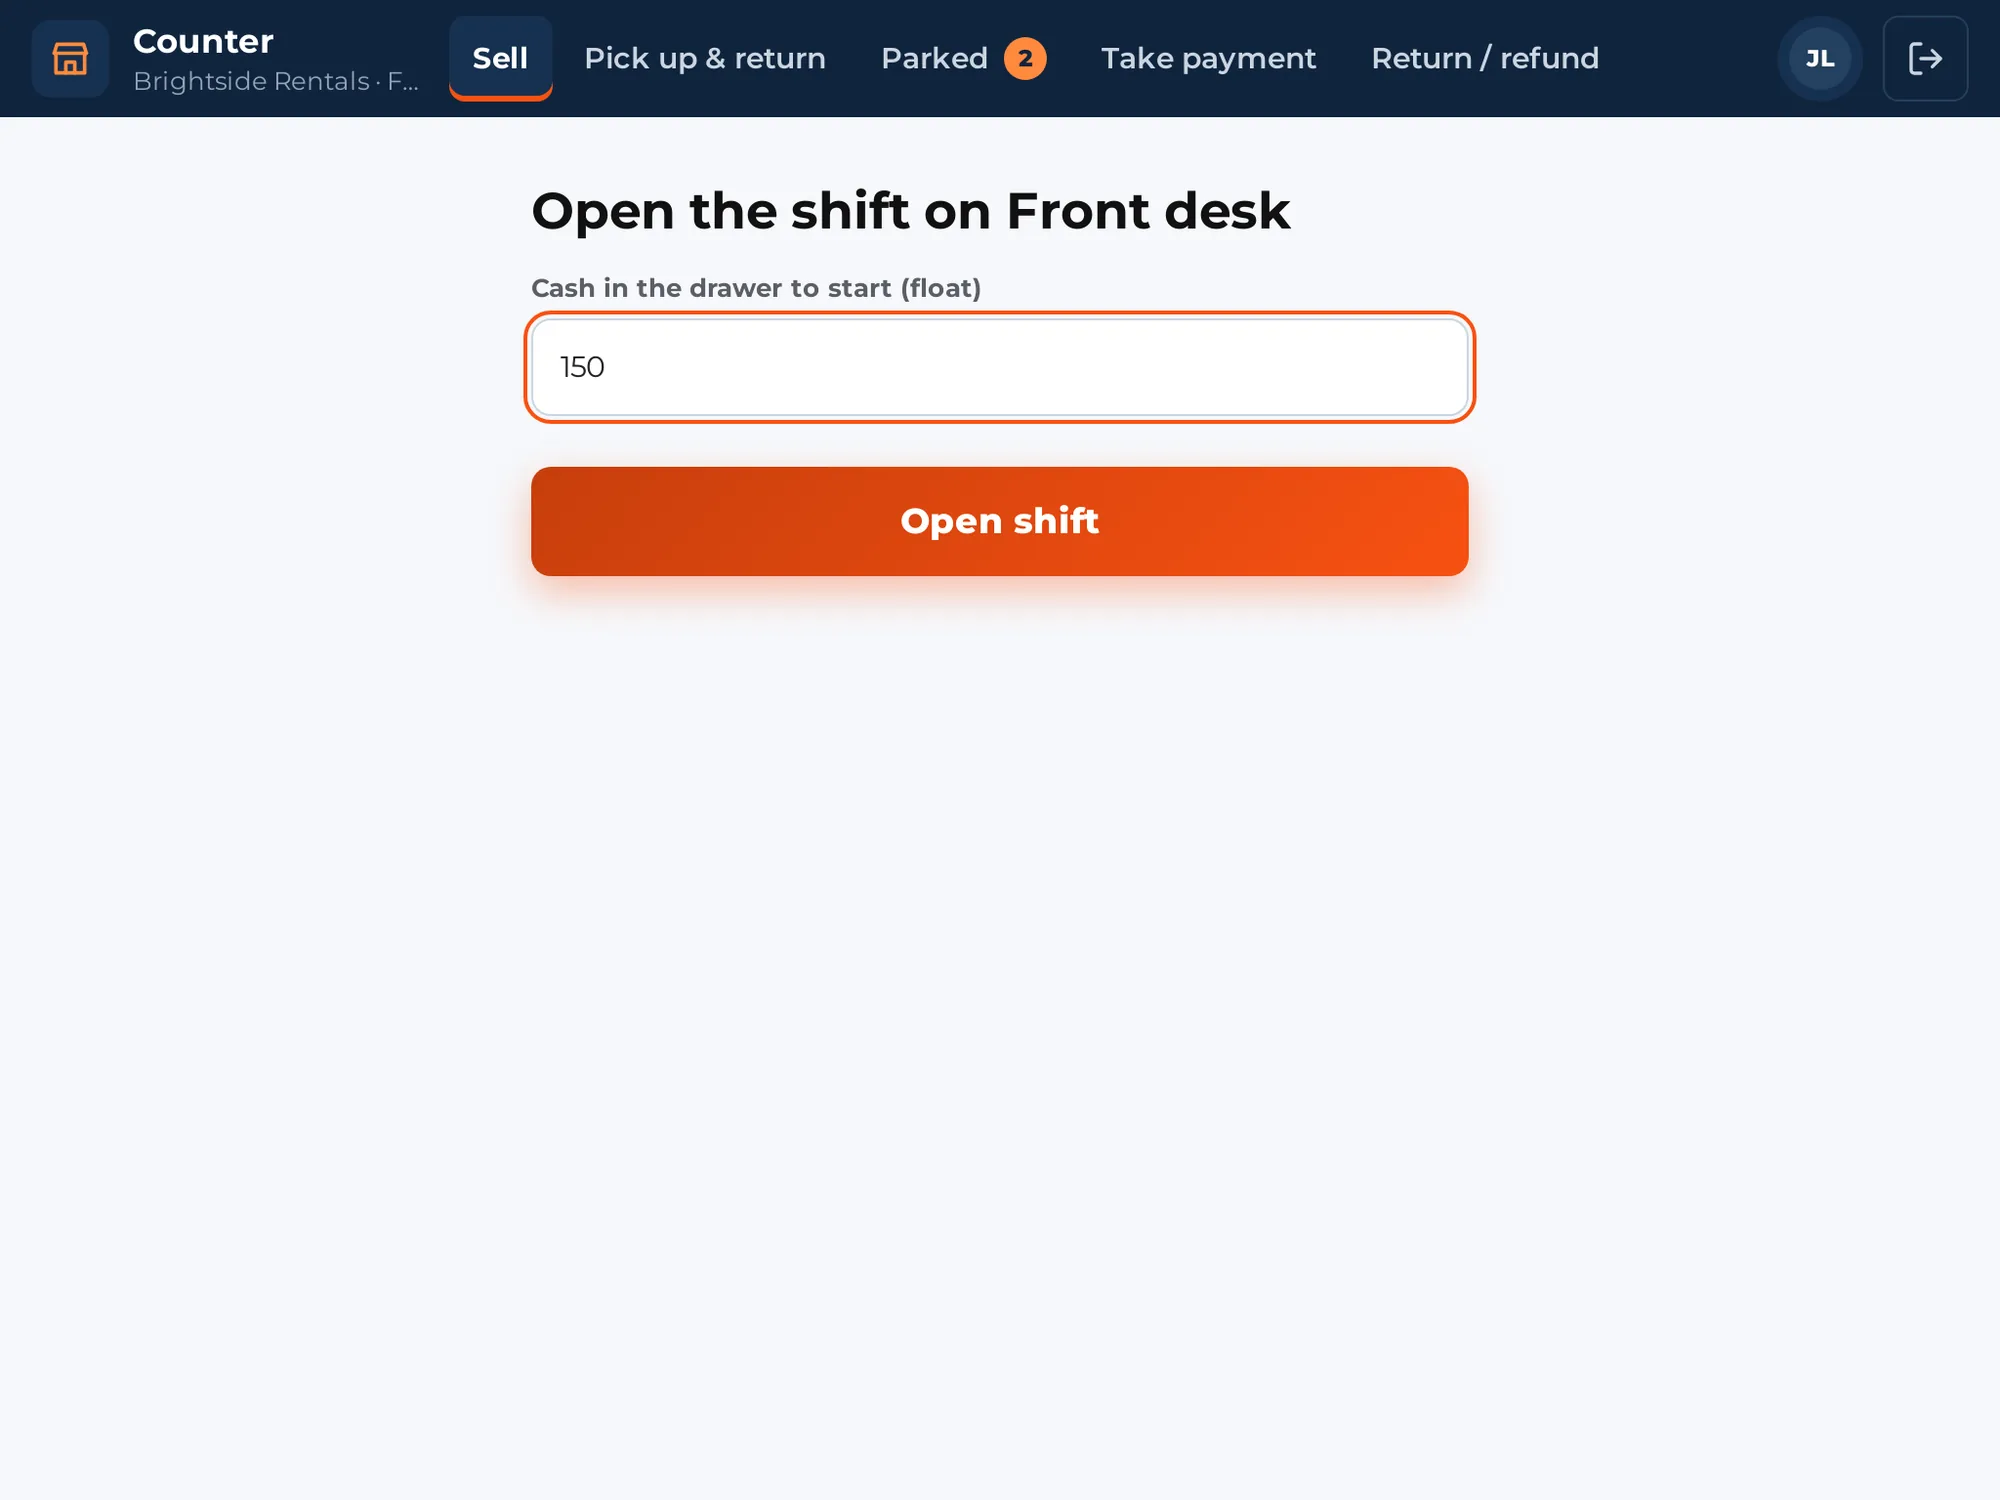
Before you can take payments, the register needs an open shift. The screen says Open the shift on followed by the register name.
- Type the cash in the drawer to start in Cash in the drawer to start (float). Type 0 if the drawer is empty.
- Tap Open shift.
More on shifts is in Shifts and the cash drawer.
Your first sale #
- Tap a product in the grid, or type in Search products, or scan a barcode. The product goes on the sale on the right.
- If the product has options (a size, a bundle with choices), a sheet opens first. Choose, then tap Add to sale.
- Tap Charge with the total on it. If an add-on needs an answer first (a signature, an ID check), a Before payment sheet opens. Otherwise the payment screen opens.
- Pick how the customer pays, for example Cash. Type the cash received, or tap an amount.
- When the order is paid you see Paid. Tap Print receipt, Email receipt or New sale.
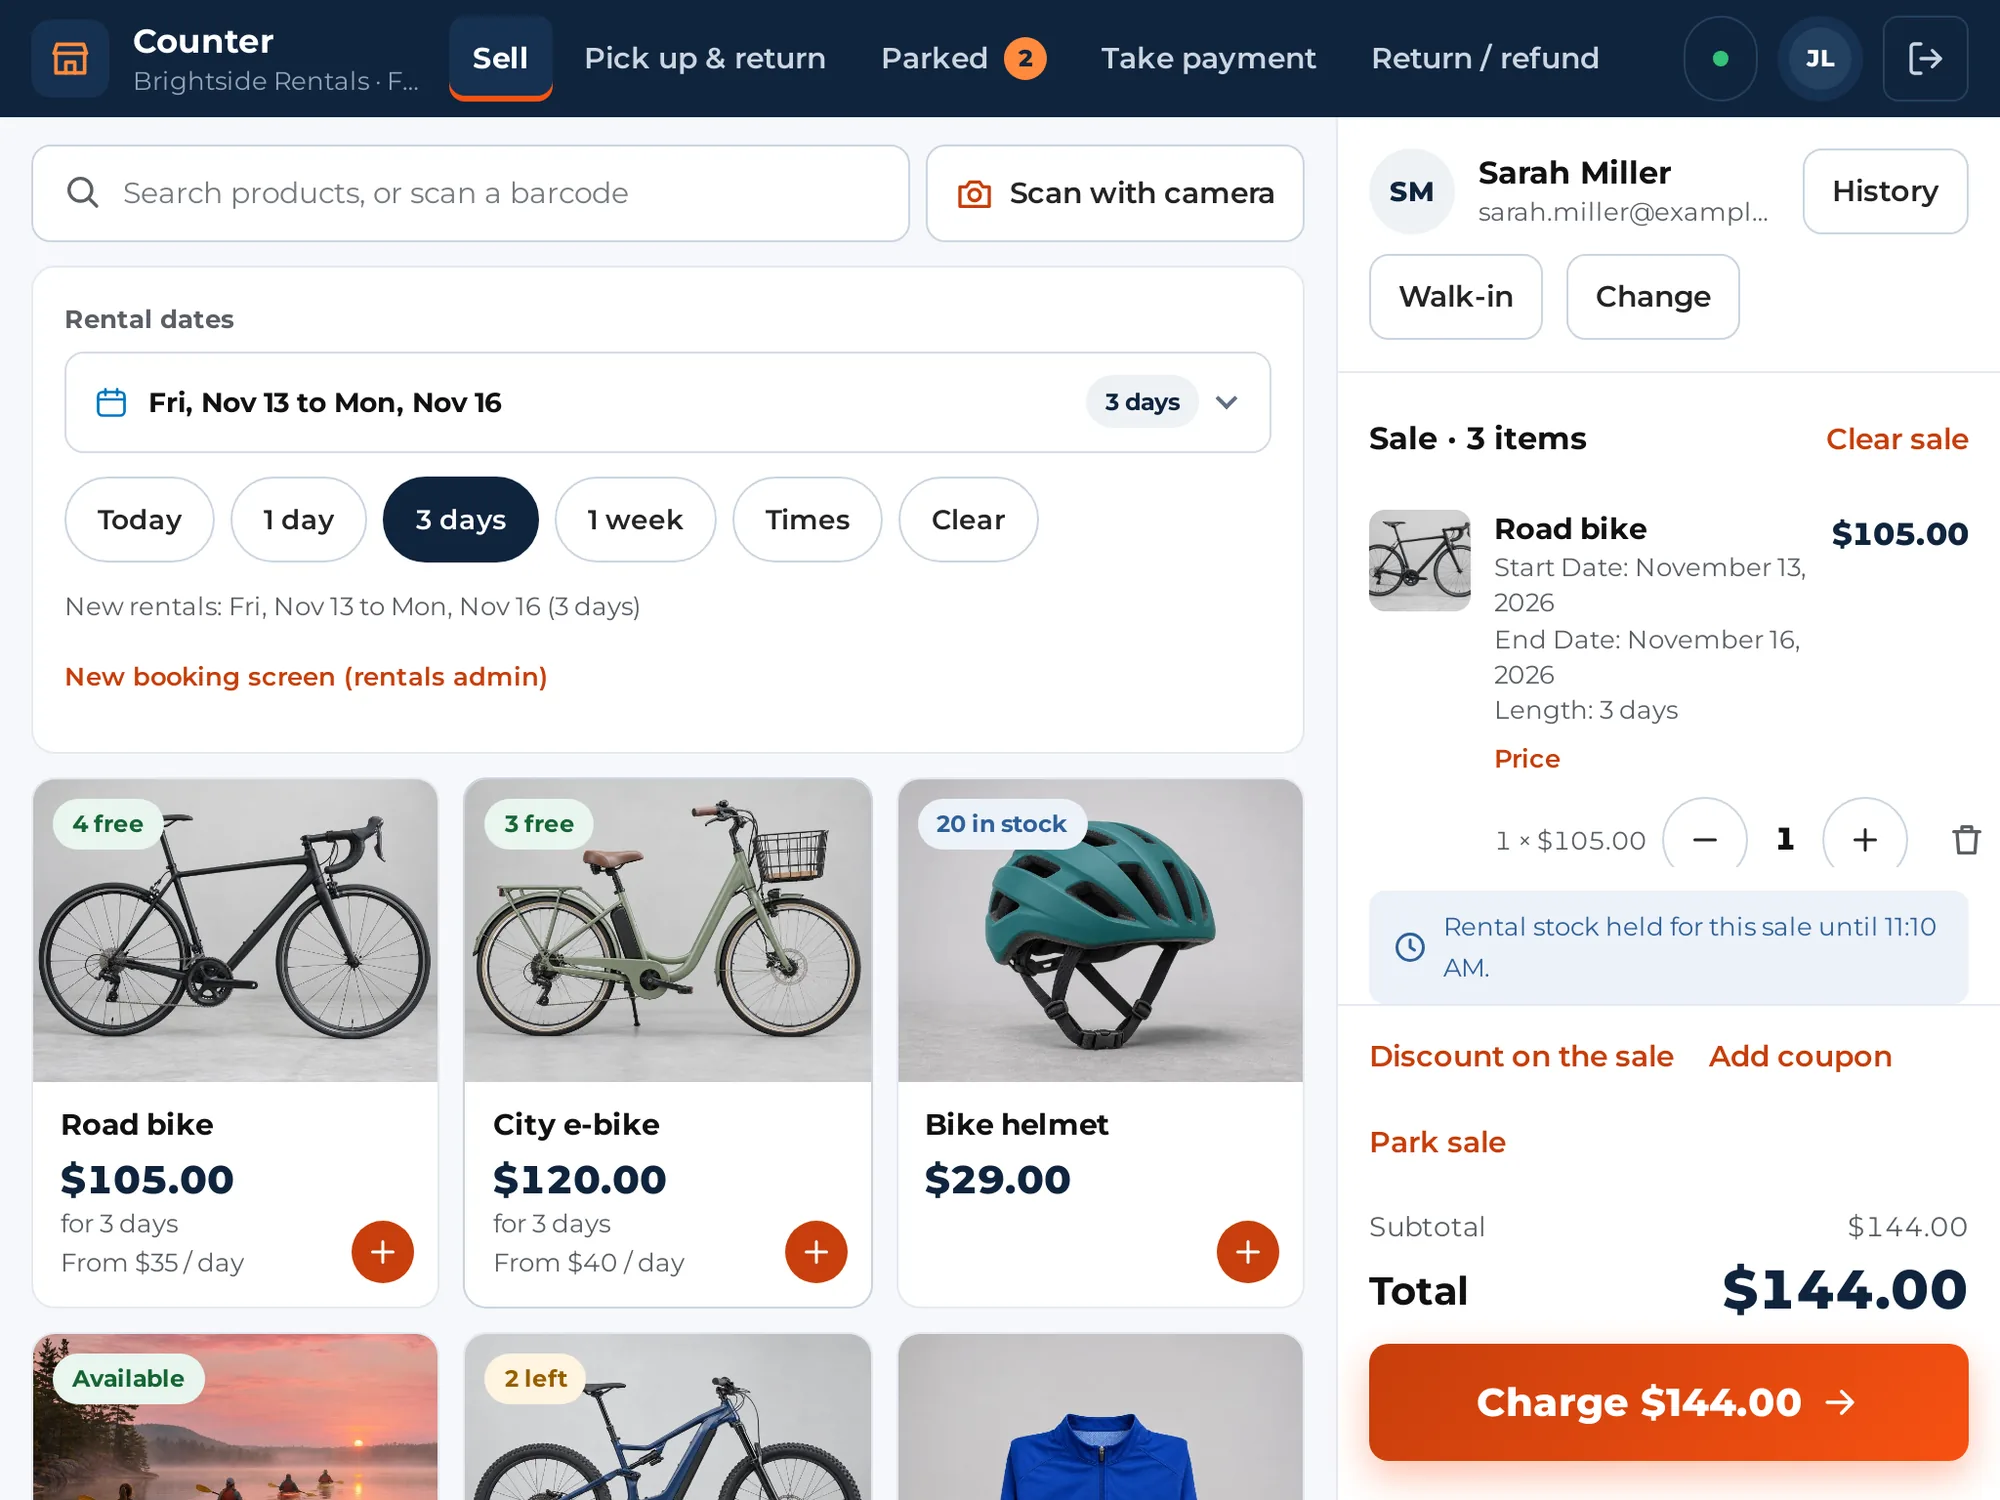
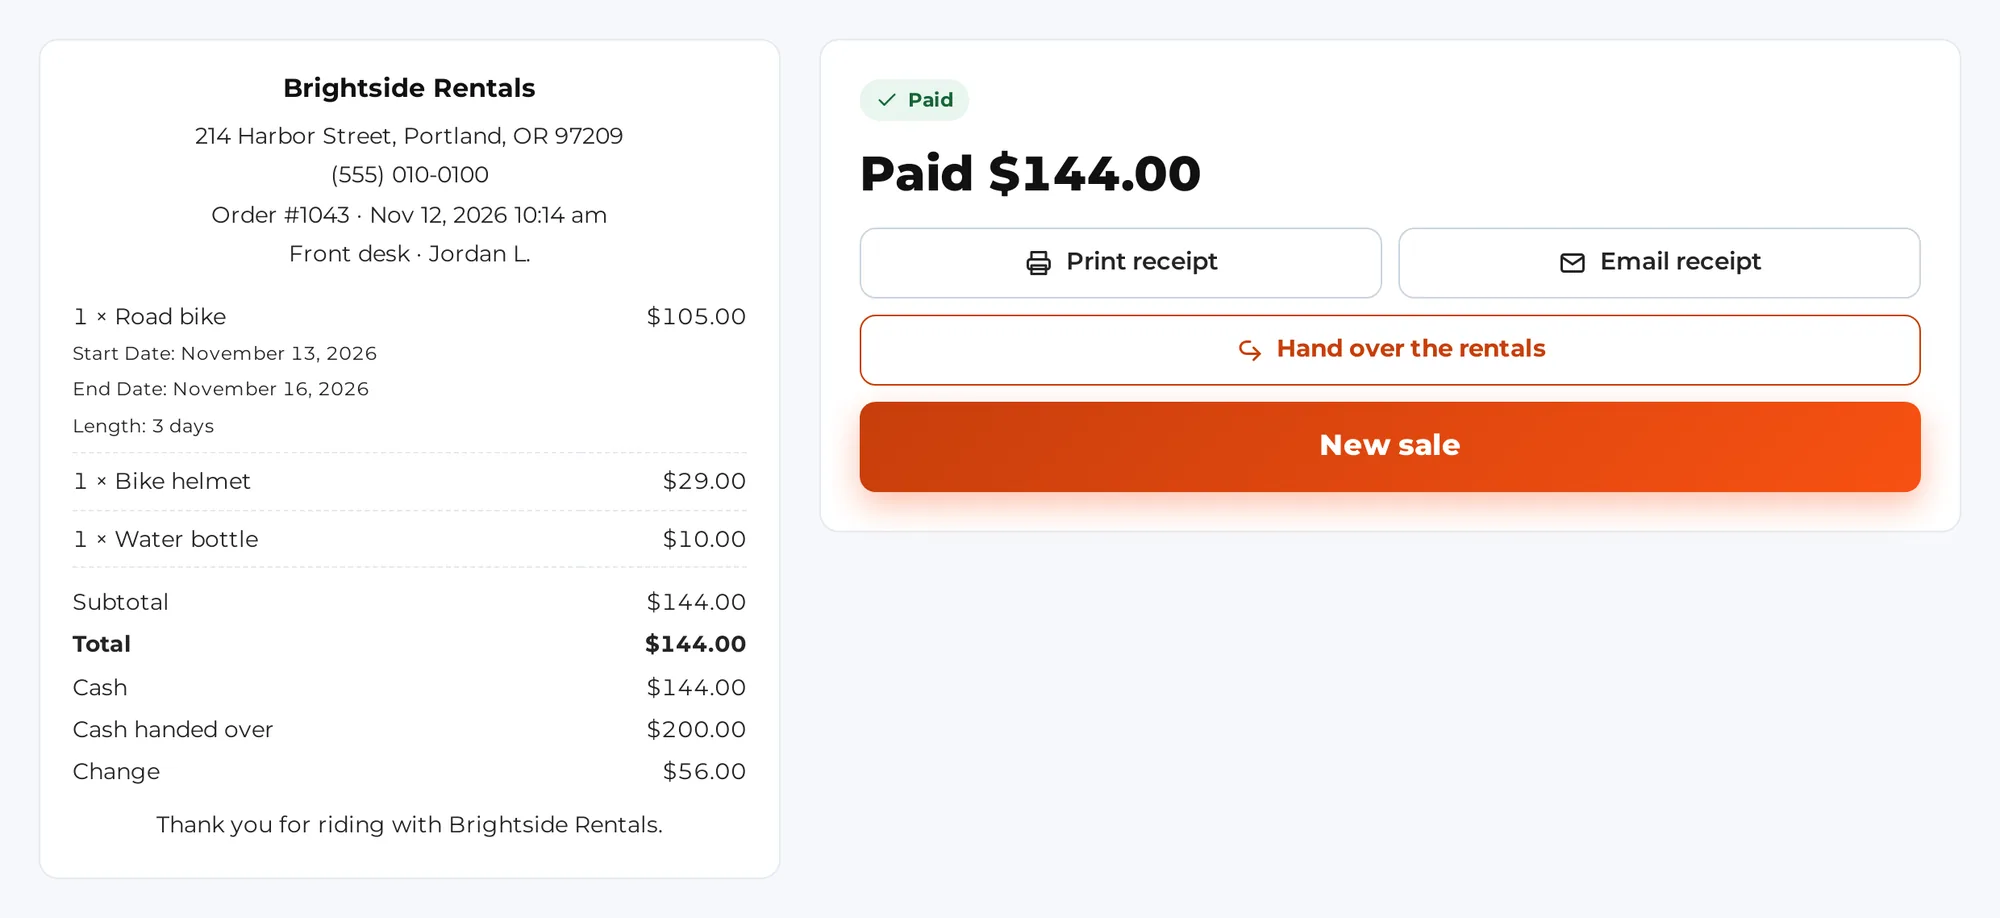
The screen has two columns on a tablet: products and the date bar on the left, the sale on the right. On a phone there are tabs at the bottom: Products, Sale and, when Rentals & Bookings Regular is active, Pick up & return.
Where to go next #
- Registers and payment routes: cash, card reader, your own card terminal, receipts and printers.
- Selling at the counter: product types, customers, discounts, parked sales.
- Rentals at the counter: dates, availability, pick-up and return, the board.
- Returns and refunds: sold items back, money back, exchanges.
- Shifts and the cash drawer: floats, cash moves, closing and the day report.
- Hardware we tested: scanners, the camera, printers, drawers, readers and screens.
- Who can do what: the staff role, the five permissions and PIN switching.


