
Editing a product gives you a Custom Fields tab in the Product data box. The unit of work there is the field group, so attaching a set of questions to a product is one tick rather than one per field.
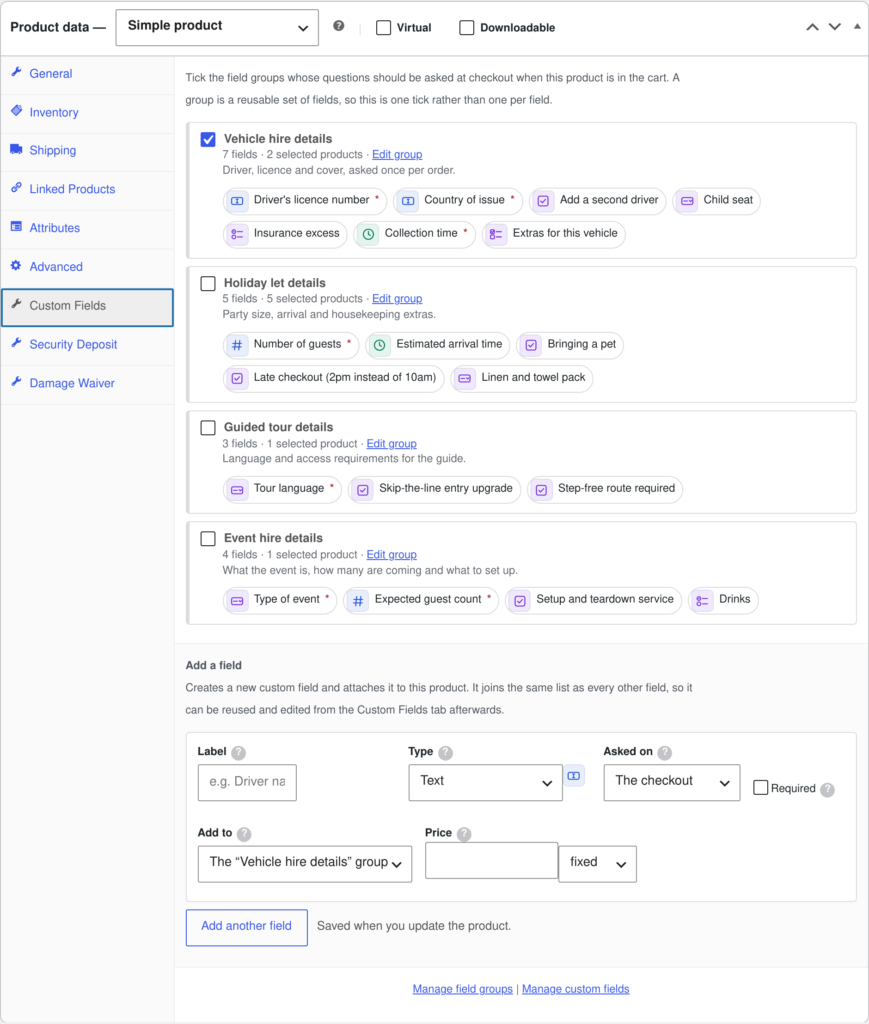
Applying a group #
Tick a group and this product joins its product list. Untick it and the product is taken back out. Each group shows how many fields it holds and lists them as chips — click any chip to open that field’s editor.
Note: Ticking a group that is not targeting anything yet also switches it to “Selected products only”, because a group left on “Nothing — off” matches nothing and the tick would silently do nothing.
Groups you cannot untick #
A group that already reaches this product through a rule — all products, rental products only, or a category — is shown ticked and locked, with the rule named underneath. There is nothing per-product to change: a rule cannot take an exception for one product. To stop it applying here, edit the rule on the Field Groups tab, or move the product out of that category.
Adding a field from the product #
The Add a field form at the bottom creates a new field without leaving the product. It becomes an ordinary field in the same list as every other one, so it can be reused and edited afterwards. The Add to choice decides how it reaches this product:
| Add to | What happens |
|---|---|
| An existing group | The field joins that group. Only groups that already apply to this product are offered — adding it to one that does not would create the field and then not show it. |
| A new group for this product | A group is created, named after the product and scoped to it. Several fields added in the same save all land in that one group. |
| Only this product, no group | The field is pointed straight at this product and nothing else. |
Use Add another field to queue up several at once. Nothing is written until you update the product. For a choice type, enter the options one per line, adding | 25 after a line to charge for that choice.


